Showing posts with label deployment. Show all posts

Friday, April 17, 2026

CI/CD Pipeline Engineering: GitHub Actions Advanced Patterns, Deployment Strategies, and DORA Metrics

Hero image

Introduction

Every engineering team runs some form of continuous integration. Far fewer run production-grade pipelines that actually compress delivery risk. There is a meaningful gap between "we have a GitHub Actions workflow that runs pytest" and a pipeline that engineers can trust to deploy to production 20 times a day without manual intervention or post-deployment incidents. Closing that gap is what separates teams that ship with confidence from teams that dread release day.

The DORA (DevOps Research and Assessment) program, now maintained by Google Cloud, has spent nearly a decade identifying the engineering practices that correlate with organizational performance. Their four key metrics — deployment frequency, lead time for changes, mean time to restore service, and change failure rate — are the clearest signal the industry has that your pipeline is working or not. Elite performers deploy multiple times per day, have a lead time under one hour, restore service within an hour of an incident, and have a change failure rate below 5 percent. These are not aspirational benchmarks for FAANG companies. Teams of five people running Django applications on Fly.io have hit every one of them.

What separates elite pipelines from mediocre ones is not the tooling. GitHub Actions, CircleCI, GitLab CI, and Buildkite are all capable of production-grade pipelines. The difference is architecture: caching strategy, parallelism, security posture, deployment patterns, and feedback loop design. A pipeline that takes 45 minutes to run doesn't just slow developers down — it actively discourages small, safe commits, pushing teams toward large batches that amplify risk.

This post covers the full pipeline engineering stack: advanced GitHub Actions patterns (matrix builds, reusable workflows, OIDC authentication), caching strategy, parallelism and fan-out, deployment patterns (blue/green, canary, rolling), security hardening, testing strategy, and how to instrument your pipeline to measure DORA metrics in practice. All code examples are production-ready YAML you can adapt directly.


1. GitHub Actions: Advanced Patterns

Architecture diagram

The default GitHub Actions tutorial gets you a workflow that installs dependencies and runs tests on a single OS and Python version. That is CI. Production-grade CI is broader: it validates against all supported environments, shares logic across workflows without duplication, eliminates static credentials, and cancels stale runs automatically. Here is how to build it.

Matrix Builds for Multiple Environments

A matrix build fans out a single job definition across a set of variable combinations. The most common pattern is testing against multiple language versions and operating systems simultaneously.

# .github/workflows/ci.yml
name: CI

on:
  push:
    branches: [main]
  pull_request:
    branches: [main]

jobs:
  test:
    name: Test (Python ${{ matrix.python-version }}, ${{ matrix.os }})
    runs-on: ${{ matrix.os }}
    strategy:
      fail-fast: false          # don't cancel other matrix jobs if one fails
      matrix:
        python-version: ["3.11", "3.12", "3.13"]
        os: [ubuntu-latest, macos-latest, windows-latest]
        exclude:
          # Windows + 3.11 has a known flakiness issue with our test suite
          - os: windows-latest
            python-version: "3.11"

    steps:
      - uses: actions/checkout@v4

      - name: Set up Python ${{ matrix.python-version }}
        uses: actions/setup-python@v5
        with:
          python-version: ${{ matrix.python-version }}

      - name: Cache pip dependencies
        uses: actions/cache@v4
        with:
          path: ~/.cache/pip
          key: ${{ runner.os }}-pip-${{ matrix.python-version }}-${{ hashFiles('requirements*.txt') }}
          restore-keys: |
            ${{ runner.os }}-pip-${{ matrix.python-version }}-
            ${{ runner.os }}-pip-

      - name: Install dependencies
        run: pip install -r requirements.txt -r requirements-dev.txt

      - name: Run tests
        run: pytest tests/ -x --tb=short

The fail-fast: false setting is worth highlighting. By default, Actions cancels the remaining matrix jobs the moment any one fails. During development this speeds up feedback, but in CI it hides information: maybe Python 3.12 passes but 3.13 fails, and you want to know both. Set fail-fast: false for full diagnostic visibility.

Reusable Workflows with workflow_call

When multiple workflows share the same build/test logic, duplication creates drift. A release workflow that re-implements the same test steps as the ci workflow will silently diverge over time. Reusable workflows solve this by defining logic once and invoking it from multiple callers.

# .github/workflows/_test-suite.yml  (reusable workflow, prefixed with _)
name: Test Suite (Reusable)

on:
  workflow_call:
    inputs:
      python-version:
        required: true
        type: string
      environment:
        required: false
        type: string
        default: testing
    secrets:
      DATABASE_URL:
        required: true

jobs:
  test:
    runs-on: ubuntu-latest
    environment: ${{ inputs.environment }}

    steps:
      - uses: actions/checkout@v4
      - uses: actions/setup-python@v5
        with:
          python-version: ${{ inputs.python-version }}
      - name: Run full test suite
        env:
          DATABASE_URL: ${{ secrets.DATABASE_URL }}
        run: pytest tests/ --cov=src --cov-fail-under=80
# .github/workflows/ci.yml  (caller)
jobs:
  run-tests:
    uses: ./.github/workflows/_test-suite.yml
    with:
      python-version: "3.12"
    secrets:
      DATABASE_URL: ${{ secrets.DATABASE_URL }}

Composite Actions for Shared Steps

Composite actions package a sequence of steps into a reusable unit that lives in your repository. Unlike reusable workflows, they run in the calling job's context, making them ideal for setup boilerplate.

# .github/actions/setup-python-env/action.yml
name: Set up Python Environment
description: Installs Python, restores pip cache, and installs dependencies

inputs:
  python-version:
    description: Python version to use
    required: true
    default: "3.12"

runs:
  using: composite
  steps:
    - uses: actions/setup-python@v5
      with:
        python-version: ${{ inputs.python-version }}

    - name: Cache pip
      uses: actions/cache@v4
      with:
        path: ~/.cache/pip
        key: ${{ runner.os }}-pip-${{ inputs.python-version }}-${{ hashFiles('requirements*.txt') }}
        restore-keys: |
          ${{ runner.os }}-pip-${{ inputs.python-version }}-

    - name: Install dependencies
      shell: bash
      run: pip install -r requirements.txt -r requirements-dev.txt

OIDC Authentication to AWS

Static AWS credentials stored as GitHub secrets are a security liability. GitHub Actions supports OIDC (OpenID Connect) token exchange, which allows workflows to assume an IAM role without any stored credentials. The AWS role validates the incoming JWT against GitHub's OIDC provider and grants temporary credentials scoped to that specific workflow run.

# .github/workflows/deploy.yml
jobs:
  deploy:
    runs-on: ubuntu-latest
    permissions:
      id-token: write    # required for OIDC
      contents: read

    steps:
      - uses: actions/checkout@v4

      - name: Configure AWS credentials via OIDC
        uses: aws-actions/configure-aws-credentials@v4
        with:
          role-to-assume: arn:aws:iam::123456789012:role/GitHubActionsDeployRole
          role-session-name: GitHubActions-${{ github.run_id }}
          aws-region: us-east-1

      - name: Deploy to ECS
        run: |
          aws ecs update-service \
            --cluster production \
            --service api \
            --force-new-deployment

The IAM role trust policy on the AWS side restricts which GitHub repositories and branches can assume it:

{
  "Condition": {
    "StringLike": {
      "token.actions.githubusercontent.com:sub": "repo:myorg/myrepo:ref:refs/heads/main"
    }
  }
}

Concurrency Groups

Every push to an active PR branch should cancel the previous workflow run for that branch. There is no value in completing a CI run for a commit that has already been superseded.

concurrency:
  group: ${{ github.workflow }}-${{ github.ref }}
  cancel-in-progress: true

This single block eliminates wasted runner minutes and keeps PR check results fresh.


2. Caching Strategy

Cache hits are the highest-leverage optimization available in CI. A cold runner that downloads 400 MB of npm packages on every run is paying a 2-3 minute penalty that cache could eliminate entirely. Getting caching right requires understanding both the key strategy and the restoration fallback chain.

Cache Key Design

The cache key controls when a cached layer is used versus rebuilt. The goal is a key that changes when and only when the underlying dependencies change.

- name: Cache pip dependencies
  uses: actions/cache@v4
  id: pip-cache
  with:
    path: |
      ~/.cache/pip
      .venv
    key: ${{ runner.os }}-python-${{ matrix.python-version }}-${{ hashFiles('requirements.txt', 'requirements-dev.txt') }}
    restore-keys: |
      ${{ runner.os }}-python-${{ matrix.python-version }}-
      ${{ runner.os }}-python-

- name: Install dependencies
  if: steps.pip-cache.outputs.cache-hit != 'true'
  run: pip install -r requirements.txt -r requirements-dev.txt

The hashFiles() function produces a SHA-256 of all matched files. When requirements.txt changes, the hash changes, the key misses, dependencies are reinstalled, and the new cache entry is saved. The restore-keys array defines a fallback chain: if the exact key misses, try a partial prefix match. A partially stale cache that only needs a few package updates is far faster than a cold install.

Node.js Cache with npm ci

For Node.js projects, use actions/setup-node's built-in cache support rather than a separate cache action:

- uses: actions/setup-node@v4
  with:
    node-version: "20"
    cache: "npm"           # caches ~/.npm keyed by package-lock.json hash

- run: npm ci             # installs from lockfile; respects cache

npm ci is critical here. Unlike npm install, it does not modify package-lock.json, making it deterministic and cache-friendly.

Docker Layer Caching in Actions

Docker builds in CI are expensive without layer caching. The docker/build-push-action supports GitHub Actions cache and registry cache backends:

- name: Set up Docker Buildx
  uses: docker/setup-buildx-action@v3

- name: Build and push Docker image
  uses: docker/build-push-action@v5
  with:
    context: .
    push: true
    tags: ghcr.io/myorg/myapp:${{ github.sha }}
    cache-from: type=gha          # restore from GitHub Actions cache
    cache-to: type=gha,mode=max   # save all layers, not just final stage

The mode=max option saves intermediate build layers, not just the final image. For multi-stage Dockerfiles, this means builder dependencies cached separately from the runtime image — significantly faster rebuilds when only application code changes.

Cache Poisoning Risks

Cache poisoning occurs when an attacker injects malicious content into a cache that a privileged workflow later restores. In GitHub Actions, pull requests from forks cannot write to the cache of the parent repository — they can only read. This asymmetry limits poisoning risk, but you should still pin dependency versions in your lockfiles and validate checksums where possible.


3. Parallelism and Speed

The 10-minute CI target is not arbitrary. Research consistently shows that feedback loops longer than 10 minutes cause developers to context-switch — they move on to other work before the CI result arrives, meaning defects are caught later and cost more to fix. Building a sub-10-minute pipeline requires deliberate parallelism.

flowchart LR A([Push to PR]) --> B[Lint & Type Check\n~1 min] A --> C[Unit Tests\n~2 min] A --> D[Security Scan\n~1 min] B --> E{All Pass?} C --> E D --> E E -->|Yes| F[Integration Tests\n~3 min] F --> G[Build Docker Image\n~2 min] G --> H([PR Ready to Merge]) E -->|No| I([Block PR])

Test Sharding Across Runners

The most effective way to speed up a long test suite is to distribute it across multiple runners in parallel. pytest supports this via pytest-xdist for in-process parallelism, but for true runner-level sharding, split by test file group:

jobs:
  test:
    runs-on: ubuntu-latest
    strategy:
      matrix:
        shard: [1, 2, 3, 4]

    steps:
      - uses: actions/checkout@v4
      - uses: ./.github/actions/setup-python-env

      - name: Run test shard ${{ matrix.shard }} of 4
        run: |
          pytest tests/ \
            --splits 4 \
            --group ${{ matrix.shard }} \
            --splitting-algorithm least_duration \
            -v

pytest-split uses timing data from previous runs to distribute tests by duration, not file count, resulting in near-equal shard times. A 20-minute sequential test suite becomes a 5-minute parallel suite with 4 shards.

Fan-Out / Fan-In Pattern

For workflows that need to produce artifacts from parallel jobs and then aggregate them, use the fan-out/fan-in pattern with explicit needs dependencies:

jobs:
  # Fan-out: 4 parallel test shards
  test-shard-1:
    uses: ./.github/workflows/_test-shard.yml
    with:
      shard: 1
      total: 4

  test-shard-2:
    uses: ./.github/workflows/_test-shard.yml
    with:
      shard: 2
      total: 4

  # Fan-in: aggregate results and gate deployment
  test-complete:
    runs-on: ubuntu-latest
    needs: [test-shard-1, test-shard-2, test-shard-3, test-shard-4]
    steps:
      - name: Download all coverage reports
        uses: actions/download-artifact@v4
        with:
          pattern: coverage-*
          merge-multiple: true

      - name: Merge coverage and check threshold
        run: |
          coverage combine
          coverage report --fail-under=80

  deploy:
    needs: test-complete
    if: github.ref == 'refs/heads/main'
    runs-on: ubuntu-latest
    steps:
      - name: Deploy
        run: echo "All tests passed, deploying..."

What Makes CI Slow

The common culprits for slow pipelines, ranked by impact:

  1. No dependency caching — reinstalling 500 packages from PyPI or npm on every run
  2. Sequential test execution — running a 2000-test suite in one process on one runner
  3. Large Docker base image pulls — pulling node:20 (1.1 GB) without layer caching
  4. Slow integration tests mixed with unit tests — database spinup and HTTP calls dominating test time
  5. Unoptimized DockerfilesCOPY . . before RUN pip install invalidates layer cache on every code change

Fixing caching alone (point 1) typically cuts pipeline time by 40-60% on a first pass. Parallelizing tests (point 2) cuts the remaining time in half. Together, most teams can reach sub-10-minute pipelines without any other changes.


4. Deployment Strategies

Getting code from a merged PR to production safely is where the real risk management happens. The deployment strategy you choose determines the blast radius of a bad deploy and how quickly you can detect and recover from it.

Comparison visual
flowchart TD subgraph BlueGreen["Blue/Green Deployment"] LB1[Load Balancer] --> Blue[Blue\nv1.0 - 100%] LB1 -.->|Switch| Green[Green\nv2.0 - 0%] end subgraph Canary["Canary Deployment"] LB2[Load Balancer] --> Stable[Stable\nv1.0 - 95%] LB2 --> CanaryInst[Canary\nv2.0 - 5%] end subgraph Rolling["Rolling Deployment"] LB3[Load Balancer] --> R1[Pod v1] LB3 --> R2[Pod v1] LB3 --> R3[Pod v2\nupdating...] LB3 --> R4[Pod v2\nupdated] end

Blue/Green Deployment

Blue/green maintains two identical production environments. At any moment, one environment (blue) serves all live traffic. Deployments go to the inactive environment (green). When green passes smoke tests, the load balancer flips traffic atomically. Rollback is instant: flip the load balancer back to blue.

# .github/workflows/deploy-blue-green.yml
jobs:
  deploy:
    runs-on: ubuntu-latest
    steps:
      - name: Determine inactive environment
        id: env
        run: |
          ACTIVE=$(aws elbv2 describe-target-groups \
            --names production-blue production-green \
            --query 'TargetGroups[?LoadBalancerArns!=`[]`].TargetGroupName' \
            --output text)
          if [ "$ACTIVE" = "production-blue" ]; then
            echo "target=production-green" >> $GITHUB_OUTPUT
          else
            echo "target=production-blue" >> $GITHUB_OUTPUT
          fi

      - name: Deploy to inactive environment
        run: |
          aws ecs update-service \
            --cluster ${{ steps.env.outputs.target }} \
            --service api \
            --task-definition api:${{ github.run_number }} \
            --force-new-deployment

      - name: Wait for service stability
        run: |
          aws ecs wait services-stable \
            --cluster ${{ steps.env.outputs.target }} \
            --services api

      - name: Run smoke tests against inactive environment
        run: |
          ENDPOINT=$(aws elbv2 describe-load-balancers \
            --names ${{ steps.env.outputs.target }} \
            --query 'LoadBalancers[0].DNSName' --output text)
          curl --fail https://$ENDPOINT/health

      - name: Shift traffic to new environment
        run: |
          aws elbv2 modify-listener \
            --listener-arn ${{ vars.PROD_LISTENER_ARN }} \
            --default-actions Type=forward,TargetGroupArn=${{ steps.env.outputs.target_arn }}

The cost of blue/green is resource overhead: you maintain two full environments. For applications that are expensive to run, canary deployment offers a middle ground.

Canary Deployment

A canary release sends a small percentage of live traffic to the new version, monitors error rates and latency, and graduates the percentage incrementally if metrics hold.

- name: Deploy canary (5% traffic)
  run: |
    kubectl apply -f k8s/canary-deployment.yaml
    kubectl patch ingress api-ingress \
      -p '{"metadata":{"annotations":{"nginx.ingress.kubernetes.io/canary":"true","nginx.ingress.kubernetes.io/canary-weight":"5"}}}'

- name: Monitor canary for 10 minutes
  run: |
    for i in $(seq 1 10); do
      ERROR_RATE=$(curl -s "${{ vars.PROMETHEUS_URL }}/api/v1/query" \
        --data-urlencode 'query=rate(http_requests_total{status=~"5..",version="canary"}[2m]) / rate(http_requests_total{version="canary"}[2m]) * 100' \
        | jq '.data.result[0].value[1]' -r)

      if (( $(echo "$ERROR_RATE > 1.0" | bc -l) )); then
        echo "Canary error rate ${ERROR_RATE}% exceeds threshold. Rolling back."
        kubectl delete -f k8s/canary-deployment.yaml
        exit 1
      fi
      echo "Canary healthy at ${ERROR_RATE}% error rate. Check $i/10."
      sleep 60
    done

- name: Promote canary to full traffic
  run: |
    kubectl set image deployment/api api=${{ env.NEW_IMAGE }}
    kubectl delete -f k8s/canary-deployment.yaml

Rolling Deployment in Kubernetes

Kubernetes rolling updates replace pods incrementally, with maxSurge controlling how many extra pods can exist during the update and maxUnavailable controlling how many pods can be offline simultaneously.

# k8s/deployment.yaml
apiVersion: apps/v1
kind: Deployment
metadata:
  name: api
spec:
  replicas: 10
  strategy:
    type: RollingUpdate
    rollingUpdate:
      maxSurge: 2          # allow 2 extra pods (12 total during update)
      maxUnavailable: 0    # never reduce below 10 healthy pods
  template:
    spec:
      containers:
        - name: api
          image: ghcr.io/myorg/api:latest
          readinessProbe:
            httpGet:
              path: /ready
              port: 8080
            initialDelaySeconds: 10
            periodSeconds: 5
            failureThreshold: 3

Setting maxUnavailable: 0 with maxSurge: 2 gives zero-downtime rolling updates. Kubernetes will not remove an old pod until its replacement passes the readiness probe.

Zero-Downtime Database Migrations

The most common source of deployment-related incidents is a database migration that is incompatible with the running version of the application. The safe pattern is expand/contract:

  1. Expand: Deploy a migration that adds new columns or tables without removing anything. Both the old and new application code must work with the expanded schema.
  2. Deploy: Roll out the new application version. It now uses the new columns.
  3. Contract: Deploy a cleanup migration that removes the old columns, which are now unused.

Never deploy a migration that removes or renames a column in the same deploy as the code that assumes it is gone. That creates a window where live application pods (old code) reference a column that no longer exists.


5. Security in CI/CD

CI pipelines have access to production credentials, cloud accounts, and container registries. A compromised pipeline is a compromised production environment. Security hardening is not optional.

flowchart LR A[Developer Push] --> B{PR from Fork?} B -->|Yes| C[Read-only\nNo secrets\nNo deployments] B -->|No| D{Target Branch?} D -->|main| E[Full CI\nOIDC Credentials\nDeploy Staging] D -->|Other| F[Full CI\nOIDC Credentials\nNo Deploy] E --> G{Manual Approval\nRequired?} G -->|Production| H[Deploy Production\nEnvironment Protection] G -->|Not Production| I[Auto-Deploy Staging]

Minimal Permissions by Default

Every workflow should declare the minimum permissions it needs. GitHub Actions defaults to read-all permissions, which is too broad for jobs that only need to check out code and run tests:

# At workflow level: default to nothing
permissions: {}

jobs:
  test:
    runs-on: ubuntu-latest
    permissions:
      contents: read         # only what we need
    steps:
      - uses: actions/checkout@v4
      # ...

  deploy:
    runs-on: ubuntu-latest
    permissions:
      contents: read
      id-token: write        # OIDC token for AWS role assumption
    # ...

SHA Pinning for Third-Party Actions

Every uses: actions/checkout@v4 pin is potentially vulnerable to a tag being moved. Pinning to a full commit SHA is the only guarantee that the action you tested is the action that runs:

# Vulnerable: tag can be moved to point to malicious code
- uses: actions/checkout@v4

# Secure: SHA is immutable
- uses: actions/checkout@11bd71901bbe5b1630ceea73d27597364c9af683  # v4.2.2

Tools like dependabot and pin-github-action can automate SHA pinning and keep them updated.

Secret Scanning

GitHub's built-in secret scanning scans every push for patterns matching known credential formats (AWS access keys, GitHub tokens, Stripe keys, etc.) and blocks the push if a match is found. Enable it at the organization level and configure push protection:

# .github/secret_scanning.yml
paths-ignore:
  - "tests/fixtures/**"  # known-safe test fixtures with fake credentials

For pre-commit scanning locally, git-secrets or detect-secrets catches leaks before they reach the remote:

# Install and configure git-secrets
git secrets --install
git secrets --register-aws
git secrets --scan  # scan current working tree

Environment Protection Rules

Production deployments should require explicit human approval via environment protection rules. In your repository settings, create a production environment with required reviewers:

# .github/workflows/deploy.yml
jobs:
  deploy-production:
    runs-on: ubuntu-latest
    environment:
      name: production
      url: https://api.myapp.com
    # This job will pause and wait for a required reviewer to approve
    # before executing any steps
    steps:
      - name: Deploy to production
        run: ./scripts/deploy.sh production

6. Testing Strategy in CI

CI is not a test runner. It is a quality gate. The distinction matters: a test runner executes tests; a quality gate decides whether a build is fit to proceed. Good CI enforces the full test pyramid, with appropriate gates at each stage.

The Test Pyramid in CI

Structure your pipeline to run faster, more reliable tests first and gate on their results before running slower tests:

jobs:
  # Stage 1: Fast feedback (< 2 min)
  lint:
    runs-on: ubuntu-latest
    steps:
      - uses: actions/checkout@v4
      - run: ruff check .
      - run: mypy src/

  unit-tests:
    runs-on: ubuntu-latest
    steps:
      - uses: actions/checkout@v4
      - uses: ./.github/actions/setup-python-env
      - run: pytest tests/unit/ --cov=src --cov-report=xml -q
      - uses: codecov/codecov-action@v4

  # Stage 2: Integration tests (gated on Stage 1)
  integration-tests:
    needs: [lint, unit-tests]
    runs-on: ubuntu-latest
    services:
      postgres:
        image: postgres:16
        env:
          POSTGRES_PASSWORD: test
        options: >-
          --health-cmd pg_isready
          --health-interval 10s
    steps:
      - uses: actions/checkout@v4
      - uses: ./.github/actions/setup-python-env
      - run: pytest tests/integration/ -v

  # Stage 3: E2E tests (only on main, gated on Stage 2)
  e2e-tests:
    needs: integration-tests
    if: github.ref == 'refs/heads/main'
    runs-on: ubuntu-latest
    steps:
      - uses: actions/checkout@v4
      - run: playwright install chromium
      - run: pytest tests/e2e/ --headed=false

Flaky Test Detection and Quarantine

Flaky tests — tests that sometimes pass and sometimes fail for non-deterministic reasons — are CI's most insidious problem. A single flaky test can reduce trust in the entire pipeline to zero. Engineers start clicking "re-run" without reading failure output, which defeats the purpose of CI entirely.

- name: Run tests with flake detection
  run: |
    pytest tests/ \
      --reruns 3 \               # retry flaky tests up to 3 times
      --reruns-delay 1 \
      --report-flaky-threshold=2 # fail if test needs >2 reruns
      -v

When a test is confirmed flaky, quarantine it: move it to a tests/quarantined/ directory, run it in CI but don't gate on it, and file a ticket. This keeps the pipeline reliable while the root cause is investigated.

Coverage Gates

A coverage threshold below which CI fails provides a quantitative floor on test quality:

- name: Check coverage threshold
  run: pytest tests/unit/ --cov=src --cov-fail-under=80 --cov-report=term-missing

The --cov-report=term-missing flag prints the line numbers of uncovered code in the CI output, making it actionable rather than just a number.


7. DORA Metrics Implementation

Measuring your pipeline's performance against DORA benchmarks closes the feedback loop between engineering practices and delivery outcomes. You cannot improve what you do not measure.

The Four Key Metrics

Metric Definition Elite Target High Target Medium Target
Deployment Frequency How often code deploys to production Multiple/day Weekly Monthly
Lead Time for Changes First commit to production < 1 hour < 1 week 1-6 months
Mean Time to Restore Incident open to resolved < 1 hour < 1 day < 1 week
Change Failure Rate % deploys that cause incidents < 5% < 15% < 45%

Instrumenting Deployment Frequency

The simplest implementation is a webhook from your CD pipeline to a metrics endpoint on every successful production deploy:

# .github/workflows/deploy.yml
jobs:
  deploy:
    steps:
      # ... deploy steps ...

      - name: Record deployment event
        if: success()
        run: |
          curl -X POST "${{ vars.METRICS_ENDPOINT }}/deployments" \
            -H "Authorization: Bearer ${{ secrets.METRICS_TOKEN }}" \
            -H "Content-Type: application/json" \
            -d '{
              "service": "api",
              "environment": "production",
              "sha": "${{ github.sha }}",
              "deployed_at": "${{ github.event.head_commit.timestamp }}",
              "run_id": "${{ github.run_id }}"
            }'

Instrumenting Lead Time

Lead time requires correlating the first commit timestamp for a PR with its production deployment timestamp. GitHub's API provides both:

# scripts/measure-lead-time.py
import os
import requests
from datetime import datetime

GITHUB_TOKEN = os.environ["GITHUB_TOKEN"]
REPO = os.environ["GITHUB_REPOSITORY"]
SHA = os.environ["GITHUB_SHA"]
DEPLOYED_AT = datetime.utcnow().isoformat()

# Find the PR that introduced this commit
prs = requests.get(
    f"https://api.github.com/repos/{REPO}/commits/{SHA}/pulls",
    headers={"Authorization": f"Bearer {GITHUB_TOKEN}", "Accept": "application/vnd.github.v3+json"},
).json()

if prs:
    pr = prs[0]
    # Get the first commit of the PR
    commits = requests.get(
        pr["commits_url"],
        headers={"Authorization": f"Bearer {GITHUB_TOKEN}"},
    ).json()
    first_commit_at = commits[0]["commit"]["author"]["date"]

    lead_time_seconds = (
        datetime.fromisoformat(DEPLOYED_AT.replace("Z", "+00:00")) -
        datetime.fromisoformat(first_commit_at.replace("Z", "+00:00"))
    ).total_seconds()

    print(f"Lead time: {lead_time_seconds / 3600:.2f} hours")

    # Post to your metrics store
    requests.post(
        os.environ["METRICS_ENDPOINT"] + "/lead-times",
        json={"lead_time_seconds": lead_time_seconds, "pr": pr["number"]},
    )

MTTR and Change Failure Rate

MTTR is measured from PagerDuty/OpsGenie incident open to resolved events. Change failure rate requires correlating deployment events with incident events in the same time window. Both are best tracked in LinearB, Sleuth, or a custom dashboard that joins your deployment log with your incident management tool's API.

For teams not ready for dedicated DORA tooling, a simple spreadsheet with deployment log timestamps and incident timestamps gives you the data you need to compute all four metrics weekly and trend them over time.

Acting on DORA Data

DORA metrics are diagnostic, not prescriptive. High lead time usually means large PRs, slow review cycles, or a slow pipeline. High change failure rate usually means insufficient test coverage or missing integration/e2e tests. Low deployment frequency usually means manual gates, large batch deployments, or fear of the pipeline. Each metric points toward a class of problems; the work is fixing the underlying engineering practices.


8. Conclusion

The most important mental shift in pipeline engineering is treating the pipeline as a product, not infrastructure. Infrastructure is maintained. Products are iterated on, measured, and improved based on user feedback. Your users are the engineers on your team, and their feedback is visible: pipeline run times, failure rates, the cadence of "it's probably just a flake, rerun it" in your Slack channel.

A production-grade CI/CD pipeline is never finished. It is a living system that evolves as your application grows, your team scales, and your deployment targets shift. The patterns in this post — OIDC authentication, matrix builds, reusable workflows, test sharding, blue/green and canary deployments, DORA measurement — are a foundation, not a ceiling.

Start with the highest-leverage improvements for your current context. If your pipeline takes 40 minutes, fix caching first. If your change failure rate is above 15%, invest in integration tests and deployment health checks. If lead time is measured in days, look at PR size and review process before touching the pipeline at all. DORA metrics tell you where the constraint is; pipeline engineering gives you the tools to move it.

The goal is a team that deploys with confidence, recovers quickly when things go wrong, and compounds those capabilities over time. That is what elite engineering looks like in practice — not heroics, but reliable systems and the discipline to keep improving them.


Sources

About the Author

Toc Am

Founder of AmtocSoft. Writing practical deep-dives on AI engineering, cloud architecture, and developer tooling. Previously built backend systems at scale. Reviews every post published under this byline.

LinkedIn X / Twitter

Published: 2026-06-06 · Written with AI assistance, reviewed by Toc Am.

Get These In Your Inbox

Weekly deep-dives on AI engineering, no fluff. Join the newsletter →

Subscribe (free)

Or grab the book ($39, ~100 pages) · Buy me a coffee

Buy Me a Coffee · 🔔 YouTube · 💼 LinkedIn · 🐦 X/Twitter

Wednesday, April 15, 2026

Feature Flags in Production: Gradual Rollouts, A/B Testing, and Kill Switches

Hero: Feature flag rollout percentages increasing from 1% to 100% with metrics tracking

Every major tech company ships features to a subset of users before rolling them out to everyone. Facebook rolls out changes to 1% of traffic first. Stripe tests payment flow changes with 5% of merchants before general availability. GitHub ships dark mode to beta users months before the official launch.

The mechanism behind all of this: feature flags. A feature flag is a conditional in your code that controls whether a feature is active — evaluated at runtime, configurable without deploying new code.

In 2026, feature flags have expanded beyond simple on/off toggles into a platform for gradual rollouts, targeted experiments, operational kill switches, and progressive delivery. This guide covers how to implement them correctly, which tools to use, and the patterns that make them powerful.

The Problem: Deploy and Pray

The traditional deploy model is binary: code ships to all users simultaneously. This creates several failure modes:

Big-bang releases: The "release day" model where a feature that took 3 months to build ships to 100% of users at once. When something breaks, you roll back the entire deployment — including unrelated changes.

Long-lived feature branches: Teams isolate features in branches to avoid shipping half-finished work. Branches diverge from main for weeks. Merging becomes painful. Integration issues surface late.

No experimentation infrastructure: Measuring whether a change actually improves user behavior requires A/B testing infrastructure most teams don't have.

Feature flags solve all three: features are deployed (to 0% of users) long before release, mainline development continues without branches, and experiments can be run with proper statistical controls.

graph LR subgraph "Traditional deploy" A[Code merged] --> B[All users] B --> C{Bug?} C -- Yes --> D[Rollback entire deploy] end subgraph "Feature flags" E[Code deployed] --> F[0% rollout] F --> G[1% → internal team] G --> H[5% → beta users] H --> I[25% → gradual] I --> J[100% → complete] J --> K{Bug?} K -- Yes --> L[Toggle flag off in 1s] end style D fill:#ef4444,color:#fff style L fill:#22c55e,color:#fff

How It Works: Anatomy of a Feature Flag

A feature flag evaluation has three parts:

  1. Flag definition: Name, type (boolean, string, number), default value, targeting rules
  2. Context: Information about the current request — user ID, company, region, plan tier
  3. Evaluation: Rules evaluated against context → returns variant
# Simplified flag evaluation logic
def evaluate_flag(flag_name: str, context: dict) -> bool | str:
    flag = get_flag_definition(flag_name)

    # Check targeting rules in order
    for rule in flag.targeting_rules:
        if rule.matches(context):
            return rule.variant  # Return the matched variant

    # No rules matched — return default
    return flag.default_variant

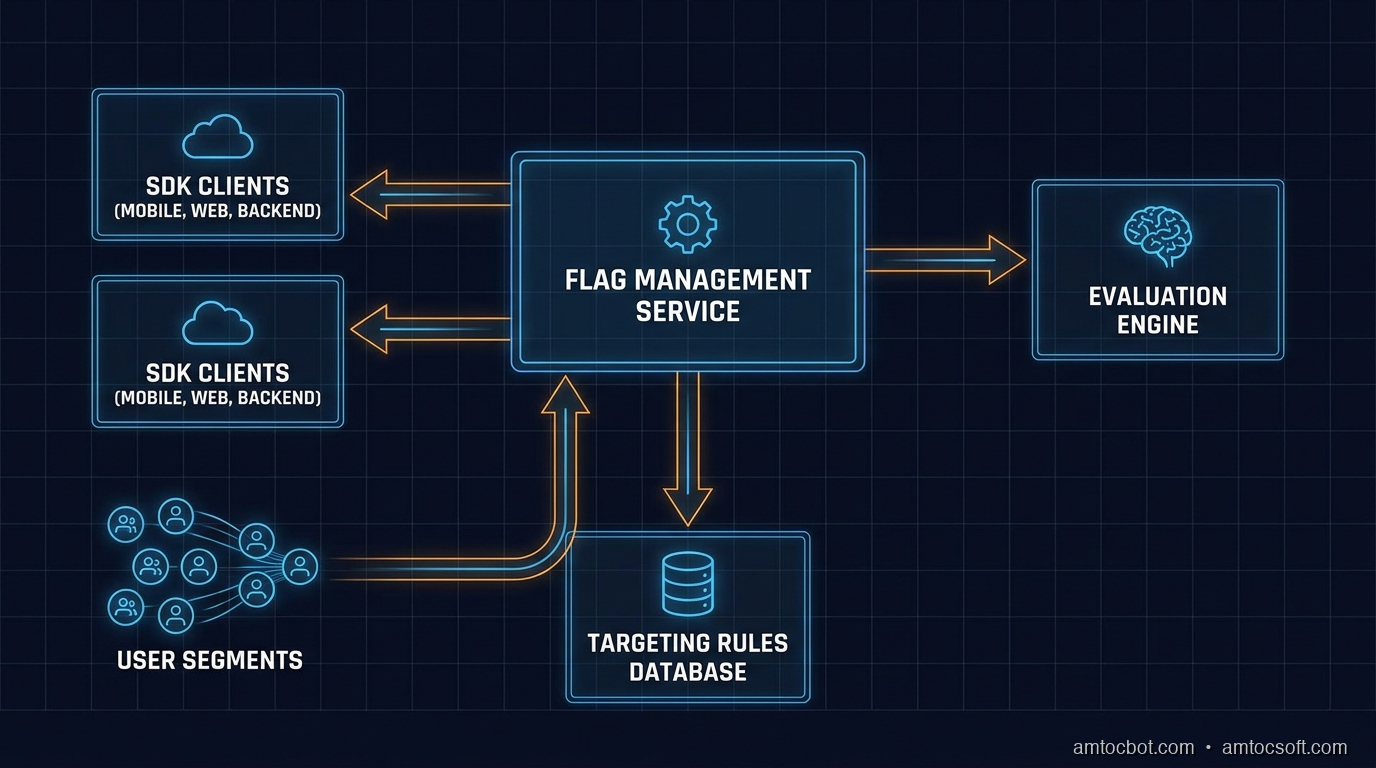
The evaluation happens in milliseconds, in-process (the SDK has a local copy of flag definitions cached from the flag service). The flag service doesn't sit in the critical path of every request.

Flag Types

Type Use Case Example
Boolean Feature on/off new_checkout_flow: true/false
String A/B variants homepage_hero: "control"/"variant_a"/"variant_b"
Number Gradual rollout % ai_summary_rollout: 0.25 (25% of users)
JSON Complex configuration rate_limits: {"free": 100, "pro": 1000}

Implementation: OpenFeature Standard

OpenFeature is a CNCF standard that decouples your feature flag code from the specific vendor. You write against the OpenFeature SDK; you swap providers without changing application code.

# pip install openfeature-sdk openfeature-provider-launchdarkly
from openfeature import api
from openfeature.evaluation_context import EvaluationContext
from openfeature.provider.launchdarkly import LaunchDarklyProvider  # or any other provider

# Initialize with your provider (done once at startup)
api.set_provider(LaunchDarklyProvider(sdk_key="sdk-your-key-here"))

client = api.get_client()

# In your request handler
def checkout_handler(request):
    # Build context from request
    ctx = EvaluationContext(
        targeting_key=str(request.user.id),
        attributes={
            "plan": request.user.plan,          # "free" / "pro" / "enterprise"
            "region": request.headers.get("CF-IPCountry", "US"),
            "email": request.user.email,        # For beta cohorts
            "company_id": str(request.user.company_id),
            "user_age_days": (datetime.now() - request.user.created_at).days,
        }
    )

    # Boolean flag — is the new checkout enabled for this user?
    use_new_checkout = client.get_boolean_value(
        "new-checkout-flow",
        default_value=False,
        evaluation_context=ctx,
    )

    # String flag — which pricing experiment variant?
    pricing_variant = client.get_string_value(
        "pricing-page-experiment",
        default_value="control",
        evaluation_context=ctx,
    )

    if use_new_checkout:
        return new_checkout_view(request, pricing_variant)
    else:
        return legacy_checkout_view(request)

Gradual Rollout with LaunchDarkly

LaunchDarkly is the market leader in 2026. Configuration is in their dashboard, but also exportable as JSON:

{
  "key": "new-checkout-flow",
  "kind": "boolean",
  "variations": [false, true],
  "rules": [
    {
      "description": "Internal team always sees new checkout",
      "clauses": [{"attribute": "email", "op": "endsWith", "values": ["@mycompany.com"]}],
      "variation": 1
    },
    {
      "description": "Enterprise customers excluded (revenue risk)",
      "clauses": [{"attribute": "plan", "op": "in", "values": ["enterprise"]}],
      "variation": 0
    }
  ],
  "fallthrough": {
    "rollout": {
      "variations": [
        {"variation": 0, "weight": 80000},
        {"variation": 1, "weight": 20000}
      ]
    }
  },
  "offVariation": 0,
  "on": true
}

This flag configuration: always shows new checkout to @mycompany.com users, never shows it to enterprise, rolls it out to 20% of everyone else.

Self-Hosted: Unleash

For teams that can't send user data to a SaaS vendor (GDPR, security policies), Unleash is the best open-source alternative:

# docker-compose.yml for Unleash
version: '3'
services:
  unleash:
    image: unleashorg/unleash-server:latest
    ports:
      - "4242:4242"
    environment:
      DATABASE_URL: postgres://unleash:password@db/unleash
      UNLEASH_DEFAULT_ADMIN_USERNAME: admin
      UNLEASH_DEFAULT_ADMIN_PASSWORD: changeme
    depends_on:
      - db
  db:
    image: postgres:16
    environment:
      POSTGRES_DB: unleash
      POSTGRES_USER: unleash
      POSTGRES_PASSWORD: password
# Python SDK for Unleash
from UnleashClient import UnleashClient

client = UnleashClient(
    url="http://localhost:4242/api",
    app_name="my-app",
    custom_headers={"Authorization": "Bearer your-api-key"}
)
client.initialize_client()

# Evaluate with context
context = {
    "userId": str(user.id),
    "properties": {
        "plan": user.plan,
        "region": user.region,
    }
}

if client.is_enabled("new-checkout-flow", context):
    return new_checkout()
else:
    return legacy_checkout()

Four Patterns That Make Feature Flags Powerful

Pattern 1: The Kill Switch

The most operationally valuable flag type. A kill switch is a boolean flag that's ON in production — until something breaks. Then you turn it OFF in 5 seconds without a deploy.

# Kill switch for a new payment processor
@app.route('/api/payments', methods=['POST'])
def process_payment():
    if not client.get_boolean_value("new-payment-processor", default_value=False, ctx=ctx):
        # Old processor
        return legacy_payment_processor.charge(request.json)

    try:
        return new_payment_processor.charge(request.json)
    except NewProcessorException as e:
        # Automatic fallback + alert
        alert_pagerduty(f"New payment processor failed: {e}")
        return legacy_payment_processor.charge(request.json)

When the new processor has issues, ops turns off the flag. No deploy. No rollback. No 3am war room. Just a toggle.

Pattern 2: Ring Deployment

Deploy to progressively larger rings of users, validating metrics at each stage:

flowchart LR A["Ring 0\nInternal (0.1%)"] --> B["Ring 1\nBeta users (1%)"] B --> C["Ring 2\nFree tier (10%)"] C --> D["Ring 3\nPro tier (50%)"] D --> E["Ring 4\nAll users (100%)"] A -.->|"Monitor:\nerror rate\nlatency\nbusiness metrics"| A B -.->|"Monitor 24hrs"| B C -.->|"Monitor 48hrs"| C D -.->|"Monitor 72hrs"| D style A fill:#3b82f6,color:#fff style E fill:#22c55e,color:#fff
# Ring deployment configuration
rings = [
    {"name": "internal", "targeting": {"email": {"endsWith": "@mycompany.com"}}, "weight": 100},
    {"name": "beta", "targeting": {"properties.beta_user": True}, "weight": 100},
    {"name": "free_10_percent", "targeting": {"plan": "free"}, "weight": 10},
    {"name": "pro_50_percent", "targeting": {"plan": "pro"}, "weight": 50},
    {"name": "all_users", "targeting": None, "weight": 100},
]

# Move to next ring after validating metrics
def advance_ring(flag_name: str, current_ring: int) -> bool:
    metrics = get_feature_metrics(flag_name, hours=24)

    if metrics.error_rate_increase > 0.01:  # 1% error rate increase
        alert(f"Flag {flag_name}: error rate elevated, holding at ring {current_ring}")
        return False

    if metrics.p99_latency_increase_ms > 50:  # 50ms p99 latency increase
        alert(f"Flag {flag_name}: latency elevated, holding at ring {current_ring}")
        return False

    return True  # Safe to advance

Pattern 3: Experiment Flags with Statistical Significance

Feature flags become A/B testing infrastructure when you add metric tracking and significance testing:

import scipy.stats as stats
import numpy as np

def evaluate_experiment(flag_key: str, metric_name: str, min_sample: int = 1000) -> dict:
    """
    Check if an experiment has reached statistical significance.
    Returns: variant recommendation and confidence level.
    """
    control_data = get_metric_data(flag_key, variant="control", metric=metric_name)
    treatment_data = get_metric_data(flag_key, variant="treatment", metric=metric_name)

    if min(len(control_data), len(treatment_data)) < min_sample:
        return {"status": "insufficient_data", "samples": len(control_data) + len(treatment_data)}

    # Two-sample t-test for continuous metrics (e.g., conversion rate, revenue)
    t_stat, p_value = stats.ttest_ind(control_data, treatment_data)

    control_mean = np.mean(control_data)
    treatment_mean = np.mean(treatment_data)
    lift = (treatment_mean - control_mean) / control_mean * 100

    return {
        "status": "significant" if p_value < 0.05 else "not_significant",
        "p_value": round(p_value, 4),
        "lift_percent": round(lift, 2),
        "control_mean": round(control_mean, 4),
        "treatment_mean": round(treatment_mean, 4),
        "recommendation": "ship" if (p_value < 0.05 and lift > 0) else "rollback" if (p_value < 0.05 and lift < 0) else "continue",
        "samples": len(control_data) + len(treatment_data),
    }

# Usage:
result = evaluate_experiment("checkout-redesign", "conversion_rate")
# → {"status": "significant", "lift_percent": 3.4, "p_value": 0.012, "recommendation": "ship"}

Pattern 4: Operational Configuration Flags

Flags aren't just for features. Use them for runtime configuration that operations may need to adjust under load:

# Rate limit configuration that ops can adjust without a deploy
rate_config = client.get_object_value(
    "api-rate-limits",
    default_value={"free": 100, "pro": 1000, "enterprise": 10000},
    evaluation_context=ctx,
)

# Under attack, ops sets: {"free": 10, "pro": 100, "enterprise": 1000}
# 10× reduction across the board, in 30 seconds, without a deploy

if request.rate_count > rate_config[user.plan]:
    return Response(status=429, headers={"Retry-After": "60"})

Cost and Latency: What Flag Evaluation Actually Costs

The operational concern teams often raise: "Won't feature flag evaluation add latency?" The answer, when implemented correctly: no.

Modern flag SDKs use a streaming architecture. On startup, the SDK downloads all flag definitions and stores them in memory. Flag evaluation happens entirely in-process — no network call, no database lookup. The SDK subscribes to a server-sent event stream and updates its local cache when flags change.

Evaluation time: sub-millisecond. Typically 50-200 microseconds, including context evaluation and rule matching.

The only performance concern is the initial SDK initialization (100-500ms to download and cache all flags). Don't evaluate flags before initialization completes — use the async initialization pattern with defaults.

# Benchmark flag evaluation latency
import time
import statistics

latencies = []
for _ in range(10000):
    start = time.perf_counter()
    client.get_boolean_value("new-feature", default_value=False, evaluation_context=ctx)
    latencies.append((time.perf_counter() - start) * 1000)

print(f"p50: {statistics.median(latencies):.3f}ms")  # → 0.041ms
print(f"p99: {statistics.quantiles(latencies, n=100)[98]:.3f}ms")  # → 0.128ms

The LaunchDarkly and Unleash SDKs both benchmark at under 0.2ms p99 for flag evaluation. For 99.9% of applications, feature flag evaluation is not in your performance budget.

Managing Technical Debt: Flag Lifecycle

The danger of feature flags is accumulating hundreds of stale flags in your codebase. Each flag is a branch in your logic — too many, and the code becomes impossible to reason about.

# Flag with built-in expiry tracking
@flag_lifecycle(
    flag_key="new-checkout-flow",
    expected_ship_date="2026-06-01",
    owner="team-checkout",
    jira_ticket="ENG-4521"
)
def checkout_handler(request):
    if client.get_boolean_value("new-checkout-flow", default_value=False, ctx=ctx):
        ...

Enforce flag retirement:
1. Set a ticket at flag creation: Create the cleanup ticket before the flag goes live
2. Alert on old flags: Monitor for flags > 90 days old that haven't been cleaned up
3. Regular flag reviews: Quarterly audit of all flags — is each one still needed?

-- Query to find stale flags (LaunchDarkly stores flag metadata)
SELECT flag_key, created_date, last_modified, owner
FROM feature_flags
WHERE last_modified < NOW() - INTERVAL '90 days'
  AND is_permanent = false
ORDER BY last_modified ASC;

Server-Side vs Client-Side Flags

Feature flags can be evaluated in two places:

Server-side flags: Evaluated in your backend. The client never sees the flag state — it only receives the feature or doesn't. No flag state exposed in client-side JavaScript. Good for: security-sensitive features, anything involving backend logic, pricing experiments.

Client-side flags: Evaluated in the browser or mobile app. The SDK downloads flag definitions and evaluates them locally. Enables UI personalization without a server round trip. Risk: flag rules are visible in client-side JavaScript — don't use for features you want to hide from users who inspect network traffic.

// Client-side SDK (LaunchDarkly Browser SDK)
import { LDClient, initialize } from 'launchdarkly-js-client-sdk';

const user = {
  kind: 'user',
  key: currentUser.id,
  plan: currentUser.plan,
  email: currentUser.email,
};

const client: LDClient = initialize('client-side-sdk-key', user);

await client.waitForInitialization();

// Evaluate a flag — happens locally, no server call
const showNewNav = client.variation('new-navigation', false);
if (showNewNav) {
  renderNewNavigation();
}

// React hook pattern
import { useLDClient, useFlags } from 'launchdarkly-react-client-sdk';

function Navigation() {
  const { 'new-navigation': showNewNav } = useFlags();
  return showNewNav ? <NewNavigation /> : <LegacyNavigation />;
}

For the backend equivalent:

# Server-side: flag evaluated in Python, result passed to template
def homepage_view(request):
    ctx = EvaluationContext(
        targeting_key=str(request.user.id),
        attributes={"plan": request.user.plan}
    )
    show_new_nav = client.get_boolean_value("new-navigation", default_value=False, evaluation_context=ctx)

    return render(request, "homepage.html", {
        "show_new_nav": show_new_nav,
        # Flag state is in template context, not exposed as JS to client
    })

The hybrid pattern: Use server-side flags for feature gating; use client-side for UI personalization where the latency of a server round-trip would be noticeable (navigation, layout).

Flag Targeting: Beyond Percentage Rollouts

Percentage rollouts are the most common targeting strategy, but several others are more appropriate in specific situations:

# Targeting strategies and when to use them

# 1. User segment: specific users by attribute
#    Use for: beta cohorts, VIP customers, internal team
flag_config = {
    "rules": [
        {"clauses": [{"attribute": "email", "op": "endsWith", "values": ["@mycompany.com"]}], "variation": 1},
        {"clauses": [{"attribute": "beta_opt_in", "op": "in", "values": [True]}], "variation": 1},
    ]
}

# 2. Sticky bucketing: same user always gets same variant
#    Default behavior in most SDKs — user hash is consistent
#    Critical for A/B tests: users shouldn't switch groups mid-experiment

# 3. Time-based: flag automatically turns off after a date
#    Use for: temporary maintenance banners, holiday promotions
from datetime import datetime

def time_gated_flag(flag_name: str, end_date: datetime) -> bool:
    if datetime.now() > end_date:
        return False
    return client.get_boolean_value(flag_name, default_value=False, evaluation_context=ctx)

# 4. Dependency: flag only active if another flag is active
#    Use for: progressive feature builds
def dependent_flag(parent_flag: str, child_flag: str) -> bool:
    if not client.get_boolean_value(parent_flag, default_value=False, evaluation_context=ctx):
        return False
    return client.get_boolean_value(child_flag, default_value=False, evaluation_context=ctx)

# 5. Context-based: target by request properties
#    Use for: region-specific features, mobile vs web
ctx_with_request = EvaluationContext(
    targeting_key=str(user.id),
    attributes={
        "region": request.headers.get("CF-IPCountry", "US"),
        "platform": request.headers.get("X-Platform", "web"),  # "ios", "android", "web"
        "app_version": request.headers.get("X-App-Version", "0.0.0"),
    }
)

Production Considerations

SDK Initialization and Fallbacks

The flag SDK must not block application startup or add request latency. Initialize asynchronously, provide defaults, cache aggressively:

# Async initialization — don't block startup
async def startup():
    await flag_client.initialize()  # Fetches flags from service, caches locally

# During startup failure — default_value is your safety net
# Never let flag evaluation throw exceptions into your business logic
try:
    enabled = client.get_boolean_value("new-feature", default_value=False, ctx=ctx)
except Exception as e:
    log.error(f"Flag evaluation failed: {e}")
    enabled = False  # Fail safe

SDKs Are Local — Flag Changes Are Near-Instant

Modern flag SDKs stream flag updates via server-sent events. Changes in the LaunchDarkly or Unleash dashboard propagate to all running SDK instances in 1-2 seconds. You don't need a deploy, a restart, or an API call — the change propagates automatically.

This is what makes kill switches operationally effective: you flip the flag, and within seconds, traffic shifts.

Feature Flags in CI/CD: Testing Against Real Flag States

Testing with feature flags requires understanding which variant your tests should run against. Two strategies:

Test both variants: Run your integration test suite against each variant. This ensures neither path regresses during a rollout.

# pytest parameterization over flag variants
import pytest
from unittest.mock import patch

@pytest.fixture(params=["control", "treatment"])
def checkout_variant(request):
    """Run each test against both checkout variants."""
    with patch.object(flag_client, 'get_string_value', return_value=request.param):
        yield request.param

def test_checkout_completes(client, checkout_variant):
    """Both variants should complete checkout successfully."""
    response = client.post('/api/checkout', json={"items": [{"id": 1, "qty": 1}]})
    assert response.status_code == 200
    assert response.json()["order_id"] is not None
    # Test passes regardless of which variant — both paths must work

Flag overrides in staging: Set specific users to specific variants in staging environments for deterministic testing.

# LaunchDarkly: staging environment flag overrides
# Individual user targeting (by ID) overrides all rules
user_targets:
  - variation: 1  # Treatment variant
    values:
      - user_id_of_test_account_1
      - user_id_of_qa_bot
      - user_id_of_automated_test_user

This ensures your QA environment always sees the new variant, while developers can test the control variant by using their personal accounts.

The Flag-Deployment Dependency

One subtle CI/CD consideration: the flag must exist in the flag service before the code that references it is deployed. If you deploy code that calls client.get_boolean_value("new-feature", ...) before creating the flag in LaunchDarkly/Unleash, the SDK returns the default value. That's fine if your default value is the safe path (default_value=False for disabled features).

The workflow:
1. Create flag in flag service (off by default, 0% rollout)
2. Deploy code (all users get default value = old behavior)
3. Enable flag for internal team (0.1% → validate)
4. Gradual rollout (1% → 10% → 50% → 100%)
5. Clean up flag (remove from code + delete from flag service)

Never deploy code that requires a flag to be already enabled on deploy. Always code for the default-value path to be safe.

Conclusion

Feature flags are one of the highest-leverage tools in modern software delivery. They separate deployment from release, enable safe experimentation, and give operations teams the ability to respond to incidents in seconds rather than minutes.

The key practices:
- OpenFeature standard decouples your code from vendor lock-in
- Ring deployments validate changes incrementally before full rollout
- Kill switches are the most operationally valuable flag type — add them proactively
- Statistical significance testing turns experiments into data, not opinions
- Flag lifecycle management prevents the codebase from becoming an unmaintainable branch forest

Start simple: add a kill switch to your next risky feature. Measure the reduction in rollback frequency and incident duration. The ROI makes itself obvious quickly.

The broader shift feature flags enable is cultural: deployment becomes routine rather than an event. When you can deploy code to production with zero users seeing it, and gradually roll it out with metrics validation at each step, the fear of shipping disappears. Teams ship more often, in smaller increments, with more confidence. That's the real value of the pattern — not just the kill switch, but the deployment culture it enables.


Sources

About the Author

Toc Am

Founder of AmtocSoft. Writing practical deep-dives on AI engineering, cloud architecture, and developer tooling. Previously built backend systems at scale. Reviews every post published under this byline.

LinkedIn X / Twitter

Published: 2026-05-16 · Written with AI assistance, reviewed by Toc Am.

Get These In Your Inbox

Weekly deep-dives on AI engineering, no fluff. Join the newsletter →

Subscribe (free)

Or grab the book ($39, ~100 pages) · Buy me a coffee

Buy Me a Coffee · 🔔 YouTube · 💼 LinkedIn · 🐦 X/Twitter

Sunday, April 12, 2026

Feature Flags in 2026: Progressive Delivery, Kill Switches, and Gradual Rollouts

Feature Flags Overview

Introduction

Deploying software used to feel like jumping off a cliff. You merged a branch, pressed deploy, held your breath, and watched error rates either stay flat or spike into the red. If something went wrong, the options were grim: roll back the entire release, hotfix under pressure, or scramble to isolate the bad code while half your user base hit a broken experience.

Feature flags change this equation entirely. Instead of treating deployment as a single, irreversible moment, flags decouple the act of shipping code from the act of releasing features. You can deploy to production continuously — every day, multiple times a day — while individual features remain hidden behind a flag, visible only to the users or environments you choose.

This is the foundation of progressive delivery: the practice of gradually exposing new features to increasing segments of your audience, with the ability to halt, revert, or adjust at any point. It is one of the most powerful patterns in modern software engineering, and in 2026 it has become an expectation rather than a luxury at companies of any serious scale.

This post goes deep on how feature flags actually work: the evaluation model, the different flag types, how to implement percentage rollouts and user targeting in Node.js and TypeScript, how to choose between self-hosted solutions like Unleash and Flagsmith versus SaaS platforms like LaunchDarkly and Statsig, and how to manage the technical debt that stale flags inevitably accumulate. By the end, you will have enough to build a production-grade flag system from scratch or evaluate which managed solution is the right fit for your team.


The Problem: Deployment Is Not the Same as Release

Most engineering teams have felt the pain of big-bang releases. A feature takes three weeks to build, lives on a long-lived branch, and gets merged the day before launch. The diff is enormous. Review is surface-level because the deadline is imminent. Testing is rushed. And then it ships to 100% of users simultaneously.

If the feature causes a performance regression, all users experience it. If there is a logic bug that only manifests at scale, you discover it in production on the worst possible day. If business requirements change mid-sprint, half the code is already shipped and the other half is in flight — untangling it is miserable.

The same problem appears at a subtler level with database migrations, API versioning, and infrastructure changes. You want to test a new query plan against real production traffic, but only a fraction of it. You want to gradually shift users from a legacy payment processor to a new one. You want to run an A/B test on a checkout flow without spinning up a separate experiment platform.

Feature flags solve all of these scenarios with a single, consistent abstraction: a named conditional that controls whether a code path is active.

if (flagClient.isEnabled('new-checkout-flow', userContext)) {
  return newCheckout(cart);
}
return legacyCheckout(cart);

That single conditional is doing enormous work. It lets you:

  • Deploy the new checkout to production without any users seeing it (flag is off globally)
  • Enable it for internal employees first to catch obvious bugs
  • Roll it to 5% of users, then 20%, then 50%, monitoring metrics at each stage
  • Kill the feature instantly if error rates climb, with no deployment required
  • Permanently remove the flag and the old code path once confidence is established

This is the model. The rest of this post is about doing it well.


How Feature Flags Work

Feature Flag System Architecture

Flag Types

Not all flags are the same. The two primary categories are boolean flags and multivariate flags.

Boolean flags are the simplest form: a feature is either on or off. They are appropriate for kill switches, gradual rollouts, and simple A/B tests. The evaluation result is true or false.

Multivariate flags return one of N values, where N is greater than two. The value can be a string, a number, a JSON object, or an enumeration. Common uses include:

  • String variants: 'control', 'variant-a', 'variant-b' — for multi-arm experiments
  • Number variants: returning a timeout value (500, 1000, 2000 ms) to test performance thresholds
  • JSON variants: returning an entire configuration object, so a single flag controls multiple related settings simultaneously
// Boolean flag
const showNewDashboard = flagClient.getBoolVariation('new-dashboard', context, false);

// String multivariate flag
const checkoutVariant = flagClient.getStringVariation('checkout-flow', context, 'control');
// Returns 'control' | 'single-page' | 'multi-step' | 'guided'

// Number multivariate flag
const timeoutMs = flagClient.getNumberVariation('api-timeout-ms', context, 3000);

// JSON multivariate flag
const searchConfig = flagClient.getJsonVariation('search-config', context, defaultConfig);
// Returns { algorithm: 'bm25', maxResults: 10, enableFuzzy: false }

Multivariate flags are especially powerful because they remove the need for a proliferation of related boolean flags. Instead of use-new-search, enable-fuzzy-search, increase-result-count, you have one search-config flag that returns a coherent configuration object.

The Evaluation Model

Feature flag evaluation is where the real power lives. A flag is not just a stored boolean value — it is a set of rules evaluated against a user context object at runtime.

flowchart TD A([User Request]) --> B[Build User Context\nuser_id, email, plan, region, beta] B --> C{Flag SDK\nLocal Cache} C -->|Cache hit| D[Load Flag Rules] C -->|Cache miss| E[Fetch from\nFlag Service] E --> F[Update Local Cache\nTTL: 30s] F --> D D --> G{Rule 1:\nIs user in\ntarget segment?} G -->|Yes| H[Return\nVariant A] G -->|No| I{Rule 2:\nIs user in\n10% rollout bucket?} I -->|Yes| J[Return\nVariant B] I -->|No| K{Rule 3:\nDefault rule} K --> L[Return\nFallback Value] H --> M([Code Path A]) J --> N([Code Path B]) L --> O([Default Code Path])

The context object is the key to targeting. It typically includes:

interface UserContext {
  key: string;           // stable user ID for consistent bucketing
  email?: string;        // for email-domain targeting
  plan?: string;         // 'free' | 'pro' | 'enterprise'
  region?: string;       // 'us-east-1' | 'eu-west-1'
  betaUser?: boolean;    // explicit opt-in segment
  customAttributes?: Record<string, string | number | boolean>;
}

Rules are evaluated in priority order. The first rule to match determines the result. Common rule types:

  • Individual targeting: user_id IN ['user-abc123', 'user-def456'] — useful for internal QA
  • Segment targeting: plan == 'enterprise' — enable features for paying customers first
  • Percentage rollout: hash the user key into a 0–99 bucket, enable if bucket < threshold
  • Default rule: the fallback that applies when no other rule matches

The percentage rollout mechanism deserves attention because it must be consistent and sticky. The same user must always land in the same bucket, regardless of when or where the evaluation happens. This is achieved by hashing the user key (not a random value):

function getBucketValue(userKey: string, flagKey: string): number {
  // Include flagKey in the hash to prevent identical rollouts across flags
  const input = `${flagKey}.${userKey}`;
  const hash = murmur3(input); // or any fast, consistent hash
  return (hash >>> 0) % 100; // 0–99
}

function isUserInRollout(userKey: string, flagKey: string, percentage: number): boolean {
  return getBucketValue(userKey, flagKey) < percentage;
}

This ensures that a user who is in the 10% rollout for a flag stays in that rollout consistently, and that their rollout status for one flag is independent of their status for another.


Implementation Guide

Building a Minimal Flag Client in TypeScript

Let's build a feature flag client from scratch to understand exactly what the production SDKs are doing under the hood. This is not a production replacement — it is a learning tool and a useful starting point for teams that want to self-host without a full platform.

// types.ts
export interface FlagRule {
  type: 'individual' | 'segment' | 'percentage' | 'default';
  attribute?: string;
  operator?: 'eq' | 'in' | 'lt' | 'gt' | 'contains';
  values?: (string | number | boolean)[];
  percentage?: number;
  variant: string;
}

export interface FlagDefinition {
  key: string;
  enabled: boolean;
  variants: Record<string, string | number | boolean | object>;
  rules: FlagRule[];
  defaultVariant: string;
}

export interface EvaluationContext {
  key: string;
  [attribute: string]: string | number | boolean | undefined;
}
// flag-client.ts
import { createHash } from 'crypto';
import type { FlagDefinition, EvaluationContext, FlagRule } from './types';

export class FeatureFlagClient {
  private flags: Map<string, FlagDefinition> = new Map();
  private cacheExpiry: number = 0;
  private readonly cacheTtlMs: number;
  private readonly flagsEndpoint: string;

  constructor(opts: { endpoint: string; cacheTtlMs?: number }) {
    this.flagsEndpoint = opts.endpoint;
    this.cacheTtlMs = opts.cacheTtlMs ?? 30_000;
  }

  async initialize(): Promise<void> {
    await this.refresh();
  }

  private async refresh(): Promise<void> {
    const res = await fetch(this.flagsEndpoint);
    if (!res.ok) throw new Error(`Flag fetch failed: ${res.status}`);
    const definitions: FlagDefinition[] = await res.json();
    this.flags.clear();
    for (const flag of definitions) {
      this.flags.set(flag.key, flag);
    }
    this.cacheExpiry = Date.now() + this.cacheTtlMs;
  }

  private async ensureFresh(): Promise<void> {
    if (Date.now() > this.cacheExpiry) {
      await this.refresh();
    }
  }

  private getBucket(userKey: string, flagKey: string): number {
    const input = `${flagKey}.${userKey}`;
    const hash = createHash('sha256').update(input).digest();
    // Use first 4 bytes as a uint32
    const value = hash.readUInt32BE(0);
    return value % 100;
  }

  private evaluateRule(rule: FlagRule, context: EvaluationContext): boolean {
    if (rule.type === 'default') return true;

    if (rule.type === 'percentage') {
      const bucket = this.getBucket(context.key, rule.variant);
      return bucket < (rule.percentage ?? 0);
    }

    if (rule.type === 'individual' || rule.type === 'segment') {
      const attribute = rule.attribute ?? 'key';
      const contextValue = context[attribute];
      if (contextValue === undefined) return false;

      switch (rule.operator) {
        case 'eq':
          return contextValue === rule.values?.[0];
        case 'in':
          return rule.values?.includes(contextValue as string | number | boolean) ?? false;
        case 'contains':
          return typeof contextValue === 'string' &&
            typeof rule.values?.[0] === 'string' &&
            contextValue.includes(rule.values[0]);
        case 'lt':
          return typeof contextValue === 'number' &&
            typeof rule.values?.[0] === 'number' &&
            contextValue < rule.values[0];
        case 'gt':
          return typeof contextValue === 'number' &&
            typeof rule.values?.[0] === 'number' &&
            contextValue > rule.values[0];
        default:
          return false;
      }
    }

    return false;
  }

  async evaluate<T>(
    flagKey: string,
    context: EvaluationContext,
    defaultValue: T
  ): Promise<T> {
    await this.ensureFresh();

    const flag = this.flags.get(flagKey);
    if (!flag || !flag.enabled) return defaultValue;

    for (const rule of flag.rules) {
      if (this.evaluateRule(rule, context)) {
        const variant = flag.variants[rule.variant];
        return (variant as T) ?? defaultValue;
      }
    }

    const defaultVariant = flag.variants[flag.defaultVariant];
    return (defaultVariant as T) ?? defaultValue;
  }

  async getBoolVariation(
    flagKey: string,
    context: EvaluationContext,
    defaultValue: boolean
  ): Promise<boolean> {
    return this.evaluate<boolean>(flagKey, context, defaultValue);
  }

  async getStringVariation(
    flagKey: string,
    context: EvaluationContext,
    defaultValue: string
  ): Promise<string> {
    return this.evaluate<string>(flagKey, context, defaultValue);
  }
}

Using the Client in an Express API

// app.ts
import express from 'express';
import { FeatureFlagClient } from './flag-client';
import type { EvaluationContext } from './types';

const app = express();
const flags = new FeatureFlagClient({
  endpoint: 'https://flags.internal.mycompany.com/api/flags',
  cacheTtlMs: 15_000,
});

// Initialize once at startup — client handles refresh internally
await flags.initialize();

app.get('/api/recommendations', async (req, res) => {
  const userId = req.headers['x-user-id'] as string;
  const userPlan = req.headers['x-user-plan'] as string;

  const context: EvaluationContext = {
    key: userId,
    plan: userPlan,
    region: process.env.AWS_REGION ?? 'us-east-1',
  };

  // Check flag — returns false if flag is undefined or user is not in rollout
  const useNewRecommendationEngine = await flags.getBoolVariation(
    'new-recommendation-engine',
    context,
    false
  );

  if (useNewRecommendationEngine) {
    const results = await newRecommendationEngine(userId);
    return res.json({ results, engine: 'v2' });
  }

  const results = await legacyRecommendationEngine(userId);
  return res.json({ results, engine: 'v1' });
});

Kill Switch Pattern

Kill switches are boolean flags that default to true and turn a feature off when triggered. This is the opposite of a rollout flag. The naming convention matters for clarity:

// Kill switch: defaults to ON, turned OFF in an emergency
const featureKilled = await flags.getBoolVariation(
  'kill-new-payment-processor',
  context,
  false  // default: not killed
);

if (featureKilled) {
  return legacyPaymentProcessor.charge(amount);
}

return newPaymentProcessor.charge(amount);

Kill switches should be pre-created for every high-risk feature before deployment. When a production incident occurs, the last thing you want to do is create a new flag, configure it, and deploy it. The flag should already exist and be toggleable in seconds.

Choosing a Rollout Strategy

flowchart TD A([New Feature Ready\nfor Release]) --> B{Is it a\nhigh-risk change?} B -->|Yes - DB migration,\npayment flow, infra| C[Start at 1%\nCanary Rollout] B -->|No - UI change,\nnon-critical feature| D[Start at 10%\nStandard Rollout] C --> E[Monitor for 30 min:\nError rate, latency, logs] D --> F[Monitor for 15 min:\nError rate, latency] E --> G{Metrics\nclean?} F --> G G -->|No — spike detected| H[Kill switch:\nSet flag to 0%] H --> I[Investigate &\nFix Bug] I --> C G -->|Yes| J[Increase to 25%] J --> K[Monitor 30 min] K --> L{Still clean?} L -->|No| H L -->|Yes| M[Increase to 50%] M --> N[Monitor 1 hour] N --> O{Still clean?} O -->|No| H O -->|Yes| P[Increase to 100%] P --> Q[Full Release:\nPlan flag cleanup\nin next sprint]

Comparison and Tradeoffs

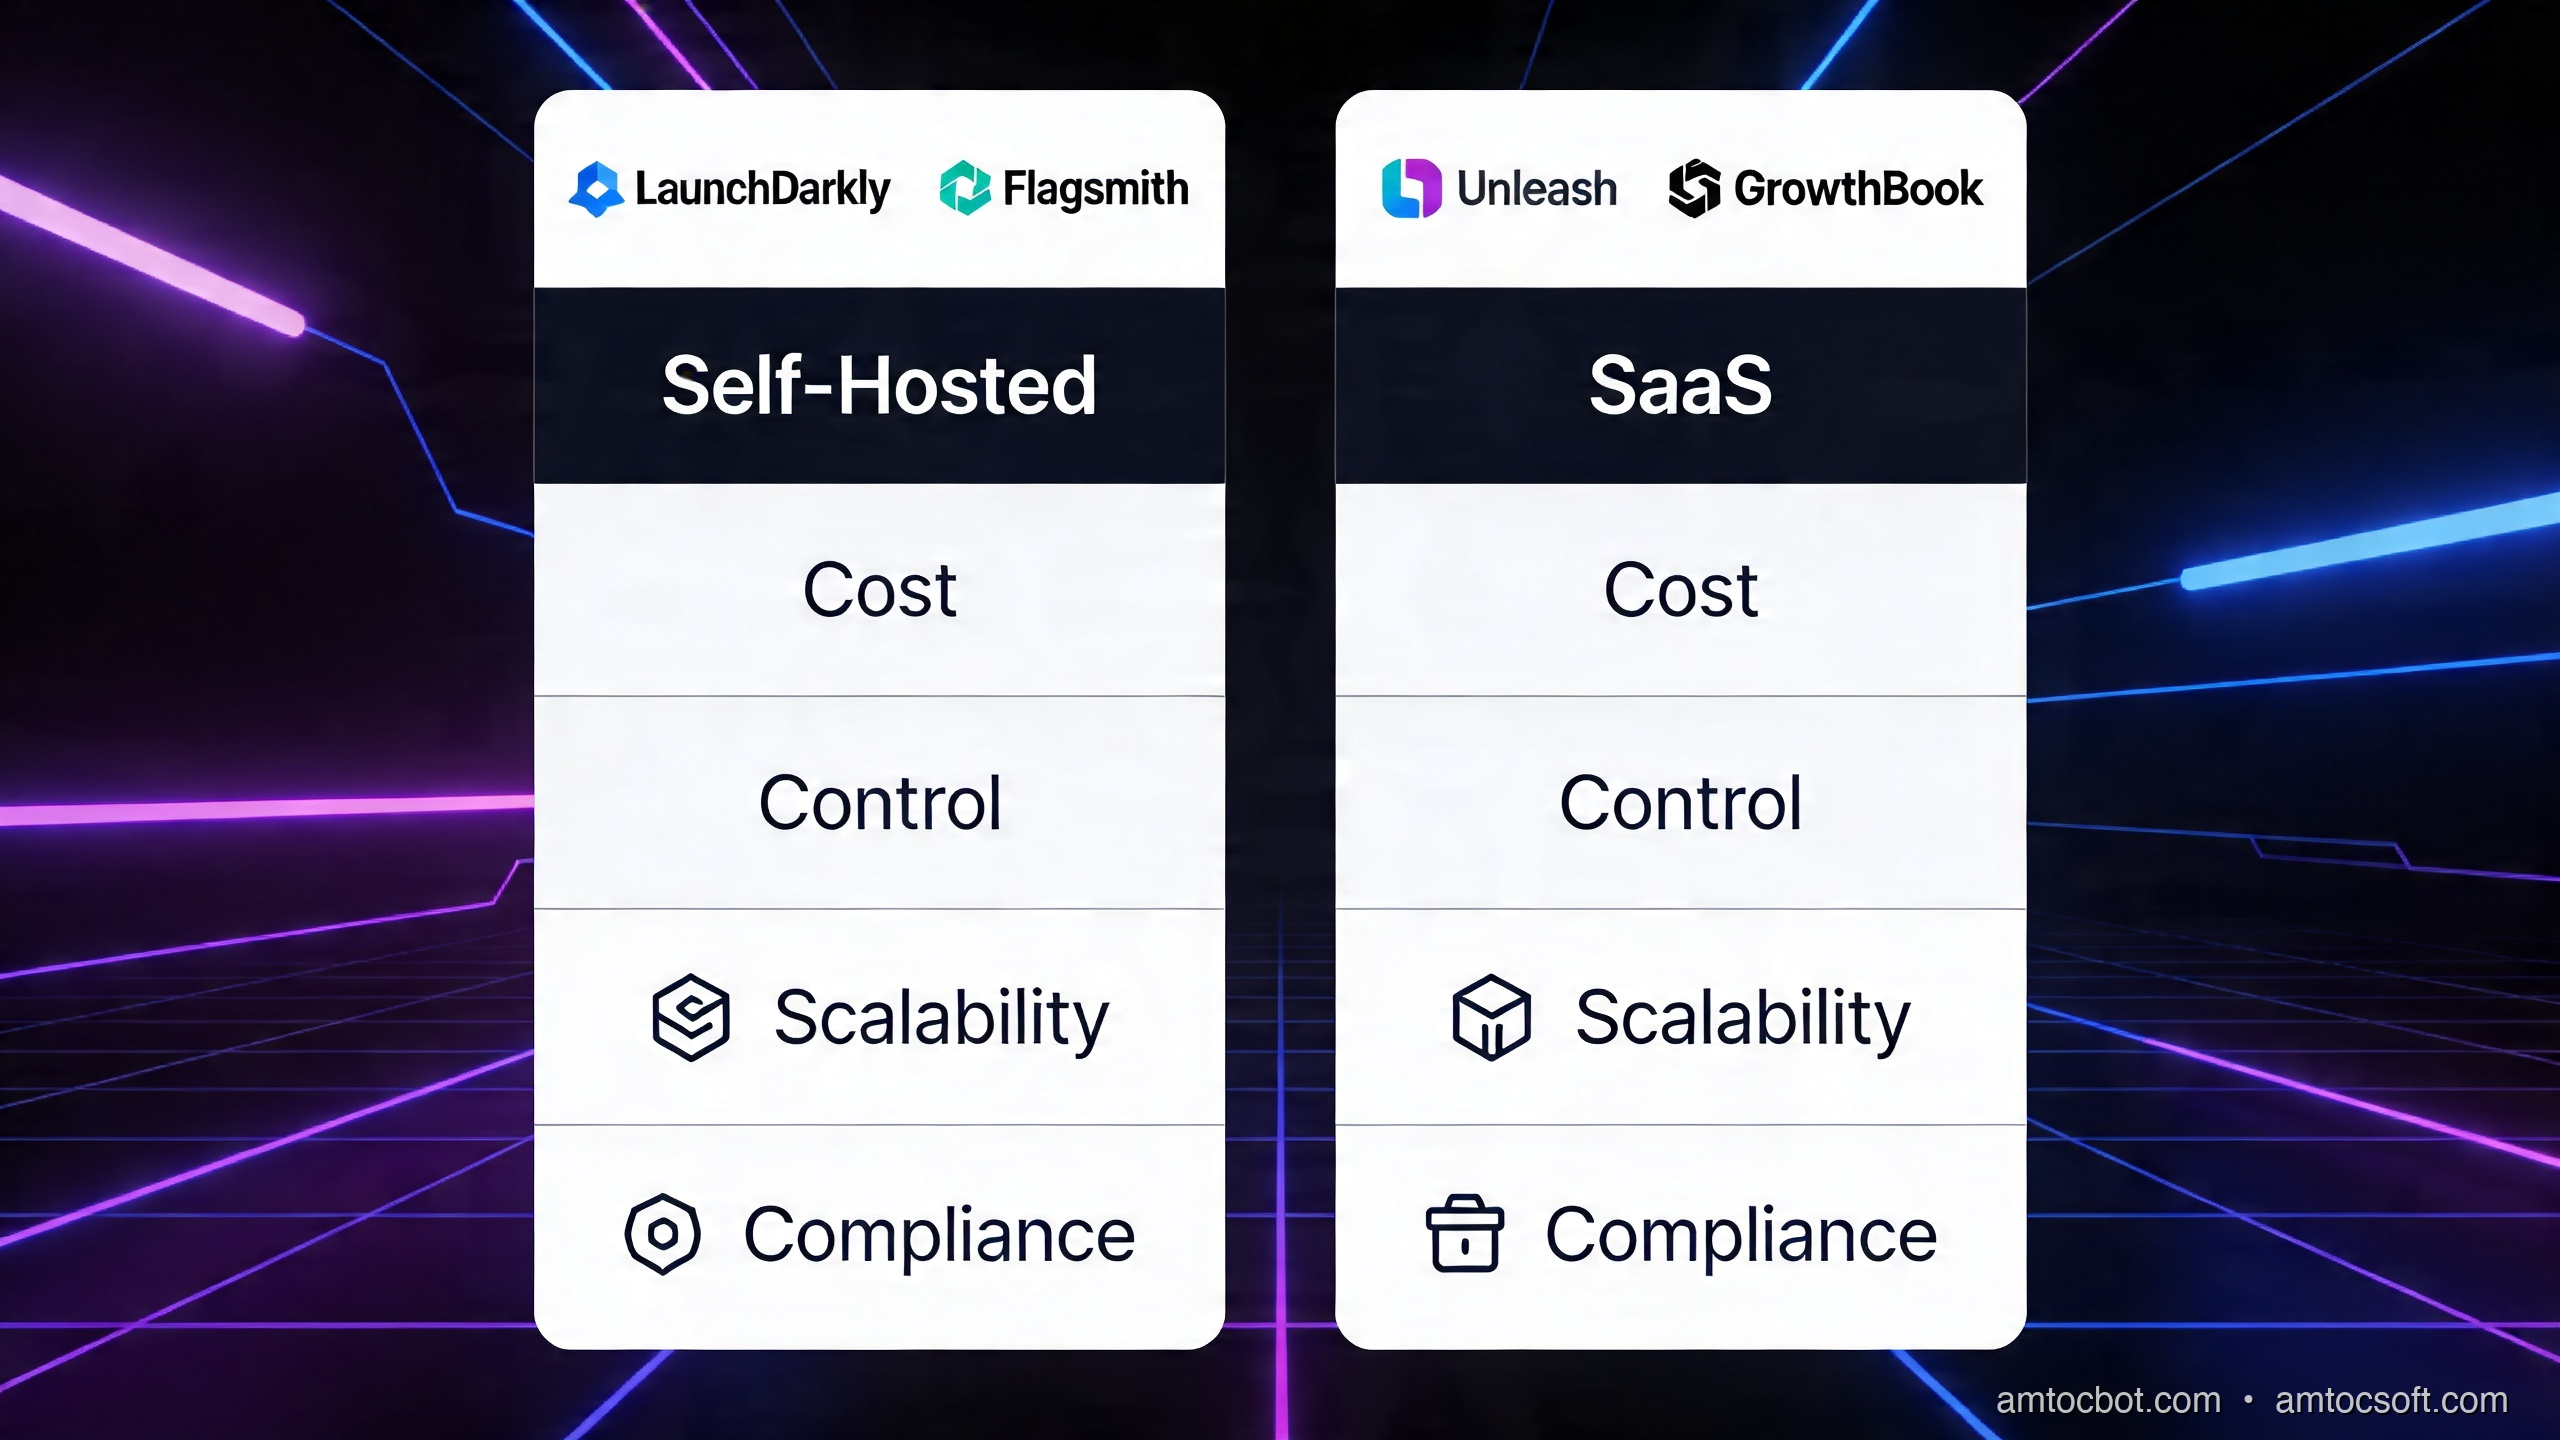
Self-Hosted vs SaaS

The build-vs-buy decision for feature flags is not trivial. Here is a practical comparison across the most relevant dimensions.

Self-hosted vs SaaS Flag Platforms
Dimension Unleash (self-hosted) Flagsmith (self-hosted) LaunchDarkly (SaaS) Statsig (SaaS)
Evaluation location SDK-side (local) SDK-side (local) SDK-side (local) SDK-side + edge
Data residency Full control Full control US/EU options US primary
Pricing Free (OSS) + Enterprise Free (OSS) + Cloud From $20k/yr (enterprise) Usage-based
Latency < 1ms (local eval) < 1ms (local eval) < 1ms (local eval) < 1ms (local eval)
Analytics / experiments Basic Basic Full A/B + stats Advanced stats engine
Ops burden High (DB, servers, HA) Medium None None
Audit logs Yes (Enterprise) Yes Yes Yes
Edge / CDN flags No No LaunchDarkly Edge Statsig on Vercel/Cloudflare
Best for Cost-sensitive, data-sovereign Mid-size, mixed cloud Enterprise, full experiments Experiment-heavy products

Choose self-hosted if:
- You have GDPR or data sovereignty requirements that prevent user data leaving your infrastructure
- You are running at a scale where SaaS per-seat or per-MAU pricing becomes expensive (> 10M MAUs)
- You have the DevOps capacity to run and maintain the service reliably

Choose SaaS if:
- You want to ship feature flag infrastructure in days, not months
- You need advanced experimentation capabilities (sequential testing, CUPED variance reduction)
- Your team is small and cannot afford the ops burden of a self-hosted system

Flag Evaluation Performance

One common concern is whether flag evaluation adds latency to request paths. The answer is: it should not, and here is why.

All production-grade feature flag SDKs (LaunchDarkly, Unleash, Flagsmith, Statsig) use a local evaluation model. The SDK downloads a snapshot of all flag rules at startup and on a polling interval (typically 30 seconds). Evaluation is then done entirely in-memory, against local data, with no network call required per evaluation.

The cost of a flag evaluation in this model is roughly:

  • Hash computation: ~1 microsecond
  • Rule traversal: ~5–20 microseconds for a typical ruleset

Compared to a database query (1–10ms) or an external API call (10–200ms), flag evaluation is effectively zero-cost.

The one exception is streaming-based updates. SDKs like LaunchDarkly maintain a persistent SSE connection to receive flag changes in real time (< 200ms propagation), rather than waiting for the next polling interval. This is important for kill switches where a 30-second delay is too long.


Production Considerations

Flag Lifecycle and Stale Flag Debt

Feature flags accumulate. A team that ships two features per week can have 100 flags after a year. Without discipline, these become permanent conditionals in the codebase — dead code paths that no one dares remove, flags that are always on but never cleaned up, and rules that reference segments that no longer exist.

Stale flags are a form of technical debt that compounds over time:

  1. Readability: Code with many flag conditionals is harder to reason about. What code path actually runs in production?
  2. Testing burden: Every combination of flag states is theoretically a different code path to test.
  3. Performance: Even with local evaluation, a ruleset with 500 flags is slower to download and parse than one with 50.

The solution is a flag lifecycle policy enforced through tooling:

// Flag definition with mandatory expiry metadata
interface FlagDefinition {
  key: string;
  enabled: boolean;
  variants: Record<string, unknown>;
  rules: FlagRule[];
  defaultVariant: string;
  metadata: {
    createdAt: string;           // ISO date
    owner: string;               // team or individual
    expiresAt: string;           // ISO date — mandatory
    jiraTicket?: string;         // cleanup ticket
    type: 'release' | 'experiment' | 'kill-switch' | 'ops';
  };
}

Recommended expiry windows:

Flag Type Max Lifetime
Release flag 2 weeks after 100% rollout
Experiment flag Duration of experiment + 1 week
Kill switch Indefinite (but reviewed quarterly)
Ops flag Indefinite (but reviewed quarterly)

Integrate expiry checks into your CI pipeline so that a PR adding a flag without an expiry date fails the build. And track overdue flag cleanup in your sprint velocity — it is real work.

Monitoring and Observability

Flag evaluations should be emitted as metrics and structured logs:

// Instrumented evaluation wrapper
async function evaluateWithMetrics<T>(
  client: FeatureFlagClient,
  flagKey: string,
  context: EvaluationContext,
  defaultValue: T
): Promise<T> {
  const start = performance.now();
  let variant: string | undefined;
  let error: Error | undefined;

  try {
    const result = await client.evaluate<T>(flagKey, context, defaultValue);
    variant = JSON.stringify(result);
    return result;
  } catch (err) {
    error = err as Error;
    return defaultValue;
  } finally {
    const durationMs = performance.now() - start;

    metrics.histogram('feature_flag.evaluation_duration_ms', durationMs, {
      flag: flagKey,
    });

    logger.info('feature_flag.evaluated', {
      flag: flagKey,
      userKey: context.key,
      variant,
      durationMs,
      error: error?.message,
    });
  }
}

Set up dashboards that show:

  • Evaluation volume by flag (which flags are hottest?)
  • Error rate per flag variant (is variant B causing more 5xx than variant A?)
  • Flag propagation latency (how quickly do changes reach production SDKs?)
  • Stale evaluation warnings (flags evaluated after their expiry date)

Trunk-Based Development and Feature Flags

Feature flags are the enabling technology for trunk-based development (TBD) — the practice where all developers commit directly to main at least once per day. With TBD, there are no long-lived feature branches, which eliminates the merge conflict tax and the integration risk of big-bang merges.

The pattern is straightforward: every in-flight feature is wrapped in a flag from day one. Developers commit incomplete code behind a flag that is globally disabled. The code ships to production but is invisible. Once the feature is complete and the flag is enabled, it becomes live — with full rollout control.

// Day 1 commit — feature is incomplete but ships behind a flag
async function handleSearch(query: string, userId: string): Promise<SearchResult[]> {
  const context: EvaluationContext = { key: userId };

  const useNewSearchEngine = await flags.getBoolVariation(
    'new-search-engine',    // globally off — safe to ship incomplete
    context,
    false
  );

  if (useNewSearchEngine) {
    // TODO: This is a stub — full implementation in next commit
    return newSearchEngine.query(query);
  }

  return legacySearch(query);
}

This model has a profound effect on team dynamics. Developers stop hoarding code on local branches. Code review happens in smaller, more reviewable chunks. And the main branch is always deployable, because every in-flight feature is safely dark.

Progressive Delivery Lifecycle

gantt title Progressive Delivery Lifecycle — Feature X dateFormat YYYY-MM-DD axisFormat %b %d section Development Feature flagged (globally off) :done, dev1, 2026-04-01, 2026-04-07 Code review + merge to main :done, dev2, 2026-04-07, 2026-04-08 section Validation Internal team (0% public) :done, val1, 2026-04-08, 2026-04-09 Beta users / employees (5%) :done, val2, 2026-04-09, 2026-04-10 Canary rollout (10%) :done, val3, 2026-04-10, 2026-04-11 section Rollout 25% rollout + metrics review :active, roll1, 2026-04-11, 2026-04-12 50% rollout + A/B analysis : roll2, 2026-04-12, 2026-04-13 100% full release : roll3, 2026-04-13, 2026-04-14 section Cleanup Flag removal ticket created :crit, cln1, 2026-04-14, 2026-04-14 Dead code removed, flag deleted : cln2, 2026-04-14, 2026-04-21 section Contingency Rollback path (kill switch ready) :crit, rb1, 2026-04-08, 2026-04-14

The Gantt diagram above represents the ideal lifecycle. Notice two things: the rollback path (kill switch) is available throughout the entire rollout period, and the cleanup phase is scheduled immediately after full release — not as an afterthought.


Conclusion

Feature flags have matured from a scrappy workaround into a first-class engineering practice. In 2026, progressive delivery is table stakes for any team that cares about deployment safety and velocity.

The key ideas to take forward:

Decouple deployment from release. Shipping code and exposing features to users are two separate events. Feature flags give you control over when the second event happens, independently of the first.

Use the right flag type for the job. Boolean flags for simple rollouts and kill switches. Multivariate flags for experiments and configuration management. Avoid proliferating multiple related booleans when a single JSON flag captures the intent more clearly.

Build with the evaluation model in mind. User context, rule priority, and consistent hashing for percentage bucketing are the core mechanics. Understand them whether you are using an SDK or rolling your own.

Pick your platform based on your constraints. Self-hosted solutions (Unleash, Flagsmith) give you data sovereignty and cost control at the price of operational overhead. SaaS solutions (LaunchDarkly, Statsig) give you speed and advanced experimentation at a cost that scales with your user base.

Treat stale flags as debt, not decoration. Every flag that outlives its purpose is a cognitive tax on every developer who reads that code path. Build expiry enforcement into your process from the start.

Combine flags with trunk-based development. The two practices amplify each other. Trunk-based development eliminates merge risk. Feature flags eliminate release risk. Together, they enable the continuous delivery culture that high-performing engineering organizations depend on.

The most important step is to start. Pick one high-risk feature that is about to ship, wrap it in a flag, and do your first percentage rollout. Watch what you can do when deployment stops being a cliff jump and becomes a dial you turn.


Next up: We will look at how Statsig's experiment platform goes beyond basic A/B testing — sequential testing, CUPED variance reduction, and multi-armed bandits for adaptive rollouts.


Sources

About the Author

Toc Am

Founder of AmtocSoft. Writing practical deep-dives on AI engineering, cloud architecture, and developer tooling. Previously built backend systems at scale. Reviews every post published under this byline.

LinkedIn X / Twitter

Published: 2026-04-14 · Written with AI assistance, reviewed by Toc Am.

Get These In Your Inbox

Weekly deep-dives on AI engineering, no fluff. Join the newsletter →

Subscribe (free)

Or grab the book ($39, ~100 pages) · Buy me a coffee

Buy Me a Coffee · 🔔 YouTube · 💼 LinkedIn · 🐦 X/Twitter
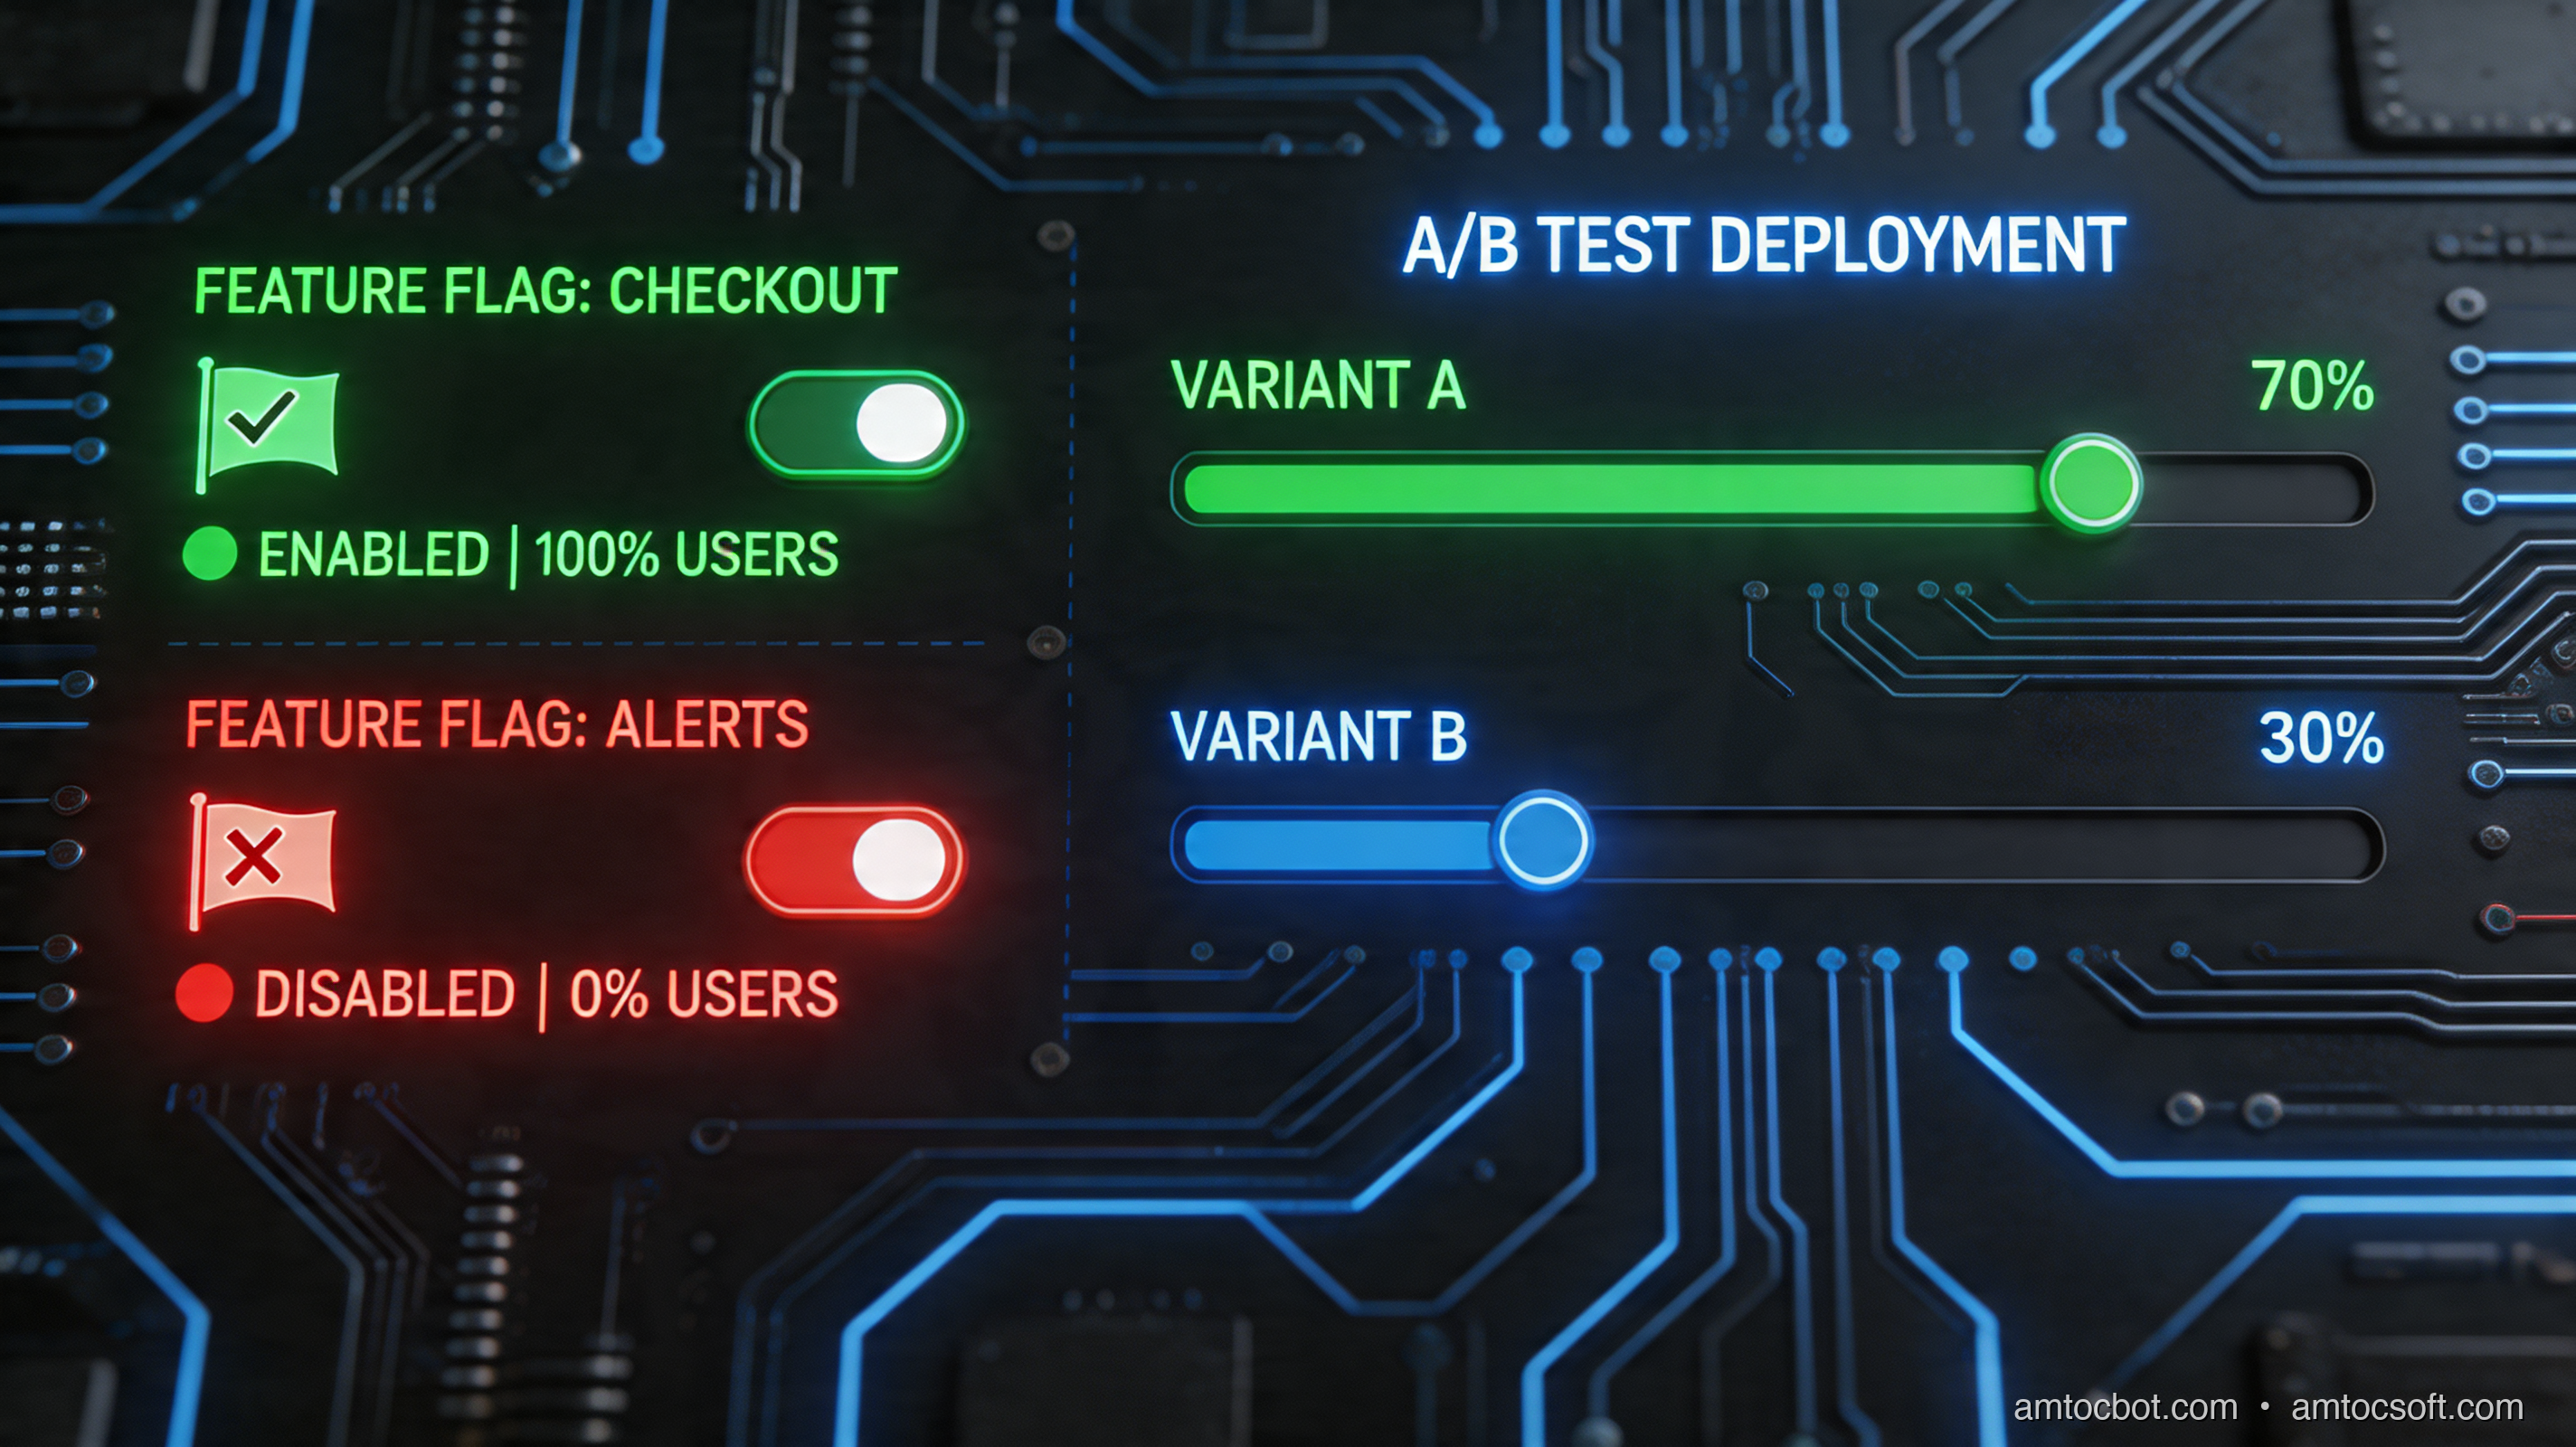
Attention Is All You Need, Explained Simply

We published a plain-language walkthrough of the 2017 transformer paper — queries, keys, values, multi-head attention, and why no-recurrence...