Showing posts with label AmtocSoft. Show all posts

Tuesday, April 14, 2026

Context Engineering: The Skill That Replaced Prompt Engineering

Hero Image

Prompt engineering taught you what to ask — context engineering teaches you what the model needs to know before it answers, and that difference is what separates toy demos from production AI systems.

For the past few years, the AI community obsessed over prompt engineering. Craft the perfect instruction. Use the magic words. Add "think step by step." Chain your prompts. There were courses, certifications, and job titles built around the art of asking AI the right question. And it worked — to a point.

But production AI systems kept failing in ways that better prompts couldn't fix. Chatbots would forget important details mid-conversation. RAG pipelines would retrieve the wrong chunks and confidently hallucinate. Agents would lose track of their task state. The model wasn't stupid; it was blind. It was answering the question you asked while missing the information it needed.

That gap between what the model knows and what it needs to know has a name now: context engineering. And in 2026, it has become the core competency separating developers who build AI systems that actually work from those who are still fighting with their system prompts.

This post is part of the AI Agent Engineering: Complete 2026 Guide. Context engineering is one of the core layers of a production agent stack — see the guide for how it fits into the full picture.

The Problem: Why 70% of LLM Failures Aren't the Model's Fault

According to a 2026 analysis by The New Stack, over 70% of production LLM application failures trace back to context problems — not model limitations. The model was capable of answering correctly. It simply didn't have what it needed in its context window to do so.

This finding reshapes how we should think about debugging AI systems. When your chatbot gives a bad answer, the instinct is to improve the prompt. Rewrite the instruction. Add more examples. Make it more explicit. But if the real problem is that the model is missing relevant background information, has too much irrelevant noise competing for attention, or is working from stale data — no amount of prompt refinement will help.

Consider a customer support bot. A user asks: "Why was my last order delayed?" The model has a beautiful system prompt explaining its role, its tone, its capabilities. But the user's order history isn't in the context. The shipping status isn't there. The warehouse disruption from last Tuesday isn't there. The model hallucinates a generic answer about carrier delays. The prompt was fine. The context was empty.

There are four recurring failure modes that context engineering addresses:

Context overflow — The context window fills up with accumulated conversation history, old tool outputs, or verbose retrieved documents. Important information gets pushed out. Attention dilutes. The model starts "forgetting" things that were mentioned earlier.

Stale context — The model is working from information that was accurate when injected but is no longer current. Cached user profiles, outdated product descriptions, old document versions. The model answers confidently based on facts that have changed.

Irrelevant context flooding — RAG retrieval returns chunks that are topically adjacent but not actually useful for the current question. The model's attention gets pulled toward noise. Answer quality degrades not because information is missing but because too much irrelevant information is present.

Missing context — The simplest failure. The model simply doesn't have information it needs. No retrieval was triggered, the conversation history was truncated, or the relevant data was never surfaced into the window in the first place.

All four of these are engineering problems. They require systems thinking, not prompt tweaking.

Architecture Diagram

Technical Breakdown: What Context Engineering Actually Is

Context engineering is the practice of strategically managing what goes into an LLM's context window — what information is included, how it's structured, in what order, at what level of compression, and when it's refreshed.

The context window is not a dump. It's a carefully curated working memory. Every token you put in the window costs attention and inference compute. Every irrelevant token competes with relevant ones. The model's ability to reason over a context degrades as that context becomes noisier, longer, or more redundant.

Context engineering operates across five primary dimensions:

1. Retrieval Strategy

Not all retrieval is equal. Naive RAG concatenates the top-K chunks by cosine similarity and calls it done. Engineered context retrieval asks: is similarity the right signal here? Maybe recency matters more. Maybe the user's stated intent should weight the retrieval differently than the literal query terms. Maybe you need to retrieve context from multiple knowledge bases and interleave them intelligently.

Hybrid retrieval (dense + sparse), re-ranking with a cross-encoder, query expansion, and HyDE (Hypothetical Document Embeddings) are all tools in the context engineer's toolkit. Each controls what information makes it into the window.

2. Context Compression

More tokens in the window does not mean more useful information. Long documents, verbose conversation history, and redundant retrieved chunks all need to be compressed before injection. Summarization, key-point extraction, and chunk deduplication reduce token consumption while preserving semantic density.

The goal is maximum information per token, not maximum tokens.

3. Ordering and Recency Weighting

Where you put information in the context window matters. LLMs exhibit a "lost in the middle" phenomenon — information at the beginning and end of long contexts is better attended to than information buried in the middle. Critical context should be placed close to the query. Background information can go earlier. Ordering is not cosmetic.

Recency weighting applies to conversation history specifically. The last few turns are almost always more relevant than what was said ten turns ago. Selectively compressing old history while preserving recent turns maintains coherent conversation without blowing the token budget.

4. Hierarchical Context Architecture

Production systems benefit from thinking about context in layers:

  • Global context: System-level information that applies to every interaction — persona, capabilities, hard constraints, domain knowledge. Typically 200-500 tokens.
  • Session context: User-specific information that applies to this conversation — user profile, preferences, prior session summaries, account state. Injected at session start.
  • Turn context: Information relevant to this specific query — retrieved documents, tool outputs, recent conversation history. Dynamically assembled per turn.

Each layer has different freshness requirements, different token budgets, and different strategies for compression and retrieval.

5. Relevance Filtering

Before injecting any retrieved content, filter it for actual relevance. A relevance score of 0.72 from your vector database doesn't tell you whether that chunk actually helps answer the current question. Post-retrieval filtering using LLM-as-judge, semantic similarity to the query intent (not just the query terms), or rule-based filters (e.g., date ranges, entity matching) can dramatically reduce context noise.

flowchart TD Q[User Query] --> QE[Query Expansion\n+ Intent Detection] QE --> RET[Hybrid Retrieval\nDense + Sparse] RET --> RANK[Cross-Encoder\nRe-Ranking] RANK --> FILT[Relevance Filter\nScore Threshold] FILT --> COMP[Chunk Compression\n+ Deduplication] SYS[System Prompt\nGlobal Context] --> ASSEMBLE SESS[Session Context\nUser Profile + History Summary] --> ASSEMBLE COMP --> ASSEMBLE[Context Assembly\nOrdering + Token Budget] HIST[Recent Turn History\nLast N Turns] --> ASSEMBLE ASSEMBLE --> WIN[Context Window\nFinal Payload] WIN --> LLM[LLM Inference] LLM --> ANS[Response] style WIN fill:#2d6a4f,color:#fff style LLM fill:#1b4332,color:#fff style ANS fill:#40916c,color:#fff

How Context Engineering Differs from Prompt Engineering

The confusion between the two is understandable — both deal with what you send to the model. But the distinction is fundamental.

Prompt engineering is about the instruction: the task description, the output format request, the few-shot examples, the chain-of-thought nudge. It assumes the model has what it needs and focuses on directing how the model should process and respond. Prompt engineering asks: "How do I phrase this?"

Context engineering is about the information: what background knowledge, retrieved documents, conversation history, user state, and domain data the model has available when it processes the prompt. It assumes the instruction is clear and focuses on ensuring the model has the right inputs. Context engineering asks: "What does the model need to know?"

In a well-architected system, both matter. But they have different leverage points. A mediocre prompt with excellent context often outperforms an excellent prompt with mediocre context. The model is fundamentally a reasoning engine — it reasons over what's in its window. The quality of the window determines the ceiling on answer quality.

Comparison
Dimension Prompt Engineering Context Engineering
Focus How the model is instructed What information the model has
Scope System prompt + task framing Retrieved docs, history, user state, dynamic injections
When it matters most Simple tasks, instruction-following benchmarks Multi-turn systems, RAG, agents, personalization
Primary failure mode Unclear instructions, wrong format Missing context, context overflow, stale data
Core skill Writing clear instructions, few-shot examples Retrieval design, compression, token budgeting
Tooling Prompt templates, prompt versioning Vector DBs, chunking pipelines, context managers
Iteration speed Fast (text edits) Slower (pipeline changes, eval frameworks)
Ceiling Limited by information available Limited by retrieval quality and token budget
2026 relevance Necessary but insufficient The differentiating skill in production AI
flowchart TD START([New User Query]) --> HIST_CHECK{History\nAvailable?} HIST_CHECK -->|Yes| HIST_LEN{History\nLength?} HIST_CHECK -->|No| RETRIEVAL HIST_LEN -->|Short < 5 turns| KEEP_FULL[Keep Full History] HIST_LEN -->|Medium 5-15 turns| COMPRESS_RECENT[Compress Older Turns\nKeep Last 5 Verbatim] HIST_LEN -->|Long > 15 turns| SUMMARIZE[Summarize + Rolling Window\nKeep Last 3 Verbatim] KEEP_FULL --> RETRIEVAL COMPRESS_RECENT --> RETRIEVAL SUMMARIZE --> RETRIEVAL RETRIEVAL{Query Needs\nExternal Context?} RETRIEVAL -->|No - chitchat/general| ASSEMBLE_SIMPLE[Assemble Simple Context\nSystem + History + Query] RETRIEVAL -->|Yes - factual/domain| HYBRID_SEARCH[Hybrid Search\nDense + BM25] HYBRID_SEARCH --> RERANK[Re-rank Top 20\nCross-encoder] RERANK --> TOKEN_CHECK{Chunks Fit\nToken Budget?} TOKEN_CHECK -->|Yes| INJECT_ALL[Inject All Chunks] TOKEN_CHECK -->|No| COMPRESS_CHUNKS[Compress + Deduplicate\nChunks to Budget] INJECT_ALL --> ASSEMBLE_FULL[Assemble Full Context\nSystem + Session + Chunks + History + Query] COMPRESS_CHUNKS --> ASSEMBLE_FULL ASSEMBLE_SIMPLE --> LLM_CALL[Send to LLM] ASSEMBLE_FULL --> LLM_CALL style LLM_CALL fill:#1b4332,color:#fff style ASSEMBLE_FULL fill:#2d6a4f,color:#fff style ASSEMBLE_SIMPLE fill:#2d6a4f,color:#fff

Implementation Guide

Building a Production ContextManager

The following Python class implements a complete context management system. It handles adding messages, compressing history, retrieving relevant documents, and assembling the final context window within a token budget.

import tiktoken
from dataclasses import dataclass, field
from typing import Optional
from openai import OpenAI

# Token estimation using tiktoken (works for GPT-4o, Claude approximation)
enc = tiktoken.get_encoding("cl100k_base")

def count_tokens(text: str) -> int:
    """Estimate token count for a string."""
    return len(enc.encode(text))


@dataclass
class Message:
    """Represents a single turn in conversation history."""
    role: str          # "system", "user", or "assistant"
    content: str
    tokens: int = field(init=False)

    def __post_init__(self):
        self.tokens = count_tokens(self.content)


@dataclass
class ContextConfig:
    """Configuration for context window management."""
    max_tokens: int = 8000          # Hard limit for assembled context
    system_budget: int = 500        # Tokens reserved for system prompt
    session_budget: int = 400       # Tokens reserved for session context (user profile etc.)
    history_budget: int = 2000      # Tokens for conversation history
    retrieval_budget: int = 4000    # Tokens for retrieved documents
    recency_turns: int = 4          # Number of recent turns to always keep verbatim


class ContextManager:
    """
    Manages LLM context window assembly for production systems.

    Handles:
    - Sliding window conversation history with compression
    - Relevance-filtered document injection
    - Token budget enforcement across context layers
    - Global → Session → Turn context hierarchy
    """

    def __init__(
        self,
        system_prompt: str,
        config: Optional[ContextConfig] = None,
        llm_client: Optional[OpenAI] = None,
        session_context: Optional[str] = None,
    ):
        self.system_prompt = system_prompt
        self.config = config or ContextConfig()
        self.client = llm_client  # Used for summarization compression
        self.session_context = session_context or ""

        self.history: list[Message] = []
        self.compressed_summary: str = ""  # Rolling summary of old history
        self.retrieved_docs: list[str] = []

    def add(self, role: str, content: str) -> None:
        """
        Add a new message to conversation history.
        Automatically triggers compression if history budget is exceeded.
        """
        msg = Message(role=role, content=content)
        self.history.append(msg)

        # Check if we've exceeded the history budget
        total_history_tokens = sum(m.tokens for m in self.history)
        if total_history_tokens > self.config.history_budget:
            self._compress_history()

    def _compress_history(self) -> None:
        """
        Compress older history turns into a rolling summary.
        Always preserves the most recent `recency_turns` verbatim.
        The rest gets summarized via LLM call and stored as compressed_summary.
        """
        # Split: keep recent turns verbatim, compress the rest
        recent = self.history[-self.config.recency_turns:]
        to_compress = self.history[:-self.config.recency_turns]

        if not to_compress:
            return

        # Build a text block from older turns for summarization
        history_text = "\n".join(
            f"{m.role.upper()}: {m.content}" for m in to_compress
        )

        if self.compressed_summary:
            # Append to existing summary rather than replacing it
            summary_input = (
                f"Previous summary:\n{self.compressed_summary}\n\n"
                f"New turns to incorporate:\n{history_text}"
            )
        else:
            summary_input = history_text

        if self.client:
            # Use LLM to generate a high-quality summary
            response = self.client.chat.completions.create(
                model="gpt-4o-mini",  # Use a cheap model for compression
                messages=[
                    {
                        "role": "system",
                        "content": (
                            "Summarize this conversation history concisely. "
                            "Preserve: key decisions, important facts stated by the user, "
                            "unresolved questions, and any commitments made. "
                            "Output 2-4 sentences maximum."
                        ),
                    },
                    {"role": "user", "content": summary_input},
                ],
                max_tokens=200,
            )
            self.compressed_summary = response.choices[0].message.content
        else:
            # Fallback: simple truncation (use in testing / no LLM available)
            self.compressed_summary = f"[Earlier conversation compressed. Key context: {history_text[:300]}...]"

        # Replace history with just the recent turns
        self.history = recent

    def retrieve(self, docs: list[str], max_tokens: Optional[int] = None) -> None:
        """
        Inject retrieved documents into the context.
        Enforces token budget — drops lowest-priority docs if over budget.

        Args:
            docs: List of document strings, ordered by relevance (most relevant first).
            max_tokens: Override the configured retrieval budget if provided.
        """
        budget = max_tokens or self.config.retrieval_budget
        self.retrieved_docs = []
        tokens_used = 0

        for doc in docs:
            doc_tokens = count_tokens(doc)
            if tokens_used + doc_tokens <= budget:
                self.retrieved_docs.append(doc)
                tokens_used += doc_tokens
            else:
                # Once we're over budget, skip remaining docs
                # (they're lower relevance anyway since docs are ranked)
                break

    def get_window(self) -> list[dict]:
        """
        Assemble the final context window as a list of messages ready for the LLM API.

        Returns messages in this order:
        1. System prompt (global context)
        2. Session context (user profile, preferences) — injected as system message
        3. Compressed history summary (if any)
        4. Retrieved documents (if any)
        5. Recent verbatim history
        (The caller appends the current user query as the final message.)
        """
        messages = []

        # Layer 1: Global system context
        system_content = self.system_prompt
        if self.session_context:
            # Append session-specific context to system message
            system_content += f"\n\n## User Context\n{self.session_context}"

        messages.append({"role": "system", "content": system_content})

        # Layer 2: Compressed history summary (if exists)
        if self.compressed_summary:
            messages.append({
                "role": "system",
                "content": f"## Earlier Conversation Summary\n{self.compressed_summary}",
            })

        # Layer 3: Retrieved documents
        if self.retrieved_docs:
            docs_block = "\n\n---\n\n".join(self.retrieved_docs)
            messages.append({
                "role": "system",
                "content": f"## Relevant Context\n{docs_block}",
            })

        # Layer 4: Recent verbatim history
        for msg in self.history:
            messages.append({"role": msg.role, "content": msg.content})

        return messages

    def token_usage(self) -> dict:
        """
        Return a breakdown of current token usage across context layers.
        Useful for monitoring and debugging context budget allocation.
        """
        return {
            "system": count_tokens(self.system_prompt + self.session_context),
            "compressed_summary": count_tokens(self.compressed_summary),
            "retrieved_docs": sum(count_tokens(d) for d in self.retrieved_docs),
            "history": sum(m.tokens for m in self.history),
            "total": (
                count_tokens(self.system_prompt + self.session_context)
                + count_tokens(self.compressed_summary)
                + sum(count_tokens(d) for d in self.retrieved_docs)
                + sum(m.tokens for m in self.history)
            ),
        }

This class encapsulates the four core operations of context engineering: add() for managing history with automatic compression, _compress_history() for rolling summarization, retrieve() for budget-aware document injection, and get_window() for assembling the final layered context payload.

The key insight in this implementation is the separation of concerns. History compression is triggered automatically — the caller doesn't need to think about it. Retrieved documents are prioritized by order (most relevant first) and cut at the budget boundary. The final assembly follows a strict hierarchy that puts global context first, session context second, and turn-specific content last.

Engineered RAG Context Assembly vs Naive Concatenation

The second critical pattern is the difference between how naive RAG systems and engineered context systems assemble retrieved content. This example shows both approaches side by side, then demonstrates the quality gap.

import numpy as np
from sentence_transformers import SentenceTransformer, CrossEncoder
from typing import NamedTuple

# Models for embedding and re-ranking
embedder = SentenceTransformer("all-MiniLM-L6-v2")
cross_encoder = CrossEncoder("cross-encoder/ms-marco-MiniLM-L-6-v2")


class Chunk(NamedTuple):
    text: str
    source: str
    date: str        # ISO date string for recency weighting
    score: float     # Embedding similarity score


def naive_rag_context(query: str, chunks: list[Chunk], top_k: int = 5) -> str:
    """
    NAIVE APPROACH: Embed query, take top-K by cosine similarity, concatenate.
    Problems:
    - No re-ranking for actual query relevance
    - No deduplication of similar chunks
    - No token budget enforcement
    - No ordering strategy (important context may land in the "lost in the middle" zone)
    - All chunks treated equally regardless of recency
    """
    query_emb = embedder.encode(query)
    chunk_embs = embedder.encode([c.text for c in chunks])

    # Cosine similarity
    similarities = np.dot(chunk_embs, query_emb) / (
        np.linalg.norm(chunk_embs, axis=1) * np.linalg.norm(query_emb)
    )

    # Take top-K and concatenate — that's it
    top_indices = np.argsort(similarities)[-top_k:][::-1]
    top_chunks = [chunks[i] for i in top_indices]

    # Naive: just dump them all in order of similarity
    return "\n\n".join(c.text for c in top_chunks)


def engineered_rag_context(
    query: str,
    chunks: list[Chunk],
    top_k_retrieval: int = 20,    # Retrieve more, then filter down
    top_k_final: int = 5,
    token_budget: int = 3000,
    recency_boost_days: int = 30,
) -> tuple[str, dict]:
    """
    ENGINEERED APPROACH: Multi-stage retrieval with re-ranking, deduplication,
    recency weighting, and budget-aware ordering.

    Returns the assembled context string plus metadata for monitoring.
    """
    from datetime import datetime, timedelta

    # Stage 1: Broad retrieval — get more candidates than we need
    query_emb = embedder.encode(query)
    chunk_embs = embedder.encode([c.text for c in chunks])
    similarities = np.dot(chunk_embs, query_emb) / (
        np.linalg.norm(chunk_embs, axis=1) * np.linalg.norm(query_emb)
    )

    # Get top_k_retrieval candidates
    top_indices = np.argsort(similarities)[-top_k_retrieval:][::-1]
    candidates = [(chunks[i], float(similarities[i])) for i in top_indices]

    # Stage 2: Cross-encoder re-ranking for actual relevance
    # Cross-encoders are slower but measure true query-document relevance
    pairs = [[query, c.text] for c, _ in candidates]
    rerank_scores = cross_encoder.predict(pairs)

    # Combine embedding similarity (0.3) with cross-encoder score (0.7)
    combined = []
    for (chunk, embed_score), rerank_score in zip(candidates, rerank_scores):
        combined_score = 0.3 * embed_score + 0.7 * (rerank_score / 10.0)  # Normalize
        combined.append((chunk, combined_score))

    # Stage 3: Recency boost — reward recent documents
    cutoff = datetime.now() - timedelta(days=recency_boost_days)
    boosted = []
    for chunk, score in combined:
        try:
            chunk_date = datetime.fromisoformat(chunk.date)
            if chunk_date > cutoff:
                # Apply a 15% boost for recent content
                score = score * 1.15
        except (ValueError, AttributeError):
            pass
        boosted.append((chunk, score))

    # Stage 4: Sort by final score
    boosted.sort(key=lambda x: x[1], reverse=True)

    # Stage 5: Deduplicate similar chunks (cosine sim > 0.92 = near-duplicate)
    selected: list[Chunk] = []
    selected_embs = []
    for chunk, score in boosted:
        chunk_emb = embedder.encode(chunk.text)
        if selected_embs:
            sims = np.dot(selected_embs, chunk_emb) / (
                np.linalg.norm(selected_embs, axis=1) * np.linalg.norm(chunk_emb)
            )
            if np.max(sims) > 0.92:
                # Near-duplicate of an already-selected chunk — skip
                continue
        selected.append(chunk)
        selected_embs.append(chunk_emb)
        if len(selected) >= top_k_final:
            break

    # Stage 6: Token budget enforcement + ordering strategy
    # Most relevant at the END (recency bias in LLM attention — recent = bottom)
    # Background/supporting context at the START
    token_count = 0
    final_chunks: list[Chunk] = []
    for chunk in reversed(selected):  # Less relevant first (will appear earlier)
        chunk_tokens = len(chunk.text.split()) * 1.3  # Rough token estimate
        if token_count + chunk_tokens > token_budget:
            break
        final_chunks.append(chunk)
        token_count += chunk_tokens

    final_chunks.reverse()  # Restore: background first, most relevant last

    # Assemble with source attribution (helps model weight information)
    assembled_parts = []
    for chunk in final_chunks:
        assembled_parts.append(
            f"[Source: {chunk.source} | Date: {chunk.date}]\n{chunk.text}"
        )

    assembled_context = "\n\n---\n\n".join(assembled_parts)

    # Return context + metadata for monitoring
    metadata = {
        "chunks_retrieved": top_k_retrieval,
        "chunks_after_rerank": len(candidates),
        "chunks_after_dedup": len(selected),
        "chunks_final": len(final_chunks),
        "estimated_tokens": int(token_count),
        "sources": [c.source for c in final_chunks],
    }

    return assembled_context, metadata

The difference in output quality between these two functions is significant in practice. The naive approach frequently returns redundant chunks (three slightly different paragraphs from the same document saying the same thing) and misses the actual most-relevant content because embedding similarity and true relevance diverge for complex queries. The engineered approach routes through re-ranking, removes near-duplicates, rewards fresh content, and places the highest-relevance material where LLM attention is strongest.

Production Considerations

Token Budget Management

Every production context engineering system needs a token budget framework. Define hard limits per layer, build monitoring to track actual token consumption per request, and set up alerts when budgets are consistently exceeded or when retrieval is returning too few results within budget.

Practical budget allocation for a general-purpose assistant on a 16K context model:
- System prompt: 400-600 tokens
- Session context (user profile, preferences): 300-500 tokens
- Compressed history summary: 200-400 tokens
- Retrieved documents: 5,000-8,000 tokens (the largest budget)
- Recent verbatim history (last 4-6 turns): 1,500-2,500 tokens
- Current query: 50-500 tokens
- Output buffer: 1,000-2,000 tokens

The output buffer is easy to forget. Your context window is shared between input and output — if you fill 15,900 tokens of a 16K context with input, the model has 100 tokens to respond. Build in headroom.

Context Cache Warming

For latency-sensitive applications, context cache warming is a significant optimization. Many LLM providers (Anthropic's prompt caching, OpenAI's cached tokens) allow you to cache a prefix of the context and pay reduced rates for cache hits. Design your context assembly so that the static portions (system prompt, global knowledge base content that rarely changes) appear early and consistently — they'll get cached across requests. Dynamic, per-query content (retrieved documents, recent history) goes after the cache boundary.

This can reduce per-request latency by 30-60% and cost by 50-80% for cache hits on the static prefix.

Monitoring Context Quality

You can't improve what you don't measure. Build these metrics into your context engineering pipeline:

Retrieval precision — Of the chunks injected into context, what percentage were actually cited or used in the model's response? Low precision indicates over-retrieval (too much irrelevant noise going in).

Context utilization rate — What fraction of your token budget is being used? Consistently at 95%+ suggests compression is insufficient. Consistently at 30-40% suggests over-conservative retrieval that's leaving relevant information on the table.

Answer grounding rate — For RAG systems, what percentage of factual claims in the response can be traced back to a specific injected chunk? Low grounding rates indicate hallucination despite good retrieval — often caused by poor ordering or context flooding.

Compression ratio — How much does your history compression reduce tokens while preserving the information the model needs to answer subsequent questions? Evaluate by testing how often the model answers questions that require information from compressed history correctly.

Context freshness lag — For systems with dynamic data, how old is the newest piece of context on average? A high lag indicates your retrieval system isn't surfacing recent enough data.

graph LR subgraph "Naive Context" N1["Query: 100 tokens"] --> NW["Context Window"] N2["Retrieved Docs: 4,000 tokens\n(20% relevant, 80% noise)"] --> NW N3["Full History: 3,000 tokens\n(15 turns, no compression)"] --> NW NW --> NR["Result:\n7,100 tokens used\nHigh noise ratio\nOld history dilutes attention"] end subgraph "Engineered Context" E1["Query: 100 tokens"] --> EW["Context Window"] E2["System + Session: 800 tokens\n(global + user context)"] --> EW E3["Compressed Summary: 300 tokens\n(15 turns → summary)"] --> EW E4["Retrieved Docs: 2,800 tokens\n(re-ranked, deduplicated, filtered)"] --> EW E5["Recent History: 800 tokens\n(last 4 turns verbatim)"] --> EW EW --> ER["Result:\n4,800 tokens used\nLow noise ratio\nRecent history preserved\n32% fewer tokens, better answers"] end style NR fill:#9b2335,color:#fff style ER fill:#2d6a4f,color:#fff

The Context Refresh Problem

Static context goes stale. A user profile injected at the start of a long session may be outdated by turn 30 if the user has updated their preferences mid-session. Product documentation injected at session start may reference prices or features that have changed. Build explicit context refresh triggers: after N turns, re-fetch session context; before answering questions about pricing or availability, always retrieve fresh data rather than relying on session-start injection.

The architectural principle is: treat context like a cache with TTLs. Every piece of injected context has an implicit freshness guarantee. When that guarantee expires, refresh it.

Conclusion

The shift from prompt engineering to context engineering reflects a maturation in how the industry builds AI systems. Prompt engineering was the right first skill — you had to learn to communicate with these models at all, and that took work. But it's a necessary precondition, not a sufficient one.

Context engineering is where the real leverage lives in 2026. The models are capable. GPT-4o, Claude 3.5 Sonnet, Gemini 2.0 — these are genuinely powerful reasoning systems. The bottleneck in almost every production failure isn't the model's intelligence; it's the quality of the information it's reasoning over.

If you're building AI systems today, audit your context before you audit your prompts. Ask: is the model seeing everything it needs? Is it being flooded with irrelevant noise? Is critical information being pushed out by conversation history overflow? Is the retrieved content actually fresh and relevant, or is it a semantic similarity score that doesn't translate to real-world usefulness?

The answers to those questions will tell you where your system is failing — and the techniques in this post give you the tools to fix it. Sliding window compression, hierarchical context layers, multi-stage retrieval with re-ranking, token budget management, and context quality monitoring are no longer advanced topics. They are table stakes for any AI application that needs to work reliably in production.

Start with the ContextManager class. Instrument your retrieval pipeline with the metadata logging from the engineered_rag_context function. Add the five monitoring metrics to your dashboards. You'll have a clearer picture of your system's context health within a week, and actionable improvements to make within two.

The model is not the problem. What you feed it is.


Tools mentioned in this post

Disclosure: the links below are affiliate links. If you sign up via them, we earn a small commission at no extra cost to you. This helps fund the writing of more posts like this one.

  • Anthropic Claude API — production LLM access. Sign up
  • OpenAI Platform — GPT-4 and embedding APIs. Sign up
  • Hugging Face — Pro / Enterprise tier. Sign up

Sources

About the Author

Toc Am

Founder of AmtocSoft. Writing practical deep-dives on AI engineering, cloud architecture, and developer tooling. Previously built backend systems at scale. Reviews every post published under this byline.

LinkedIn X / Twitter

Published: 2026-04-21 · Written with AI assistance, reviewed by Toc Am.

Get These In Your Inbox

Weekly deep-dives on AI engineering, no fluff. Join the newsletter →

Subscribe (free)

Or grab the book ($39, ~100 pages) · Buy me a coffee

Buy Me a Coffee · 🔔 YouTube · 💼 LinkedIn · 🐦 X/Twitter

Monday, April 6, 2026

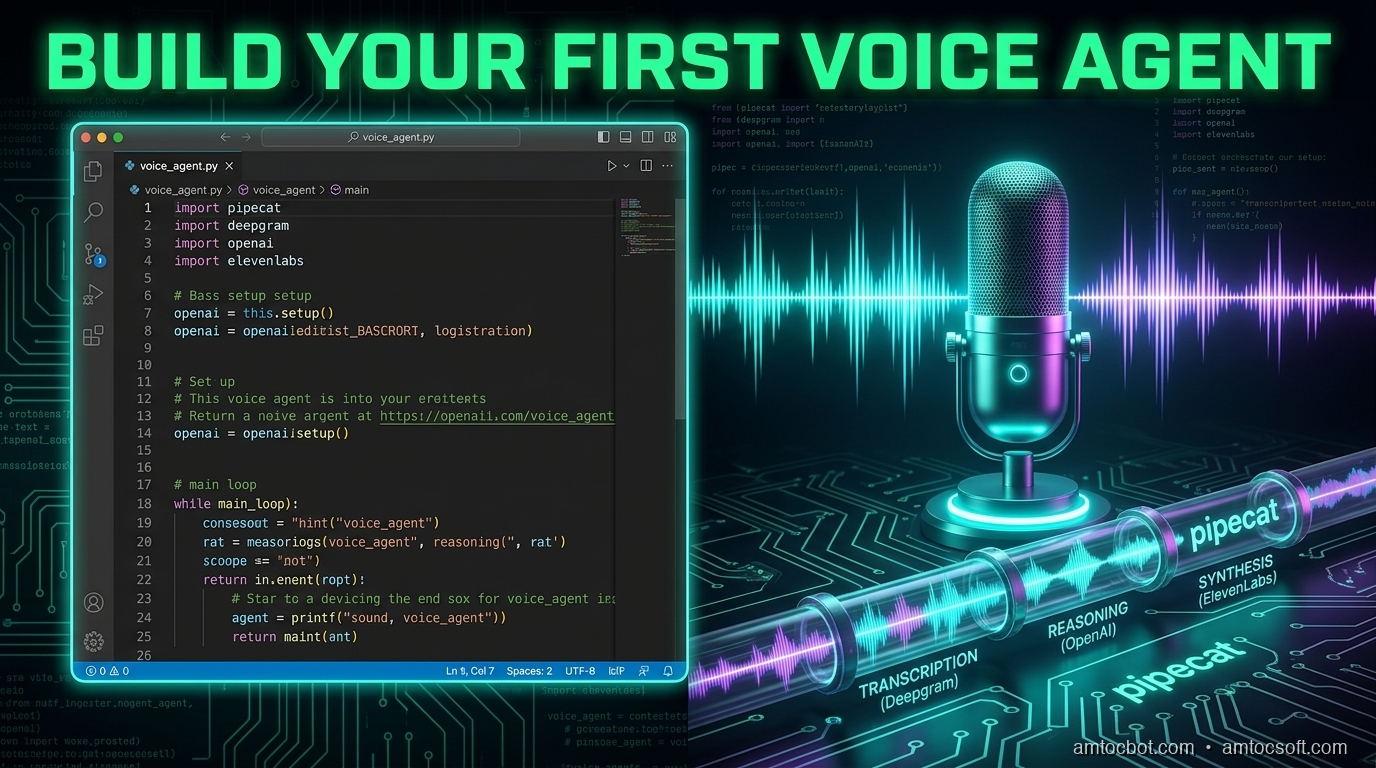
Build Your First Voice Agent: Python Tutorial with Pipecat

Level: Intermediate
Topic: Voice AI, TTS, STT

Hero Image: Python code flowing into a voice assistant speaking to a user

In the previous posts, we explored TTS engines and STT models individually. Now it's time to wire them together into something that actually talks back. In this tutorial, you'll build a voice agent from scratch using Python and Pipecat -- an open-source framework for building real-time voice and multimodal AI pipelines.

By the end, you'll have a working voice agent that listens to your microphone, processes your speech through an LLM, and speaks the response back to you -- all in real time. We'll start with the simplest possible agent (under 80 lines), then progressively add function calling, conversation memory, error handling, and phone connectivity.

Pipecat has grown into a mature framework with 60+ provider integrations, client SDKs for JavaScript, React, iOS, Android, and C++, and a managed cloud hosting option. It's the most popular open-source choice for voice agent development in 2026.


What Is Pipecat?

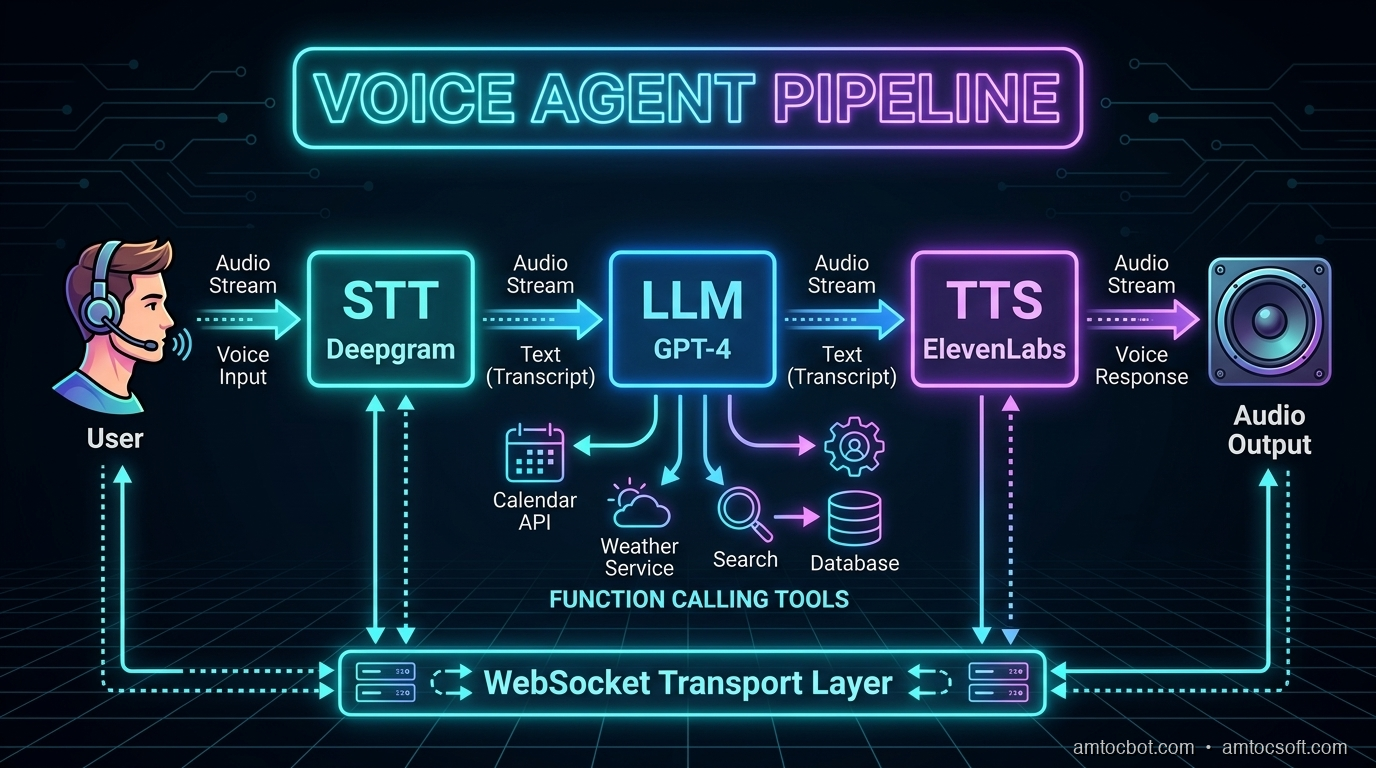
Pipecat is an open-source Python framework created by Daily.co for building real-time voice and multimodal AI applications. It provides a pipeline-based architecture where you chain together processors -- STT, LLM, TTS, transport -- and data flows through them automatically.

Why Pipecat Over Building From Scratch?

  • Pipeline abstraction: Chain STT, LLM, and TTS together declaratively -- no manual threading or async coordination
  • Turn-taking: Built-in support for interruptions, barge-in, and conversational flow
  • Transport layer: Handles WebRTC, WebSocket, and local audio I/O
  • Provider-agnostic: Swap STT/LLM/TTS providers without rewriting your pipeline (60+ integrations including Deepgram, OpenAI, Anthropic, ElevenLabs, Cartesia, Kokoro, and more)
  • Real-time optimized: Frame-based processing designed for sub-second latency
  • Client SDKs: JavaScript, React, React Native, iOS, Android, C++ for building front-ends
graph LR subgraph Pipecat Pipeline A[Transport Input
Microphone/WebRTC] --> B[STT
Deepgram Nova-3] B --> C[Context Aggregator
User Message] C --> D[LLM
GPT-4o / Claude] D --> E[TTS
OpenAI / ElevenLabs] E --> F[Transport Output
Speaker/WebRTC] F --> G[Context Aggregator
Assistant Message] end style A fill:#4CAF50,color:#fff style D fill:#FF9800,color:#fff style F fill:#2196F3,color:#fff

Prerequisites

Before we start, make sure you have:

  • Python 3.10 or higher
  • A microphone and speakers (or headphones -- recommended to avoid echo)
  • API keys for:
  • OpenAI (for the LLM and TTS) -- platform.openai.com
  • Deepgram (for STT) -- free tier gives you $200 in credits at console.deepgram.com
  • Basic Python async/await knowledge

Step 1: Set Up the Project

Create a new project directory and install dependencies:

mkdir voice-agent && cd voice-agent
python -m venv venv
source venv/bin/activate  # On Windows: venv\Scripts\activate

# Install Pipecat with the providers we need
pip install "pipecat-ai[daily,openai,deepgram,silero]"

# Install PyAudio for local microphone access
pip install pyaudio

# If PyAudio fails on macOS:
# brew install portaudio
# pip install pyaudio

Create a .env file for your API keys:

OPENAI_API_KEY=your-openai-key
DEEPGRAM_API_KEY=your-deepgram-key

Project structure:

voice-agent/
  .env
  agent.py           # Basic agent (Step 3)
  agent_tools.py     # Agent with function calling (Step 5)
  agent_full.py      # Production-ready agent (Step 8)
  venv/

Step 2: Understand the Pipeline Architecture

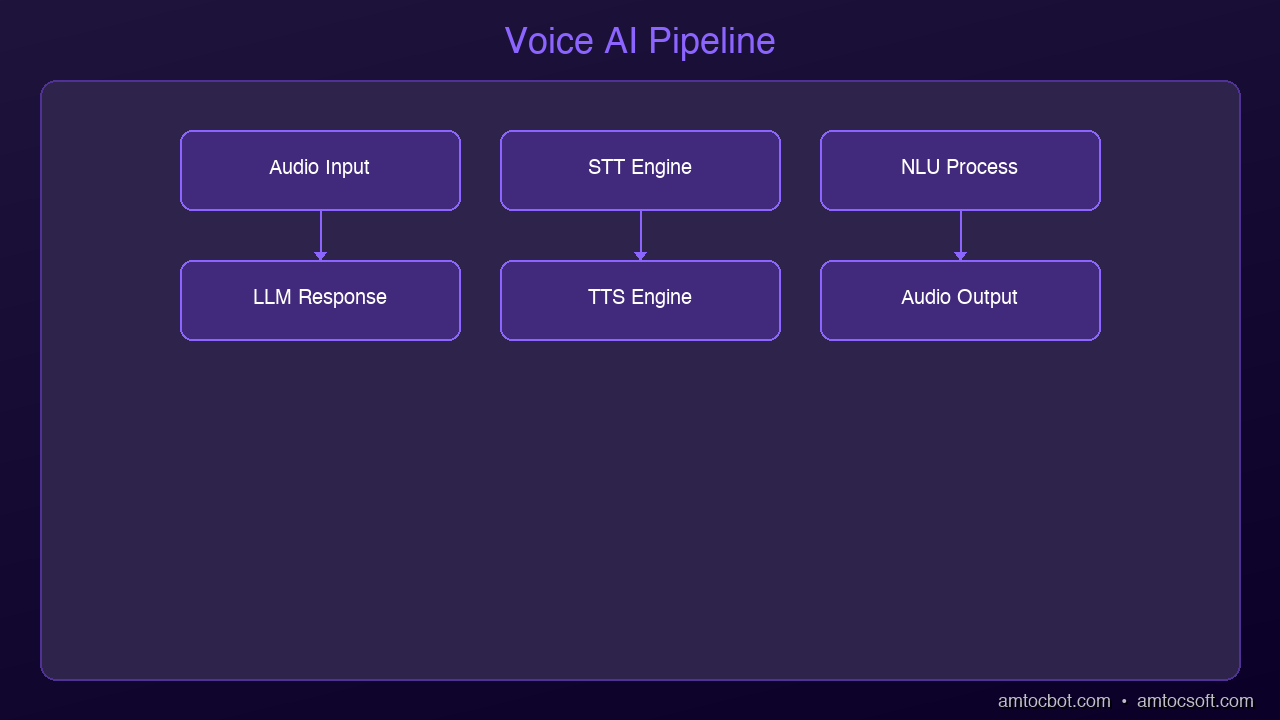
A voice agent pipeline has four stages that process data in sequence:

Microphone Audio
      |
      v
[1. STT] -- Deepgram Nova-3 converts speech to text
      |
      v
[2. LLM] -- GPT-4o processes text and generates response
      |
      v
[3. TTS] -- OpenAI TTS converts response to speech audio
      |
      v
Speaker Output

In Pipecat, each stage is a processor that receives frames (units of data) and outputs new frames. Audio frames flow in, text frames flow between processors, and audio frames flow out.

The key insight: everything streams. The STT starts outputting text before you finish speaking. The LLM starts generating tokens before the full input arrives. The TTS starts producing audio from the first sentence while the LLM is still generating the rest. This streaming overlap is what makes sub-second response times possible.

Architecture Diagram: Data flow through Pipecat pipeline stages

Latency Budget

Here's where time is spent in a well-optimized pipeline:

Stage Latency Optimization
VAD (end-of-speech detection) 50-100ms Silero VAD with tuned thresholds
STT finalization 100-300ms Deepgram streaming with endpointing
LLM time-to-first-token 150-400ms GPT-4o-mini for speed, GPT-4o for quality
TTS time-to-first-byte 100-300ms OpenAI tts-1 or ElevenLabs Flash
Network + buffering 50-150ms Connection pooling, edge deployment
Total 450-1250ms Target: <800ms P95

Step 3: Build a Minimal Voice Agent

Here's the simplest possible voice agent with Pipecat. Create a file called agent.py:

import asyncio
import os
from dotenv import load_dotenv

from pipecat.frames.frames import EndFrame, LLMMessagesFrame
from pipecat.pipeline.pipeline import Pipeline
from pipecat.pipeline.runner import PipelineRunner
from pipecat.pipeline.task import PipelineParams, PipelineTask
from pipecat.processors.aggregators.openai_llm_context import OpenAILLMContext
from pipecat.services.deepgram import DeepgramSTTService
from pipecat.services.openai import OpenAILLMService, OpenAITTSService
from pipecat.transports.local.audio import LocalAudioTransport
from pipecat.vad.silero import SileroVADAnalyzer

load_dotenv()

async def main():
    # --- Transport: handles microphone input and speaker output ---
    transport = LocalAudioTransport(
        mic_enabled=True,
        speaker_enabled=True,
        vad_analyzer=SileroVADAnalyzer()  # Detects when you're speaking
    )

    # --- STT: Deepgram Nova-3 for real-time transcription ---
    stt = DeepgramSTTService(
        api_key=os.getenv("DEEPGRAM_API_KEY"),
        model="nova-3",
        language="en"
    )

    # --- LLM: OpenAI GPT-4o for conversation ---
    llm = OpenAILLMService(
        api_key=os.getenv("OPENAI_API_KEY"),
        model="gpt-4o"
    )

    # --- TTS: OpenAI TTS for speech output ---
    tts = OpenAITTSService(
        api_key=os.getenv("OPENAI_API_KEY"),
        voice="nova",
        model="tts-1"
    )

    # --- Conversation context ---
    messages = [
        {
            "role": "system",
            "content": (
                "You are a helpful voice assistant. Keep your responses "
                "concise -- aim for 1-2 sentences. You're having a real-time "
                "voice conversation, so be natural and conversational. "
                "Don't use markdown, lists, or formatting in your responses."
            ),
        }
    ]

    context = OpenAILLMContext(messages)
    context_aggregator = llm.create_context_aggregator(context)

    # --- Build the pipeline ---
    pipeline = Pipeline([
        transport.input(),       # Microphone audio in
        stt,                     # Speech to text
        context_aggregator.user(),  # Add user message to context
        llm,                     # Generate response
        tts,                     # Text to speech
        transport.output(),      # Speaker audio out
        context_aggregator.assistant()  # Add assistant message to context
    ])

    task = PipelineTask(
        pipeline,
        PipelineParams(
            allow_interruptions=True,  # Let user interrupt the AI
            enable_metrics=True        # Track latency metrics
        )
    )

    # --- Run ---
    runner = PipelineRunner()

    # Send initial greeting
    await task.queue_frames([
        LLMMessagesFrame(messages),
    ])

    print("Voice agent is running! Speak into your microphone.")
    print("Press Ctrl+C to stop.")

    await runner.run(task)

if __name__ == "__main__":
    asyncio.run(main())

Run it:

python agent.py

Speak into your microphone, and the agent will respond through your speakers. That's a working voice agent in under 80 lines of code.


Step 4: Add Turn-Taking and Interruptions

The basic agent already supports interruptions thanks to allow_interruptions=True. But let's understand how turn-taking works and how to customize it for your use case.

How Pipecat Handles Turns

graph TD A[User starts speaking] --> B[VAD detects speech] B --> C[Audio streams to STT] C --> D[STT produces interim transcripts] D --> E{User stops speaking?} E -->|No - still talking| C E -->|Yes - silence detected| F[STT produces final transcript] F --> G[Transcript sent to LLM] G --> H[LLM generates response tokens] H --> I[Tokens stream to TTS] I --> J[TTS produces audio chunks] J --> K[Audio plays through speaker] K --> L{User interrupts?} L -->|Yes| M[Stop TTS playback immediately] M --> A L -->|No| N[Response completes] N --> O[Wait for next user utterance] O --> A style A fill:#4CAF50,color:#fff style M fill:#f44336,color:#fff style N fill:#2196F3,color:#fff

Customizing VAD Sensitivity

The Voice Activity Detection (VAD) parameters control when the agent thinks you've started and stopped speaking:

from pipecat.vad.silero import SileroVADAnalyzer, VADParams

# Configure VAD sensitivity
vad_analyzer = SileroVADAnalyzer(
    params=VADParams(
        threshold=0.5,              # Speech detection sensitivity (0-1)
                                     # Lower = more sensitive, higher = less false positives
        min_speech_duration_ms=250,  # Minimum speech to trigger (ignore brief sounds)
        max_speech_duration_s=30,    # Maximum single utterance before forced turn end
        min_silence_duration_ms=500, # Silence before end-of-turn
                                     # THIS IS THE MOST IMPORTANT PARAMETER
        speech_pad_ms=100            # Padding around detected speech
    )
)

transport = LocalAudioTransport(
    mic_enabled=True,
    speaker_enabled=True,
    vad_analyzer=vad_analyzer
)

Tuning min_silence_duration_ms

This parameter determines how long the agent waits after you stop talking before it responds:

Value Behavior Best For
200-300ms Very responsive, but interrupts natural pauses Quick Q&A, command-driven agents
400-600ms Good balance for most conversations General-purpose voice agents
700-1000ms Very patient, lets user collect thoughts Therapy bots, elderly users, complex topics
1000-2000ms Extremely patient Dictation, users with speech difficulties

Start with 500ms and adjust based on user feedback.


Step 5: Add Function Calling

A voice agent becomes truly useful when it can take actions. Let's add function calling so our agent can check the weather, set reminders, or look up information.

import json
from datetime import datetime, timedelta

# Define tools the agent can use
tools = [
    {
        "type": "function",
        "function": {
            "name": "get_weather",
            "description": "Get the current weather for a location",
            "parameters": {
                "type": "object",
                "properties": {
                    "location": {
                        "type": "string",
                        "description": "City name, e.g. 'San Francisco'"
                    }
                },
                "required": ["location"]
            }
        }
    },
    {
        "type": "function",
        "function": {
            "name": "set_reminder",
            "description": "Set a reminder for the user",
            "parameters": {
                "type": "object",
                "properties": {
                    "message": {
                        "type": "string",
                        "description": "The reminder message"
                    },
                    "minutes": {
                        "type": "integer",
                        "description": "Minutes from now"
                    }
                },
                "required": ["message", "minutes"]
            }
        }
    },
    {
        "type": "function",
        "function": {
            "name": "search_knowledge_base",
            "description": "Search internal documentation or knowledge base",
            "parameters": {
                "type": "object",
                "properties": {
                    "query": {
                        "type": "string",
                        "description": "The search query"
                    }
                },
                "required": ["query"]
            }
        }
    }
]

# Handler for function calls
async def handle_function_call(function_name, tool_call_id, args, llm, context, result_callback):
    if function_name == "get_weather":
        location = args["location"]
        # In production, call a real weather API (OpenWeatherMap, etc.)
        result = json.dumps({
            "location": location,
            "temperature": 72,
            "condition": "sunny",
            "humidity": 45
        })
        await result_callback(result)

    elif function_name == "set_reminder":
        message = args["message"]
        minutes = args["minutes"]
        reminder_time = datetime.now() + timedelta(minutes=minutes)
        # In production, schedule via APScheduler, Celery, or system cron
        result = json.dumps({
            "status": "set",
            "message": message,
            "trigger_at": reminder_time.isoformat()
        })
        await result_callback(result)

    elif function_name == "search_knowledge_base":
        query = args["query"]
        # In production, call your RAG pipeline (Pinecone, Weaviate, etc.)
        result = json.dumps({
            "results": [
                {"title": "Getting Started Guide", "relevance": 0.95},
                {"title": "API Reference", "relevance": 0.87}
            ],
            "query": query
        })
        await result_callback(result)

# Register handlers with the LLM
llm = OpenAILLMService(
    api_key=os.getenv("OPENAI_API_KEY"),
    model="gpt-4o"
)
llm.register_function("get_weather", handle_function_call)
llm.register_function("set_reminder", handle_function_call)
llm.register_function("search_knowledge_base", handle_function_call)

# Update context to include tools
messages = [
    {
        "role": "system",
        "content": (
            "You are a helpful voice assistant with access to tools. "
            "You can check the weather, set reminders, and search a knowledge base. "
            "Keep responses concise and conversational. Never use markdown."
        ),
    }
]

context = OpenAILLMContext(messages, tools)

Now you can say "What's the weather in Tokyo?" and the agent will call the function and speak the result naturally.


Step 6: Add Conversation Memory

Pipecat's context aggregator automatically tracks conversation history. Every user message and assistant response is added to the context window. But for longer conversations, you need a strategy to manage context size.

from pipecat.processors.frame_processor import FrameProcessor
from pipecat.frames.frames import Frame, LLMMessagesFrame

class ConversationMemoryManager(FrameProcessor):
    """Manages conversation context to prevent token overflow.

    Strategy: Keep system message + summary of old messages + last N messages.
    This preserves important context while staying within token limits.
    """

    def __init__(self, max_messages: int = 20, summary_threshold: int = 15):
        super().__init__()
        self.max_messages = max_messages
        self.summary_threshold = summary_threshold
        self.conversation_summary = ""

    async def process_frame(self, frame: Frame, direction):
        if isinstance(frame, LLMMessagesFrame):
            messages = frame.messages

            if len(messages) > self.max_messages:
                system_msg = messages[0]  # Always keep system message

                # Summarize older messages (in production, use the LLM for this)
                old_messages = messages[1:-(self.summary_threshold)]
                topics = set()
                for msg in old_messages:
                    content = msg.get("content", "")
                    if len(content) > 20:
                        topics.add(content[:50])

                self.conversation_summary = (
                    f"Earlier in this conversation, the following topics "
                    f"were discussed: {', '.join(list(topics)[:5])}. "
                    f"Continue naturally from the recent context."
                )

                summary_msg = {
                    "role": "system",
                    "content": self.conversation_summary
                }

                recent = messages[-(self.summary_threshold):]
                frame.messages = [system_msg, summary_msg] + recent

        await self.push_frame(frame, direction)

Token Budget Planning

LLM Context Window Recommended Conversation Limit
GPT-4o 128K tokens ~50-100 exchanges before summarizing
GPT-4o-mini 128K tokens ~50-100 exchanges (cheaper per token)
Claude Sonnet 200K tokens ~100-200 exchanges before summarizing

For most voice agents, conversations last 5-15 exchanges. Context overflow is mainly a concern for long customer service calls or ongoing assistant sessions.


Step 7: Add Error Handling and Resilience

Real voice agents need to handle failures gracefully. Users can't see error logs -- they only hear silence or confusion. Every failure mode needs a spoken recovery.

from pipecat.processors.frame_processor import FrameProcessor
from pipecat.frames.frames import Frame, TextFrame, ErrorFrame
import logging

logger = logging.getLogger(__name__)

class VoiceErrorHandler(FrameProcessor):
    """Catches errors in the pipeline and converts them to spoken feedback.

    Without this, errors cause dead silence -- the worst possible UX.
    """

    def __init__(self):
        super().__init__()
        self.consecutive_errors = 0
        self.max_retries = 3

    async def process_frame(self, frame: Frame, direction):
        if isinstance(frame, ErrorFrame):
            self.consecutive_errors += 1
            logger.error(f"Pipeline error ({self.consecutive_errors}): {frame.error}")

            if self.consecutive_errors >= self.max_retries:
                # Too many errors -- graceful shutdown
                error_response = TextFrame(
                    "I'm experiencing technical difficulties and need to restart. "
                    "Please try again in a moment."
                )
                await self.push_frame(error_response, direction)
                # In production: alert on-call, restart pipeline
            else:
                # Recoverable error -- ask user to repeat
                error_response = TextFrame(
                    "I'm sorry, I ran into a brief issue. "
                    "Could you please repeat that?"
                )
                await self.push_frame(error_response, direction)
        else:
            # Reset error counter on successful frames
            self.consecutive_errors = 0
            await self.push_frame(frame, direction)


class LatencyMonitor(FrameProcessor):
    """Tracks and logs latency between pipeline stages.

    Critical for production monitoring -- alerts when TTFB exceeds targets.
    """

    def __init__(self, stage_name: str, warn_threshold_ms: float = 500):
        super().__init__()
        self.stage_name = stage_name
        self.warn_threshold_ms = warn_threshold_ms
        self.frame_count = 0
        self.total_latency = 0

    async def process_frame(self, frame: Frame, direction):
        import time
        start = time.monotonic()
        await self.push_frame(frame, direction)
        elapsed_ms = (time.monotonic() - start) * 1000

        self.frame_count += 1
        self.total_latency += elapsed_ms

        if elapsed_ms > self.warn_threshold_ms:
            logger.warning(
                f"[{self.stage_name}] High latency: {elapsed_ms:.0f}ms "
                f"(threshold: {self.warn_threshold_ms}ms)"
            )

    @property
    def avg_latency_ms(self) -> float:
        return self.total_latency / max(self.frame_count, 1)


# Add to pipeline
pipeline = Pipeline([
    transport.input(),
    stt,
    LatencyMonitor("stt", warn_threshold_ms=300),
    context_aggregator.user(),
    llm,
    LatencyMonitor("llm", warn_threshold_ms=500),
    VoiceErrorHandler(),         # Catch errors before TTS
    tts,
    LatencyMonitor("tts", warn_threshold_ms=300),
    transport.output(),
    context_aggregator.assistant()
])

Step 8: Connect to WebRTC (Phone & Web)

To make your voice agent accessible beyond your local machine -- via a web browser or phone -- replace the local audio transport with Daily's WebRTC transport.

from pipecat.transports.services.daily import DailyTransport, DailyParams

# Replace LocalAudioTransport with DailyTransport
transport = DailyTransport(
    room_url="https://your-domain.daily.co/your-room",
    token="your-daily-token",
    bot_name="AmtocBot",
    params=DailyParams(
        audio_in_enabled=True,
        audio_out_enabled=True,
        vad_enabled=True,
        vad_analyzer=SileroVADAnalyzer(
            params=VADParams(
                threshold=0.5,
                min_silence_duration_ms=500
            )
        )
    )
)

Web Browser Integration

Daily provides a JavaScript SDK for embedding voice agents in web pages:

// Frontend: Connect to the voice agent via WebRTC
import DailyIframe from '@daily-co/daily-js';

const callFrame = DailyIframe.createFrame();
await callFrame.join({
    url: 'https://your-domain.daily.co/your-room',
    token: 'your-participant-token'
});

// Audio is automatically routed to/from the voice agent

Phone Connectivity

Connect a Twilio phone number to a Daily room for telephone access:

# Twilio webhook handler (Flask example)
from flask import Flask, request
from twilio.twiml.voice_response import VoiceResponse, Connect

app = Flask(__name__)

@app.route("/incoming-call", methods=["POST"])
def handle_incoming_call():
    response = VoiceResponse()
    connect = Connect()
    # Route the phone call to the Daily room where your agent lives
    connect.stream(
        url="wss://your-domain.daily.co/your-room/stream",
        name="phone-caller"
    )
    response.append(connect)
    return str(response)

Step 9: Swap Providers Without Rewriting

One of Pipecat's biggest strengths is provider swappability. Here's how to switch between different STT, LLM, and TTS providers with minimal code changes:

# --- STT Options ---
# Deepgram (best for real-time streaming)
from pipecat.services.deepgram import DeepgramSTTService
stt = DeepgramSTTService(api_key=os.getenv("DEEPGRAM_API_KEY"), model="nova-3")

# Google (best for enterprise/multilingual)
from pipecat.services.google import GoogleSTTService
stt = GoogleSTTService(credentials=os.getenv("GOOGLE_CREDENTIALS"))

# AssemblyAI (best streaming accuracy)
from pipecat.services.assemblyai import AssemblyAISTTService
stt = AssemblyAISTTService(api_key=os.getenv("ASSEMBLYAI_API_KEY"))

# --- LLM Options ---
# OpenAI GPT-4o
from pipecat.services.openai import OpenAILLMService
llm = OpenAILLMService(api_key=os.getenv("OPENAI_API_KEY"), model="gpt-4o")

# Anthropic Claude
from pipecat.services.anthropic import AnthropicLLMService
llm = AnthropicLLMService(api_key=os.getenv("ANTHROPIC_API_KEY"), model="claude-sonnet-4-20250514")

# Groq (ultra-fast inference)
from pipecat.services.groq import GroqLLMService
llm = GroqLLMService(api_key=os.getenv("GROQ_API_KEY"), model="llama-3.3-70b")

# --- TTS Options ---
# OpenAI TTS (simple, reliable)
from pipecat.services.openai import OpenAITTSService
tts = OpenAITTSService(api_key=os.getenv("OPENAI_API_KEY"), voice="nova")

# ElevenLabs (highest quality)
from pipecat.services.elevenlabs import ElevenLabsTTSService
tts = ElevenLabsTTSService(api_key=os.getenv("ELEVENLABS_API_KEY"), voice_id="...")

# Cartesia (lowest latency -- 40ms)
from pipecat.services.cartesia import CartesiaTTSService
tts = CartesiaTTSService(api_key=os.getenv("CARTESIA_API_KEY"), voice_id="...")

# Kokoro (self-hosted, free)
from pipecat.services.kokoro import KokoroTTSService
tts = KokoroTTSService(voice="af_heart")

The pipeline code stays exactly the same -- only the service initialization changes.


The Complete Production-Ready Agent

Here's the full agent combining everything we've built:

import asyncio
import os
import json
import logging
from datetime import datetime, timedelta
from dotenv import load_dotenv

from pipecat.frames.frames import LLMMessagesFrame
from pipecat.pipeline.pipeline import Pipeline
from pipecat.pipeline.runner import PipelineRunner
from pipecat.pipeline.task import PipelineParams, PipelineTask
from pipecat.processors.aggregators.openai_llm_context import OpenAILLMContext
from pipecat.services.deepgram import DeepgramSTTService
from pipecat.services.openai import OpenAILLMService, OpenAITTSService
from pipecat.transports.local.audio import LocalAudioTransport
from pipecat.vad.silero import SileroVADAnalyzer, VADParams

load_dotenv()
logging.basicConfig(level=logging.INFO)

# --- Tools ---
tools = [
    {
        "type": "function",
        "function": {
            "name": "get_weather",
            "description": "Get the current weather for a location",
            "parameters": {
                "type": "object",
                "properties": {
                    "location": {"type": "string", "description": "City name"}
                },
                "required": ["location"]
            }
        }
    },
    {
        "type": "function",
        "function": {
            "name": "set_reminder",
            "description": "Set a reminder for the user",
            "parameters": {
                "type": "object",
                "properties": {
                    "message": {"type": "string"},
                    "minutes": {"type": "integer"}
                },
                "required": ["message", "minutes"]
            }
        }
    }
]

async def handle_function_call(function_name, tool_call_id, args, llm, context, result_callback):
    if function_name == "get_weather":
        result = json.dumps({
            "temperature": 72, "condition": "sunny",
            "location": args["location"]
        })
        await result_callback(result)
    elif function_name == "set_reminder":
        trigger = datetime.now() + timedelta(minutes=args["minutes"])
        result = json.dumps({
            "status": "set", "message": args["message"],
            "trigger_at": trigger.strftime("%I:%M %p")
        })
        await result_callback(result)

async def main():
    # Transport with tuned VAD
    transport = LocalAudioTransport(
        mic_enabled=True,
        speaker_enabled=True,
        vad_analyzer=SileroVADAnalyzer(
            params=VADParams(
                threshold=0.5,
                min_silence_duration_ms=500,
                min_speech_duration_ms=250
            )
        )
    )

    # Services
    stt = DeepgramSTTService(
        api_key=os.getenv("DEEPGRAM_API_KEY"),
        model="nova-3",
        language="en"
    )

    llm = OpenAILLMService(
        api_key=os.getenv("OPENAI_API_KEY"),
        model="gpt-4o"
    )
    llm.register_function("get_weather", handle_function_call)
    llm.register_function("set_reminder", handle_function_call)

    tts = OpenAITTSService(
        api_key=os.getenv("OPENAI_API_KEY"),
        voice="nova",
        model="tts-1"
    )

    # Context
    messages = [
        {
            "role": "system",
            "content": (
                "You are a friendly voice assistant called Amtoc. "
                "Keep responses to 1-3 sentences. Be conversational "
                "and natural. You can check the weather and set reminders. "
                "Never use markdown, lists, or formatting. "
                "If you're not sure about something, say so honestly."
            ),
        }
    ]
    context = OpenAILLMContext(messages, tools)
    context_aggregator = llm.create_context_aggregator(context)

    # Pipeline
    pipeline = Pipeline([
        transport.input(),
        stt,
        context_aggregator.user(),
        llm,
        tts,
        transport.output(),
        context_aggregator.assistant()
    ])

    task = PipelineTask(
        pipeline,
        PipelineParams(
            allow_interruptions=True,
            enable_metrics=True
        )
    )

    runner = PipelineRunner()
    await task.queue_frames([LLMMessagesFrame(messages)])

    print("=" * 50)
    print("  Amtoc Voice Agent is Running!")
    print("  Speak into your microphone.")
    print("  Press Ctrl+C to stop.")
    print("=" * 50)

    await runner.run(task)

if __name__ == "__main__":
    asyncio.run(main())

Troubleshooting Common Issues

"No audio input detected"

  • Check microphone permissions in your OS settings
  • Verify PyAudio can see your microphone: python -c "import pyaudio; p = pyaudio.PyAudio(); print(p.get_device_count())"
  • On macOS: grant Terminal/IDE microphone permission in System Settings > Privacy
  • Try specifying a device index in the transport configuration

High latency (>1 second response time)

  • Switch from tts-1-hd to tts-1 (quality vs speed trade-off)
  • Use gpt-4o-mini instead of gpt-4o for the LLM (2-3x faster)
  • Reduce min_silence_duration_ms to detect end-of-turn faster (try 300ms)
  • Check network: API calls need low latency (<50ms round trip)
  • Use Cartesia TTS (40ms TTFA) instead of OpenAI (200-400ms)

Agent interrupts you mid-sentence

  • Increase min_silence_duration_ms (try 700-800ms)
  • Increase min_speech_duration_ms to avoid triggering on brief sounds (try 300ms)
  • Adjust VAD threshold higher (0.6-0.7) to require stronger speech signal

Echo or feedback loop

  • Use headphones -- this is the #1 fix
  • Enable acoustic echo cancellation in your OS audio settings
  • In production, use WebRTC transport (Daily) which has built-in echo cancellation

API rate limits

  • Implement exponential backoff for retries
  • Use connection pooling (Pipecat does this automatically)
  • For high-volume: negotiate enterprise API rates or self-host STT/TTS

Cost of Running This Agent

For a typical deployment handling 1,000 minutes of conversation per month:

Component Provider Cost/Month
STT Deepgram Nova-3 (streaming) $7.70
LLM GPT-4o $10-30 (varies by conversation length)
TTS OpenAI tts-1 ~$15
Total ~$33-53/month

For budget optimization, swap GPT-4o for GPT-4o-mini ($3-10/month) and you're under $30/month for 1,000 minutes.


Next Steps

You now have a working voice agent. From here, you can:

  1. Add more tools: Connect to calendars, databases, CRMs -- anything your agent needs
  2. Swap providers: Try ElevenLabs TTS for higher quality, or self-hosted Kokoro for zero API costs
  3. Deploy to the cloud: Use Daily rooms and Twilio for phone access, or Pipecat Cloud for managed hosting
  4. Add a personality: Tune the system prompt for your specific use case
  5. Build a web interface: Use the React or JavaScript SDK to embed the agent in a web page
  6. Add analytics: Track conversation metrics, user satisfaction, and task completion rates

In the next post, we'll go deeper into voice agent architectures -- comparing the pipeline approach we just built to end-to-end models like GPT-4o Voice and managed platforms like Retell and VAPI.

Sources & References:
1. Pipecat — "Voice Agent Framework" — https://github.com/pipecat-ai/pipecat
2. OpenAI — "Whisper API" — https://platform.openai.com/docs/guides/speech-to-text
3. Deepgram — "Streaming Speech-to-Text" — https://developers.deepgram.com/


This is part 4 of the AmtocSoft Voice AI series. Full source code is available in the examples above -- copy, paste, and start experimenting.


Tools mentioned in this post

Disclosure: the links below are affiliate links. If you sign up via them, we earn a small commission at no extra cost to you. This helps fund the writing of more posts like this one.

  • Pinecone — production vector database. Sign up
  • Anthropic Claude API — production LLM access. Sign up
  • OpenAI Platform — GPT-4 and embedding APIs. Sign up

About the Author

Toc Am

Founder of AmtocSoft. Writing practical deep-dives on AI engineering, cloud architecture, and developer tooling. Previously built backend systems at scale. Reviews every post published under this byline.

LinkedIn X / Twitter

Published: 2026-04-06 · Written with AI assistance, reviewed by Toc Am.

Get These In Your Inbox

Weekly deep-dives on AI engineering, no fluff. Join the newsletter →

Subscribe (free)

Or grab the book ($39, ~100 pages) · Buy me a coffee

Buy Me a Coffee · 🔔 YouTube · 💼 LinkedIn · 🐦 X/Twitter
Sunday, April 5, 2026

What Is Voice AI? TTS, STT, and Voice Agents Explained

What Is Voice AI Hero

What Is Voice AI? TTS, STT, and Voice Agents Explained

Level: Beginner
Topic: Voice AI, TTS, STT

Voice AI is everywhere in 2026 -- calling your doctor's office, answering support lines, running drive-through orders, and powering real-time translation earbuds. But most people have no idea how it actually works under the hood.

In this post, we'll break down the three pillars of voice AI, explain how they fit together into a complete system, and show you where this technology is headed.


graph LR
  A["User Speech"] --> B["Microphone"]
  B --> C["Speech-to-Text (STT)"]
  C --> D["Natural Language Understanding"]
  D --> E["AI Processing"]
  E --> F["Text-to-Speech (TTS)"]
  F --> G["Speaker"]
  G --> H["User Hears Response"]

The Three Pillars of Voice AI

Architecture Diagram

Every voice AI system is built on three core technologies. Think of them as a relay race where each runner handles one leg:

1. Speech-to-Text (STT) -- Listening

Speech-to-text, also called automatic speech recognition (ASR), converts spoken audio into written text. When you talk to Siri, Alexa, or Google Assistant, the first thing that happens is your voice gets transcribed into words.

How it works at a high level:

  1. Audio capture: A microphone records your voice as a waveform
  2. Feature extraction: The system breaks the audio into small frames (usually 20-30ms each) and extracts acoustic features
  3. Model inference: A neural network maps those features to text tokens
  4. Language model: A decoder uses language patterns to pick the most likely sequence of words

Modern STT models like OpenAI's Whisper and Deepgram Nova can achieve word error rates below 5% on clean English audio -- meaning they get 95+ words right out of every 100.

2. Text-to-Speech (TTS) -- Speaking

Text-to-speech does the reverse: it takes written text and produces natural-sounding audio. This is what makes AI assistants sound human instead of robotic.

The evolution has been dramatic:

  • 2015 and earlier: Concatenative synthesis -- stitching pre-recorded phonemes together. Sounded choppy and mechanical
  • 2018-2022: Neural TTS models like Tacotron and WaveNet brought natural intonation and rhythm
  • 2024-2026: Models like ElevenLabs and OpenAI TTS produce voices nearly indistinguishable from real humans, with emotional expressiveness and consistent character

Modern TTS systems work by:

  1. Text analysis: Breaking text into phonemes, handling punctuation, numbers, abbreviations
  2. Prosody prediction: Determining pitch, speed, emphasis, and emotional tone
  3. Audio synthesis: Generating the actual waveform using a neural vocoder

3. Voice Agents -- Thinking

A voice agent combines STT and TTS with an AI brain (typically a large language model) to hold actual conversations. This is where things get interesting.

Instead of just transcribing or speaking, a voice agent:

  • Listens to what you say (STT)
  • Understands your intent and formulates a response (LLM)
  • Speaks the response back to you (TTS)
  • Manages the conversation flow -- knowing when to speak, when to listen, and when to interrupt

Voice agents are what power the AI receptionists, customer support lines, and interview bots you've been encountering more and more in 2026.


How the Full Stack Works End-to-End

Let's trace what happens when you call an AI-powered support line:

You speak: "I need to reschedule my appointment to next Tuesday"
        |
        v
[1. Audio Capture] -- Microphone picks up your voice
        |
        v
[2. STT Engine] -- Converts speech to text
   Output: "I need to reschedule my appointment to next Tuesday"
        |
        v
[3. LLM Processing] -- Understands intent, checks calendar,
   formulates response     finds available slots
        |
        v
[4. TTS Engine] -- Converts response text to speech audio
        |
        v
[5. Audio Playback] -- You hear: "I can reschedule you for
   Tuesday at 10am or 2pm. Which works better?"

This entire loop -- from the moment you stop speaking to the moment you hear a response -- needs to happen fast. How fast? That brings us to the most critical metric in voice AI.


The 500ms Latency Threshold

Research in conversational dynamics has consistently shown that humans expect responses within about 500 milliseconds in natural conversation. Go beyond that, and the interaction starts to feel awkward. Past 1 second, it feels broken. Past 2 seconds, people hang up.

Here's what eats into that budget:

Stage Typical Latency Target
Audio capture + network 50-100ms 50ms
STT processing 100-300ms 100ms
LLM inference 200-800ms 200ms
TTS generation 100-300ms 100ms
Audio delivery 50-100ms 50ms
Total 500-1600ms 500ms

Getting the total under 500ms requires optimization at every stage:

  • Streaming STT: Start processing audio before the user finishes speaking
  • LLM streaming: Begin generating the response token by token, don't wait for the complete answer
  • TTS chunking: Start synthesizing audio from the first sentence while the LLM is still generating the rest
  • Edge deployment: Run components closer to the user to reduce network round trips

The best systems in 2026 achieve 300-500ms end-to-end latency by overlapping these stages -- the STT is still finishing while the LLM starts reasoning, and the TTS begins speaking while the LLM is still generating the tail end of the response.


Where Voice AI Is Used Today

Customer Support

The most visible application. Companies like airlines, banks, and healthcare providers use voice agents to handle routine calls -- appointment scheduling, order status, account inquiries. The best implementations handle 60-80% of calls without human transfer.

Healthcare

AI scribes listen to doctor-patient conversations and automatically generate clinical notes. Voice agents handle appointment scheduling, prescription refill requests, and symptom triage. This saves clinicians 1-2 hours of documentation time per day.

Drive-Through Ordering

Fast food chains are deploying voice AI to take orders at drive-through windows. The system handles menu questions, customizations, upselling, and payment -- all through natural conversation.

Real-Time Translation

Voice AI powers real-time translation devices and apps. Speak in English, and the person across the table hears your words in Japanese within a second. The pipeline is STT (English) then Machine Translation then TTS (Japanese).

Accessibility

Screen readers with natural-sounding TTS voices make digital content accessible to visually impaired users. Voice-controlled interfaces help people with motor disabilities navigate devices and applications.

Podcasting and Content Creation

AI voices now narrate audiobooks, generate podcast episodes, and dub video content into multiple languages. Content creators use TTS to produce audio versions of their written content without recording a single word themselves.

Voice Commerce

Shopping by voice is growing rapidly. Voice agents help customers browse products, compare options, and complete purchases -- all through conversation. Think of it as a personal shopping assistant you can call anytime.


Key Concepts to Know

Wake Words

A wake word (like "Hey Siri" or "Alexa") is a small, always-listening model that detects a specific phrase and activates the full voice AI pipeline. These models are tiny -- they run on microphone chips consuming microwatts of power.

Voice Activity Detection (VAD)

VAD determines when someone is speaking vs. when there's silence or background noise. It's essential for knowing when to start and stop STT processing, and for managing turn-taking in conversations.

Turn-Taking

In human conversation, we naturally know when it's our turn to speak. Voice agents need to replicate this -- detecting when the user has finished their thought (not just paused) and when they're expecting a response.

Voice Cloning

Modern TTS systems can clone a person's voice from as little as 15 seconds of sample audio. This enables personalized voice assistants, preserving a loved one's voice, and dubbing content in the original speaker's voice across languages.


The Voice AI Stack in 2026

If you're building with voice AI today, here's the typical technology stack:

Layer Options
STT Whisper, Deepgram Nova, Google Speech, AssemblyAI
LLM Claude, GPT-4o, Gemini, Llama 3
TTS ElevenLabs, OpenAI TTS, Kokoro, Piper
Orchestration Pipecat, LiveKit Agents, Vocode
Telephony Twilio, Vonage, Telnyx
Infrastructure AWS, GCP, or self-hosted GPU servers

The exciting part: you can build a functional voice agent today with open-source tools and free-tier APIs. The barrier to entry has never been lower.


What's Next

In the next posts in this series, we'll go deeper into each layer:

  • TTS comparison: ElevenLabs vs OpenAI vs open-source models -- quality, cost, and latency benchmarks
  • STT showdown: Whisper vs Deepgram vs Google -- which one should you use?
  • Build a voice agent: A hands-on tutorial using Python and Pipecat
  • Architecture deep dive: Pipeline vs end-to-end approaches
  • Production guide: Scaling, monitoring, and cost optimization

Voice AI is one of the fastest-moving areas in tech right now. Understanding the fundamentals puts you in a strong position to build with it, evaluate vendors, or simply understand what's happening when you talk to an AI on the phone.

Sources & References:
1. Google — "Text-to-Speech Documentation" — https://cloud.google.com/text-to-speech
2. OpenAI — "Whisper: Robust Speech Recognition" — https://openai.com/index/whisper/
3. Pipecat — "Build Voice Agents" — https://github.com/pipecat-ai/pipecat


This is part 1 of the AmtocSoft Voice AI series. Follow along as we go from fundamentals to production-ready voice agents.

About the Author

Toc Am

Founder of AmtocSoft. Writing practical deep-dives on AI engineering, cloud architecture, and developer tooling. Previously built backend systems at scale. Reviews every post published under this byline.

LinkedIn X / Twitter

Published: 2026-04-06 · Written with AI assistance, reviewed by Toc Am.

Get These In Your Inbox

Weekly deep-dives on AI engineering, no fluff. Join the newsletter →

Subscribe (free)

Or grab the book ($39, ~100 pages) · Buy me a coffee

Buy Me a Coffee · 🔔 YouTube · 💼 LinkedIn · 🐦 X/Twitter
Attention Is All You Need, Explained Simply

We published a plain-language walkthrough of the 2017 transformer paper — queries, keys, values, multi-head attention, and why no-recurrence...