Showing posts with label service-mesh. Show all posts

Friday, April 17, 2026

Kubernetes Networking: Services, Ingress, Network Policies, and Service Mesh

Hero image

Introduction

Kubernetes networking is the layer that most engineers understand just enough to debug obvious failures — and not enough to prevent subtle ones. Pod-to-pod communication works by default, but "works by default" means all pods can reach all other pods with no access controls. A compromised pod in your frontend namespace can reach your database service. A misconfigured Ingress routes production traffic to a test deployment. A missing network policy allows a compromised dependency to exfiltrate data.

This post covers Kubernetes networking at production depth: how Services work at the IP table level, why ClusterIP vs NodePort vs LoadBalancer matters beyond YAML syntax, Ingress controllers and their performance characteristics, Network Policies as the foundation of zero-trust networking in Kubernetes, the CNI layer (what Cilium actually does), service mesh trade-offs, and the automation stack (ExternalDNS, cert-manager) that makes production cluster management manageable. Each section includes the debugging approach for when things go wrong — because in production, they always do eventually.

The Kubernetes Network Model

Kubernetes mandates three properties of its network model:
1. Every pod gets a unique IP address
2. Pods on the same node communicate without NAT
3. Pods on different nodes communicate without NAT

How this is implemented depends on the CNI (Container Network Interface) plugin: Flannel (simple VXLAN overlay), Calico (BGP + iptables), Cilium (eBPF), or Weave. The API is uniform; the implementation varies significantly in performance and features.

Pod IPs are ephemeral — they change when pods restart. Services provide stable virtual IPs (ClusterIPs) that route to healthy pod endpoints. The kube-proxy component (or its replacement) implements this routing.

Architecture diagram

Services: ClusterIP, NodePort, and LoadBalancer

# ClusterIP: stable virtual IP, only reachable within cluster
apiVersion: v1
kind: Service
metadata:
  name: payment-api
  namespace: payments
spec:
  type: ClusterIP
  selector:
    app: payment-api        # routes to pods with this label
  ports:
  - port: 80               # service port (what callers use)
    targetPort: 8080       # pod port (what your app listens on)
    protocol: TCP
---
# NodePort: exposes service on each node's IP at a static port
# Use for local development, not production (bypasses Ingress/LoadBalancer)
apiVersion: v1
kind: Service
spec:
  type: NodePort
  ports:
  - port: 80
    targetPort: 8080
    nodePort: 30080        # 30000-32767 range; if omitted, auto-assigned
---
# LoadBalancer: provisions a cloud load balancer (NLB/ELB)
# Each LoadBalancer service costs money (one cloud LB per service)
# Use Ingress to multiplex many services behind one LoadBalancer
apiVersion: v1
kind: Service
spec:
  type: LoadBalancer
  ports:
  - port: 443
    targetPort: 8443

How ClusterIP routing works: kube-proxy (or eBPF in Cilium) watches the Endpoints object (list of healthy pod IPs) for each Service. It programs iptables rules that DNAT the ClusterIP:port to one of the healthy pod IPs using random or round-robin selection. When a pod fails its liveness probe and is removed from Endpoints, it's removed from the iptables rules within seconds. The Service IP is stable; the underlying pod IPs rotate.

The iptables implementation has an O(n) lookup time — at 10,000 services, iptables rules become a performance bottleneck. Cilium's eBPF implementation uses hash tables for O(1) lookup and is the reason large clusters migrate away from kube-proxy.

Ingress: HTTP Routing and TLS Termination

An Ingress resource defines HTTP routing rules: host-based and path-based routing to Services. One Ingress controller (typically one LoadBalancer service) multiplexes traffic to hundreds of backend services.

apiVersion: networking.k8s.io/v1
kind: Ingress
metadata:
  name: api-ingress
  namespace: production
  annotations:
    # nginx-specific annotations
    nginx.ingress.kubernetes.io/rate-limit: "100"
    nginx.ingress.kubernetes.io/rate-limit-window: "1m"
    nginx.ingress.kubernetes.io/proxy-body-size: "10m"
    nginx.ingress.kubernetes.io/ssl-redirect: "true"
    nginx.ingress.kubernetes.io/use-regex: "true"
spec:
  ingressClassName: nginx
  tls:
  - hosts:
    - api.example.com
    secretName: api-tls-cert  # TLS cert stored as Secret
  rules:
  - host: api.example.com
    http:
      paths:
      - path: /api/v1/payments(/|$)(.*)
        pathType: Prefix
        backend:
          service:
            name: payment-api
            port:
              number: 80
      - path: /api/v1/orders(/|$)(.*)
        pathType: Prefix
        backend:
          service:
            name: order-api
            port:
              number: 80
      - path: /
        pathType: Prefix
        backend:
          service:
            name: frontend
            port:
              number: 80

Ingress controller choices in 2026:
- nginx-ingress: most widely deployed, extensive annotation-based configuration, well-documented
- Traefik: native Let's Encrypt integration, middleware chain, better UI
- Kong: API gateway features (auth plugins, rate limiting, request transformation)
- Gateway API (standard): the successor to Ingress, more expressive, better multi-team support

The Gateway API (now stable as of Kubernetes 1.28+) separates cluster-level infrastructure (GatewayClass, Gateway) from application-level routing (HTTPRoute), enabling better multi-tenant control. The Ingress API remains supported but new features are being added to Gateway API.

# Gateway API: replacing Ingress
apiVersion: gateway.networking.k8s.io/v1
kind: HTTPRoute
metadata:
  name: payment-route
spec:
  parentRefs:
  - name: prod-gateway           # references the Gateway (cluster-level)
  hostnames:
  - "api.example.com"
  rules:
  - matches:
    - path:
        type: PathPrefix
        value: /api/v1/payments
    backendRefs:
    - name: payment-api
      port: 80
      weight: 90               # 90% traffic to stable
    - name: payment-api-canary
      port: 80
      weight: 10               # 10% traffic to canary — traffic splitting

The Gateway API's traffic splitting capability enables canary deployments at the Ingress layer — weight-based routing without a service mesh.

Network Policies: Zero-Trust Kubernetes Networking

Without Network Policies, all pods in a cluster can reach all other pods. A compromised pod in your CDN service can connect to your database. Network Policies define which pods can talk to which pods.

# Default deny: no ingress or egress from the payments namespace
apiVersion: networking.k8s.io/v1
kind: NetworkPolicy
metadata:
  name: default-deny-all
  namespace: payments
spec:
  podSelector: {}              # applies to all pods in the namespace
  policyTypes:
  - Ingress
  - Egress
---
# Allow: payments pods can receive traffic from API gateway only
apiVersion: networking.k8s.io/v1
kind: NetworkPolicy
metadata:
  name: allow-api-gateway-ingress
  namespace: payments
spec:
  podSelector:
    matchLabels:
      app: payment-service
  policyTypes:
  - Ingress
  ingress:
  - from:
    - namespaceSelector:
        matchLabels:
          name: api-gateway     # only from api-gateway namespace
    - podSelector:
        matchLabels:
          app: api-gateway      # and only from api-gateway pods
    ports:
    - port: 8080
      protocol: TCP
---
# Allow: payments pods can reach the database and DNS only
apiVersion: networking.k8s.io/v1
kind: NetworkPolicy
metadata:
  name: payment-service-egress
  namespace: payments
spec:
  podSelector:
    matchLabels:
      app: payment-service
  policyTypes:
  - Egress
  egress:
  - to:
    - namespaceSelector:
        matchLabels:
          name: databases
    ports:
    - port: 5432               # PostgreSQL
  - to:
    - namespaceSelector:
        matchLabels:
          kubernetes.io/metadata.name: kube-system
    ports:
    - port: 53                 # DNS — don't forget this or pod DNS breaks
      protocol: UDP
    - port: 53
      protocol: TCP

The default-deny-all then explicit-allow pattern is the correct approach for production. Start locked down; add permissions as needed. The common mistake is writing podSelector: {} (allow-all) for both ingress and egress because it "just works" — then you have no network segmentation at all.

Network Policy enforcement requires a CNI that supports it. Flannel does not. Calico, Cilium, and Weave do. Verify your CNI supports Network Policies before applying them — on Flannel clusters, the policies are accepted by the API server but silently not enforced.

Comparison visual

EndpointSlices and Large-Scale Service Routing

The Endpoints object has a 1MB size limit — a single Service with more than ~5,000 pod IPs exceeds this limit and breaks. EndpointSlices (stable since Kubernetes 1.21) shard the endpoint data: each EndpointSlice holds up to 100 endpoints, and kube-proxy watches all EndpointSlices for a Service.

EndpointSlices also reduce kube-proxy CPU load: when a single pod is added to a Service, only the affected EndpointSlice is updated — not the entire endpoint list. At 1,000-pod Services, this reduces the update payload by ~99%.

Topology-aware routing (also called topology hints) assigns EndpointSlices to the same zone as the requesting pod. This reduces cross-zone data transfer costs (in cloud providers, cross-zone traffic is billed at ~$0.01/GB) and latency for services with geographically distributed nodes:

# Enable topology-aware routing on a Service
apiVersion: v1
kind: Service
metadata:
  name: recommendation-api
  annotations:
    service.kubernetes.io/topology-mode: "auto"  # prefer same-zone endpoints
spec:
  selector:
    app: recommendation-api
  ports:
  - port: 80
    targetPort: 8080

With topology-mode: auto, kube-proxy (or Cilium) preferentially routes requests to endpoints in the same availability zone. If no in-zone endpoints are available, it falls back to any endpoint. The annotation works best when endpoints are roughly evenly distributed across zones — severely imbalanced distributions disable the optimization automatically.

Cilium: eBPF-Based Networking

Cilium replaces kube-proxy and extends Network Policies with capabilities not possible in iptables:

# Cilium NetworkPolicy: L7-aware policies (iptables only does L3/L4)
apiVersion: cilium.io/v2
kind: CiliumNetworkPolicy
metadata:
  name: payment-l7-policy
spec:
  endpointSelector:
    matchLabels:
      app: payment-service
  ingress:
  - fromEndpoints:
    - matchLabels:
        app: api-gateway
    toPorts:
    - ports:
      - port: "8080"
        protocol: TCP
      rules:
        http:
        - method: "POST"
          path: "/api/v1/charge"   # only allow this specific endpoint
        - method: "GET"
          path: "/api/v1/status"   # and this one
        # All other paths blocked at the network layer

L7-aware policies block specific HTTP paths or gRPC methods at the network layer — not the application layer. A compromised internal service cannot call DELETE /api/v1/all_orders even if it can reach the payment service's pod IP.

Cilium's eBPF implementation also provides:
- Network performance: O(1) service lookup vs O(n) iptables, measurable improvement at >1000 services
- Hubble observability: real-time flow visibility, service dependency maps, network policy verification
- Transparent encryption: WireGuard-based pod-to-pod encryption without application changes
- Bandwidth management: per-pod egress bandwidth limits

The operational trade-off: Cilium requires a more recent Linux kernel (5.4+ for most features, 5.10+ for advanced features) and a more complex installation than vanilla kube-proxy. In 2026, most managed Kubernetes offerings (EKS, GKE, AKS) support or default to Cilium.

ExternalDNS: Automating DNS Record Management

Manually updating DNS records when LoadBalancer IPs change is error-prone. ExternalDNS watches Services and Ingresses and automatically updates Route 53, Cloud DNS, or Cloudflare when load balancer IPs are assigned:

# ExternalDNS deployment
apiVersion: apps/v1
kind: Deployment
metadata:
  name: external-dns
spec:
  template:
    spec:
      containers:
      - name: external-dns
        image: registry.k8s.io/external-dns/external-dns:v0.14.0
        args:
        - --source=service
        - --source=ingress
        - --domain-filter=example.com      # only manage example.com records
        - --provider=aws                   # Route 53
        - --policy=upsert-only             # never delete records (safer)
        - --aws-zone-type=public
        - --log-level=info

When you create an Ingress with host: api.example.com, ExternalDNS automatically creates a Route 53 A record pointing to the Ingress controller's LoadBalancer IP. When the LoadBalancer IP changes (during cluster migration, for example), ExternalDNS updates the record automatically.

Combined with cert-manager (automatic TLS certificate provisioning from Let's Encrypt), you get fully automated HTTPS endpoint management:

# cert-manager ClusterIssuer for Let's Encrypt
apiVersion: cert-manager.io/v1
kind: ClusterIssuer
metadata:
  name: letsencrypt-prod
spec:
  acme:
    server: https://acme-v02.api.letsencrypt.org/directory
    email: ops@example.com
    privateKeySecretRef:
      name: letsencrypt-prod-key
    solvers:
    - http01:
        ingress:
          class: nginx

# Ingress with cert-manager annotation: auto-provisions certificate
apiVersion: networking.k8s.io/v1
kind: Ingress
metadata:
  annotations:
    cert-manager.io/cluster-issuer: letsencrypt-prod  # triggers cert provisioning
spec:
  tls:
  - hosts:
    - api.example.com
    secretName: api-example-com-tls   # cert-manager stores cert here
  rules:
  - host: api.example.com
    ...

The combination of ExternalDNS + cert-manager + nginx-ingress is the standard production Kubernetes HTTP stack: deploy an application, annotate the Ingress, and within 2 minutes it's live with a valid HTTPS certificate and DNS record — fully automated.

Service Mesh: When You Need It

A service mesh (Istio, Linkerd, Cilium Service Mesh) adds a sidecar proxy (or eBPF) to each pod that handles:
- Mutual TLS (mTLS) between all services
- Traffic management (canary deployments, circuit breakers, retries)
- Observability (distributed traces, metrics, per-service dashboards)

The value is real. The cost is also real: Istio adds 7-15MB memory per sidecar, 1-3ms latency per hop, and significant operational complexity (CRDs, control plane management, certificate rotation).

Use a service mesh when:
- You require mTLS for compliance (SOC 2, PCI DSS) and can't add TLS to each service individually
- You need circuit breaking, retries, and timeout policies applied consistently across all services
- You want distributed tracing without application-level instrumentation (OpenTelemetry auto-instrumentation is usually sufficient)
- You have 20+ services that need consistent traffic management

Don't use a service mesh when:
- You have fewer than 10 services (overhead exceeds benefit)
- Your team doesn't have operational experience with the service mesh control plane
- You can achieve the same goals with Cilium Network Policies + OpenTelemetry + Gateway API traffic splitting

Linkerd has a much simpler operational model than Istio (no complex VirtualService/DestinationRule CRDs, lower resource overhead, automatic mTLS with near-zero config). If mTLS compliance is the primary driver, Linkerd is the better choice. If advanced traffic management is needed, Istio's capabilities justify its complexity.

Note that Cilium Service Mesh (available when Cilium is your CNI) provides mTLS and basic traffic management via eBPF without sidecars — zero sidecar overhead. For clusters already running Cilium, this is worth evaluating before adopting Istio or Linkerd, since the infrastructure is already in place.

Debugging Kubernetes Network Issues

A systematic approach to the most common networking failures:

Pod can't reach another pod by Service name:

# Step 1: Verify DNS resolves
kubectl exec -it debug-pod -- nslookup payment-api.payments.svc.cluster.local
# If fails: CoreDNS problem or pod DNS config issue

# Step 2: Verify Service has endpoints
kubectl get endpoints payment-api -n payments
# If ADDRESS column is empty: selector doesn't match pod labels

# Step 3: Test direct pod-to-pod connectivity (bypass Service)
kubectl get pods -n payments -o wide          # get pod IP
kubectl exec -it debug-pod -- curl http://10.244.1.5:8080/health
# If succeeds but Service fails: iptables/kube-proxy issue

# Step 4: Check Network Policy isn't blocking
kubectl exec -n payments debug-pod -- curl http://payment-api:80
# If denied: check NetworkPolicy objects in both namespaces

# Cilium policy troubleshooting with Hubble
hubble observe --namespace payments --follow
# Shows dropped packets with reason: network policy rule, etc.

Ingress not routing correctly:

# Check Ingress controller logs
kubectl logs -n ingress-nginx deploy/ingress-nginx-controller | grep payment-api

# Verify Ingress backend resolves
kubectl describe ingress api-ingress -n production
# Look for: "Default backend: default-http-backend:80 (<error>)"

# Check that the backend Service and its pods are healthy
kubectl get svc payment-api -n payments
kubectl get endpoints payment-api -n payments  # must have addresses

# Test with curl from inside the cluster (bypasses Ingress, tests Service)
kubectl run test --image=curlimages/curl --rm -it -- \
    curl http://payment-api.payments.svc.cluster.local/health

Connection timeout to external services:

# Check egress Network Policy allows the external IP/port
kubectl get networkpolicy -n payments

# Test DNS resolution of external service
kubectl exec -it pod -- nslookup api.stripe.com

# Check if traffic is being NATted correctly
kubectl exec -it pod -- curl -v https://api.stripe.com/v1/balance \
    -H "Authorization: Bearer sk_test_..."

Intermittent connection failures under load:
This is often a conntrack table overflow (the kernel's connection tracking table is full). Symptoms: nf_conntrack: table full, dropping packet in node kernel logs. Mitigation:

# On each node
sysctl net.netfilter.nf_conntrack_max
# Increase if close to limit under load
# Also check: sysctl net.netfilter.nf_conntrack_count

With Cilium (eBPF), conntrack is handled in eBPF maps with much higher limits than the kernel conntrack table — this is one of the scaling advantages.

DNS in Kubernetes: CoreDNS and Service Discovery

CoreDNS is the default DNS server in Kubernetes. Services are resolvable via DNS within the cluster:

# DNS name format: <service>.<namespace>.svc.cluster.local
# Short forms also work within the same namespace:
# - <service>                            (same namespace)
# - <service>.<namespace>                (any namespace)
# - <service>.<namespace>.svc            (any namespace)
# - <service>.<namespace>.svc.cluster.local (full FQDN)

# From within payments namespace:
# payment-api              → resolves to ClusterIP
# payment-api.payments     → same
# postgres.databases       → cross-namespace

# Headless services (ClusterIP: None): DNS returns pod IPs
# Used for StatefulSets where you need to reach specific pods

CoreDNS performance issues at scale: with many pods making many DNS lookups, CoreDNS can become a bottleneck. Mitigations:
- ndots:5 default causes each DNS lookup to try 5 search domain suffixes before returning. Set ndots:2 for services that use FQDNs
- NodeLocal DNSCache: DNS cache on each node, reduces CoreDNS load by ~70%
- Increase CoreDNS replicas: HPA on CoreDNS based on requests/second

Production Kubernetes Networking Stack: Recommendations by Scale

Small clusters (1-20 nodes, <100 services):
- CNI: Flannel or Calico (simple, well-understood)
- Service routing: kube-proxy (iptables overhead not visible at this scale)
- Ingress: nginx-ingress (most documentation, easiest debugging)
- Network Policies: Calico provides enforcement even with Flannel overlay
- Service mesh: skip (overhead exceeds benefit)
- DNS automation: ExternalDNS + cert-manager

Medium clusters (20-200 nodes, 100-1000 services):
- CNI: Cilium (eBPF performance advantage becomes measurable, Hubble for visibility)
- Service routing: Cilium replaces kube-proxy
- Ingress: nginx-ingress or Gateway API
- Network Policies: Cilium NetworkPolicy (L7-aware)
- Service mesh: Linkerd if mTLS compliance required; skip otherwise
- Topology-aware routing for cross-zone cost reduction

Large clusters (200+ nodes, 1000+ services):
- CNI: Cilium (iptables simply doesn't scale here)
- EndpointSlices: enabled and monitored
- Ingress: Gateway API (mature at this cluster size)
- Service mesh: likely required (traffic management at this scale benefits from centralized control)
- NodeLocal DNSCache: required (CoreDNS becomes bottleneck without it)

Conclusion

Kubernetes networking has multiple layers, each with distinct concerns. Services provide stable virtual IPs for ephemeral pods. Ingress (and increasingly, Gateway API) multiplexes HTTP traffic with host and path routing. Network Policies provide the access controls that make multi-tenant clusters safe. Cilium's eBPF implementation delivers L7-aware policies and O(1) service lookup at scale. Service meshes add mTLS and advanced traffic management — valuable for large deployments, over-engineered for small ones.

The security posture that production clusters should target: default-deny Network Policies per namespace, explicit-allow ingress and egress for every service, CoreDNS always permitted. Combined with Cilium for enforcement and Hubble for visibility, you have network segmentation comparable to a traditional firewall — but dynamic and programmable through Kubernetes manifests.

The automation stack of ExternalDNS plus cert-manager plus an Ingress controller eliminates manual DNS and certificate management — the operational overhead that previously made Kubernetes networking painful to manage. In 2026, a new service can be deployed, DNS-assigned, and HTTPS-terminated in minutes with no manual intervention. When things go wrong, the debugging workflow follows the layers: DNS resolution, Service endpoints, Network Policy rules, Ingress configuration — in that order. Cilium's Hubble CLI makes network policy debugging particularly tractable, showing dropped packets with the exact policy rule that blocked them.

Sources

About the Author

Toc Am

Founder of AmtocSoft. Writing practical deep-dives on AI engineering, cloud architecture, and developer tooling. Previously built backend systems at scale. Reviews every post published under this byline.

LinkedIn X / Twitter

Published: 2026-04-17 · Written with AI assistance, reviewed by Toc Am.

Get These In Your Inbox

Weekly deep-dives on AI engineering, no fluff. Join the newsletter →

Subscribe (free)

Or grab the book ($39, ~100 pages) · Buy me a coffee

Buy Me a Coffee · 🔔 YouTube · 💼 LinkedIn · 🐦 X/Twitter

Tuesday, April 7, 2026

Identity Is the New Perimeter: Zero Trust for Developers

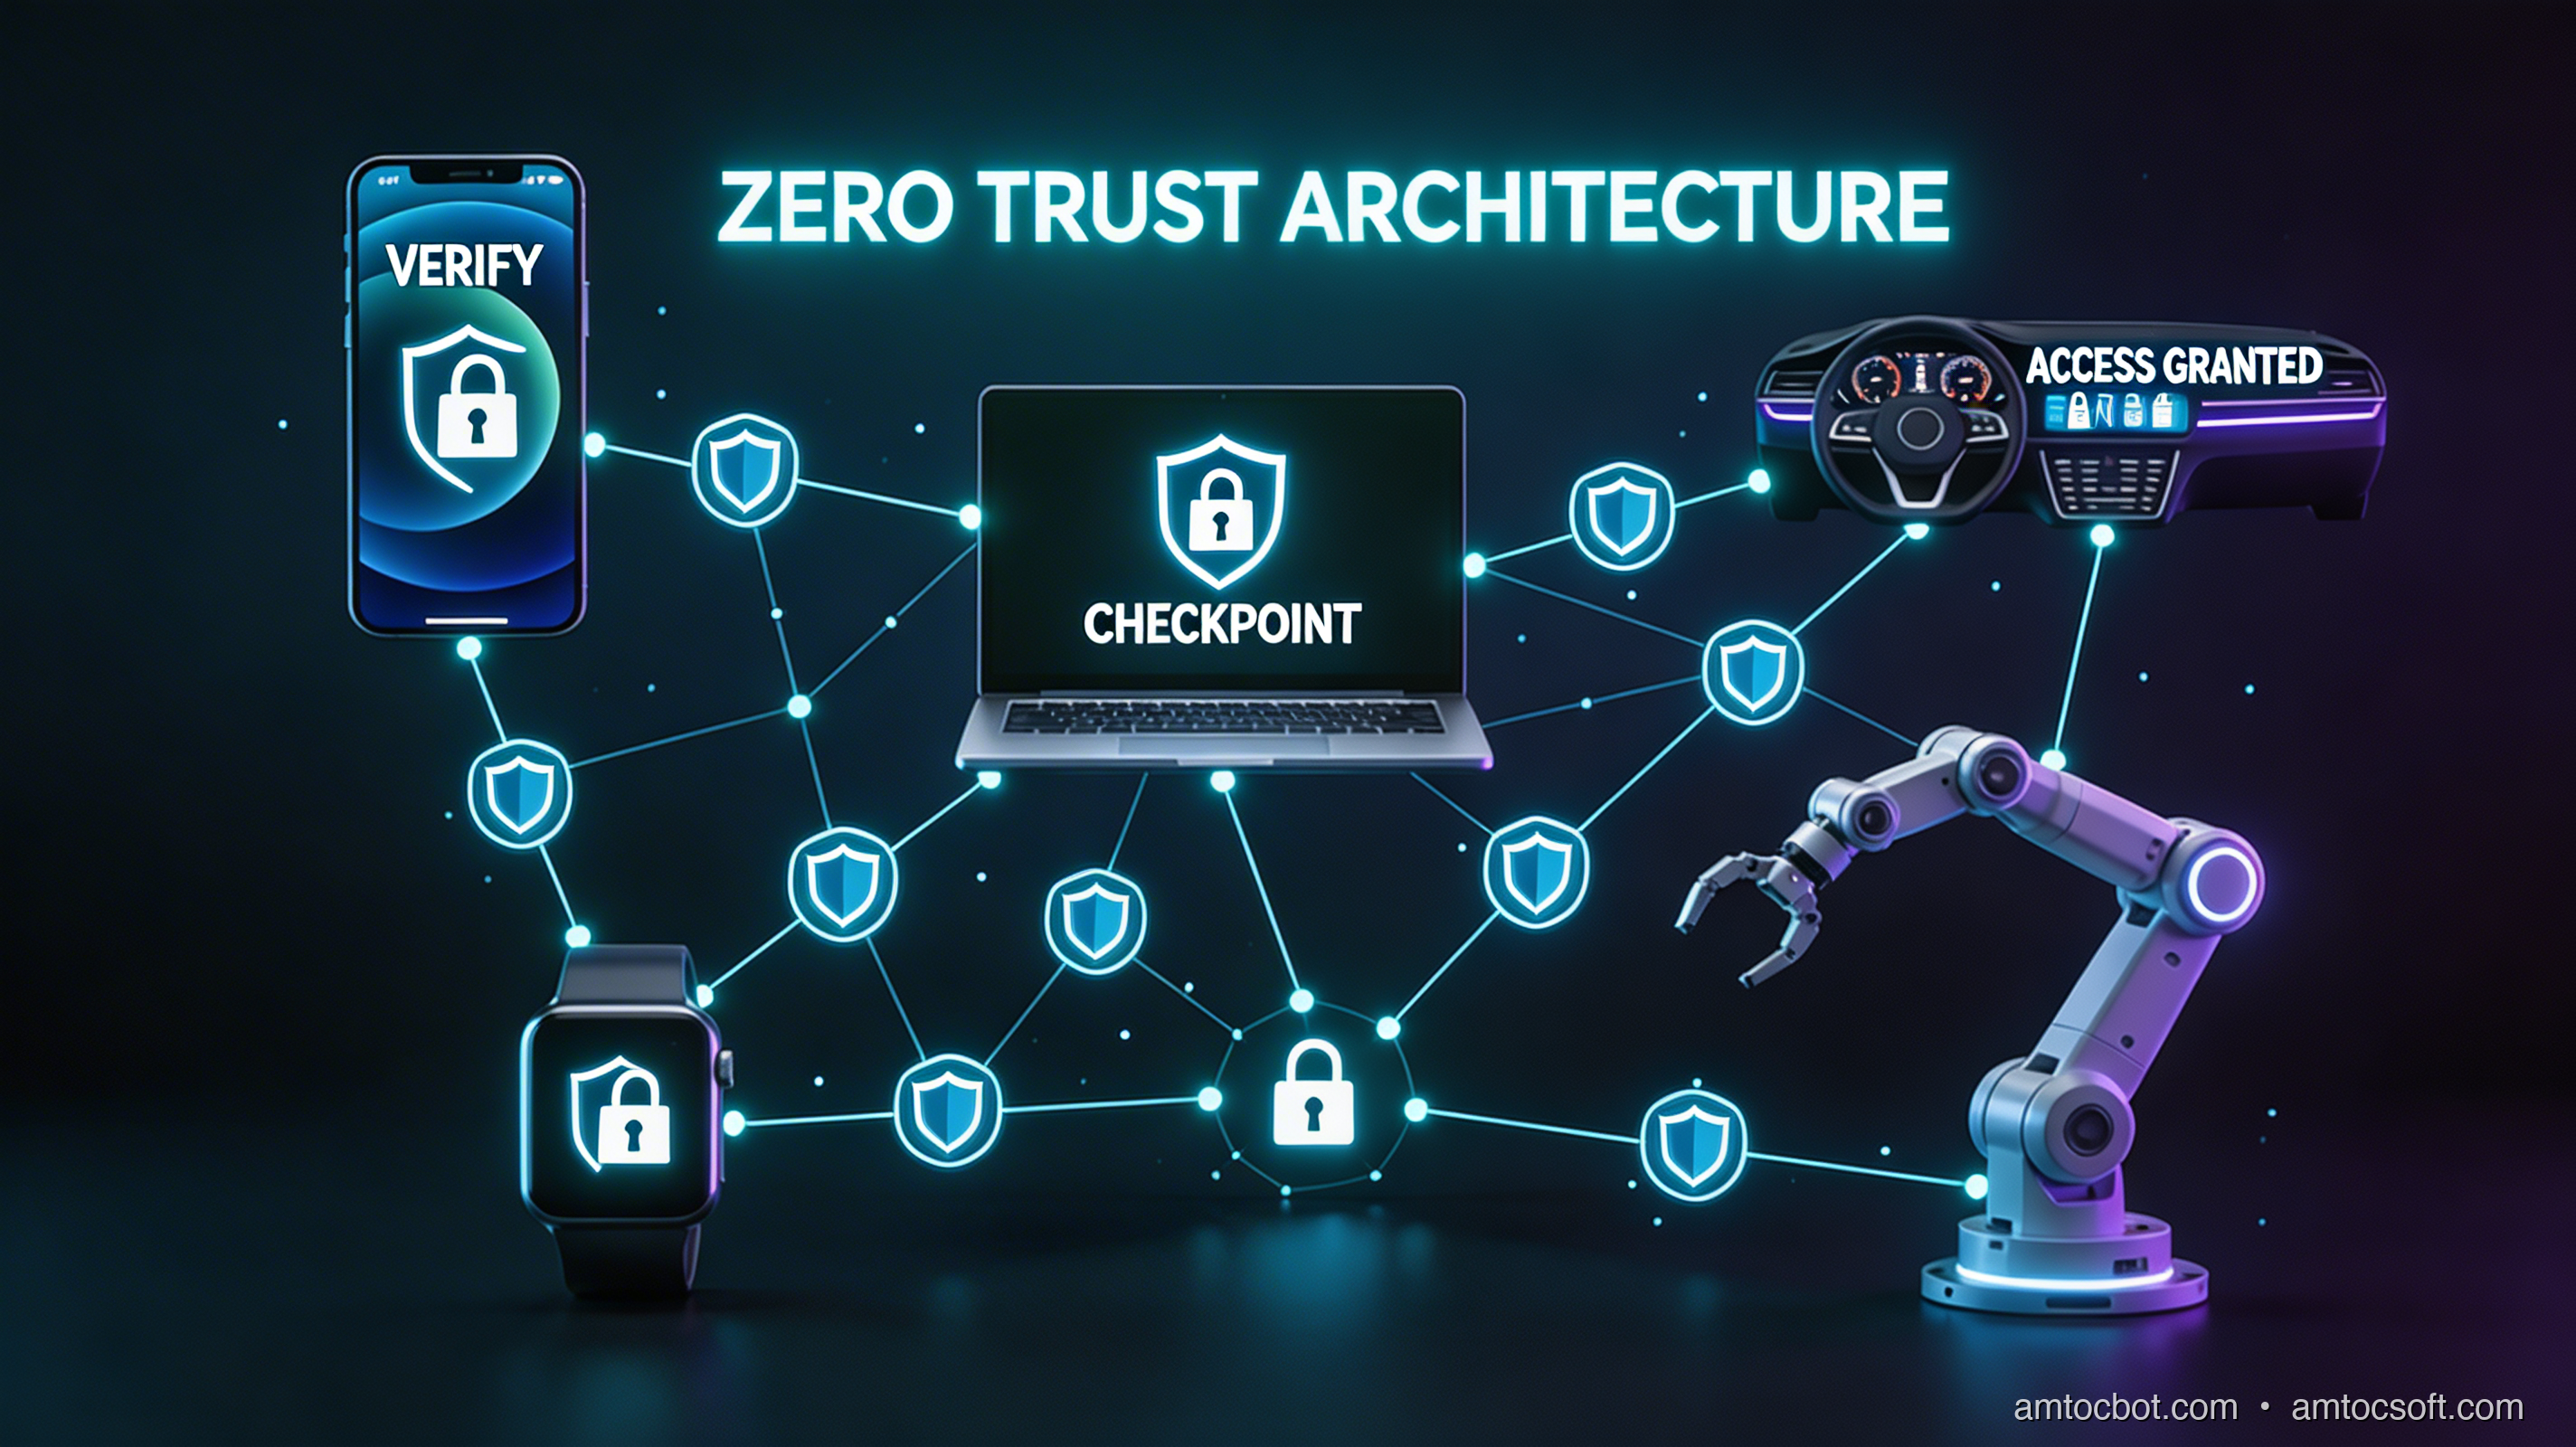
Hero: Zero Trust Architecture — identity verification at every hop

Introduction

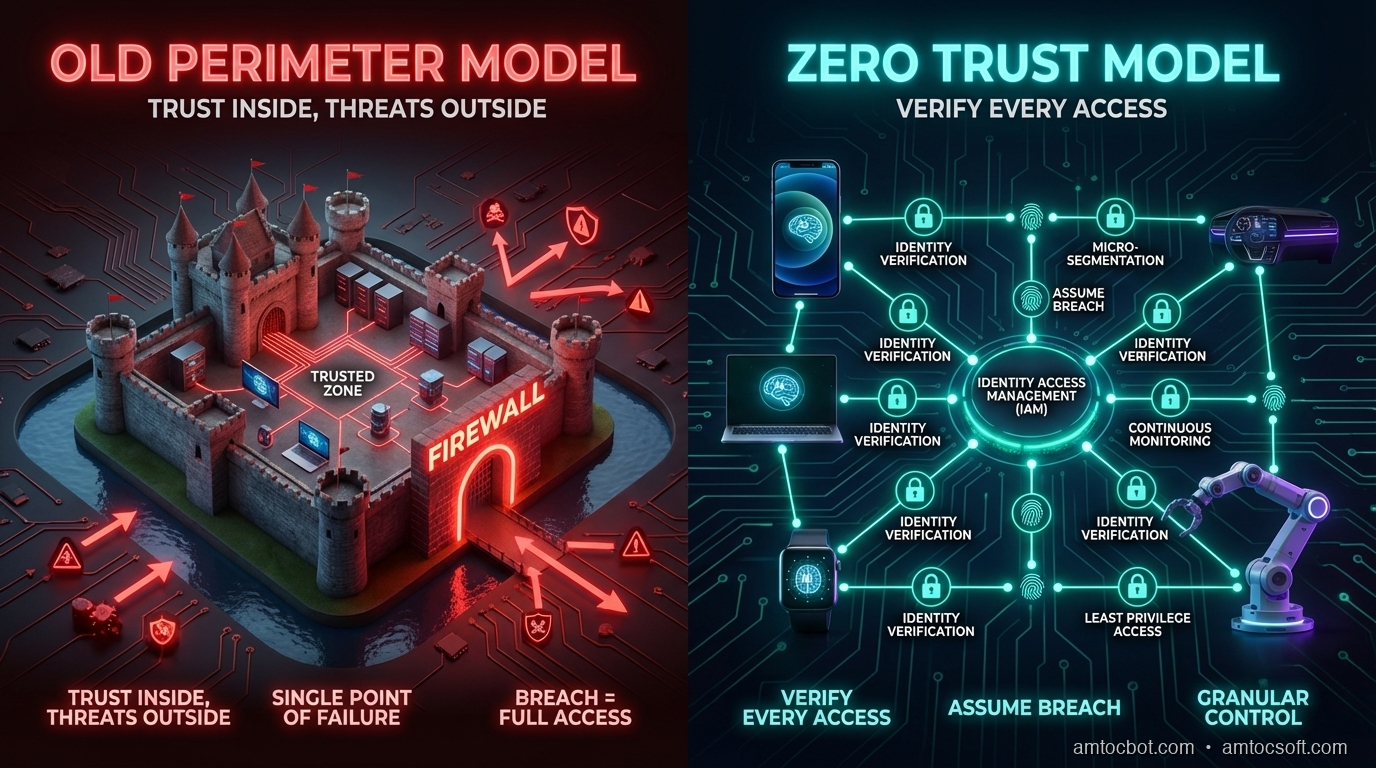
There was a time when building secure software meant building a moat. You put your servers inside a corporate network, slapped a firewall on the edge, and assumed that anything already inside the walls was trustworthy. If a request came from the right IP range, it was probably fine. If it was on the VPN, it was almost certainly fine.

That model made sense when applications ran in a single data center, when developers worked from a single office, and when "the cloud" meant someone else's file cabinet. It does not make sense anymore.

Today's applications are distributed across AWS, GCP, Azure, and edge nodes. Developers connect from home, coffee shops, and co-working spaces. Microservices talk to other microservices across container boundaries that do not map to any physical location. A single user request might touch a dozen internal APIs before a response is assembled. The "inside" of the network is everywhere — and that means the perimeter no longer exists in any meaningful sense.

Zero Trust is the architectural response to this reality. The core principle is blunt: never trust, always verify. Every request — whether it comes from a user's browser, a background job, or a peer microservice — must authenticate, must be authorized for the specific action it is requesting, and must be re-verified continuously. Location on the network grants nothing.

For security architects and compliance teams, Zero Trust is often discussed at the policy and framework level. This post is for developers. We will get into the code: how to validate JWT tokens properly in a FastAPI service, how to configure mTLS between services, how to use SPIFFE/SPIRE to give workloads cryptographic identities, and how to write policy-based authorization using OPA. We will look at what these patterns actually cost in terms of latency and operational overhead. And we will be honest about the tradeoffs, because Zero Trust is not free.

By the end, you will have a concrete mental model and working code you can adapt to your own services.


The Problem: Why the Perimeter Broke

The castle-and-moat security model rests on one assumption: that the boundary between "inside" and "outside" is meaningful and enforceable. Every architectural decision since 2010 has systematically destroyed that assumption.

Cloud-native infrastructure erased the inside. When your application runs across multiple cloud providers and regions, there is no single network boundary. A Kubernetes pod in us-east-1 talking to a managed database in eu-west-1 is not "inside" anything. Traffic travels over paths controlled by third parties. The old mental model of "trust internal IPs" becomes actively dangerous because internal IP ranges overlap between VPCs, between cloud providers, and between tenants on shared infrastructure.

Remote work and contractor access expanded the edge to everywhere. Your developers are not in an office behind a managed switch. They are connecting from personal routers with default passwords, from hotel networks, from devices that may or may not have EDR installed. VPNs were designed to extend the perimeter to remote employees, but they do so by essentially putting those employees "inside" the castle — with all the trust that implies. A compromised developer laptop on a VPN has full lateral movement access to anything the VPN permits.

Lateral movement is the real threat. Major breaches are rarely about a single endpoint getting owned. They are about attackers using that initial foothold to move laterally through a network that trusted internal traffic implicitly. The 2020 SolarWinds attack, the 2021 Colonial Pipeline ransomware, and dozens of high-profile cloud breaches all followed the same pattern: initial access, lateral movement, persistence, exfiltration. Perimeter security stops initial access (sometimes). It does almost nothing about lateral movement once an attacker is inside.

Third-party dependencies and SaaS integrations punched holes in the moat. Modern applications integrate with dozens of external services: payment processors, identity providers, analytics platforms, communication tools. Each integration is a potential entry point. Each API key stored in a .env file is a credential that, if leaked, grants access from outside the perimeter entirely.

The implicit trust model creates hidden attack surface. When service A trusts service B simply because B is on the same internal network, an attacker who compromises any internal service can impersonate any other. There is no cryptographic proof of identity — just network topology, which is increasingly meaningless.

Zero Trust addresses all of these by shifting the security model from "where are you" to "who are you, what do you want, and can I verify both cryptographically."

The three core principles:

  1. Never trust, always verify — Every request must present verifiable credentials. Network location is not a credential.
  2. Least privilege — Every identity (user, service, device) gets only the permissions it needs for the specific action, at the specific time, with the specific scope.
  3. Assume breach — Design systems as if an attacker is already inside. Minimize blast radius, segment access, log everything, and detect anomalies.
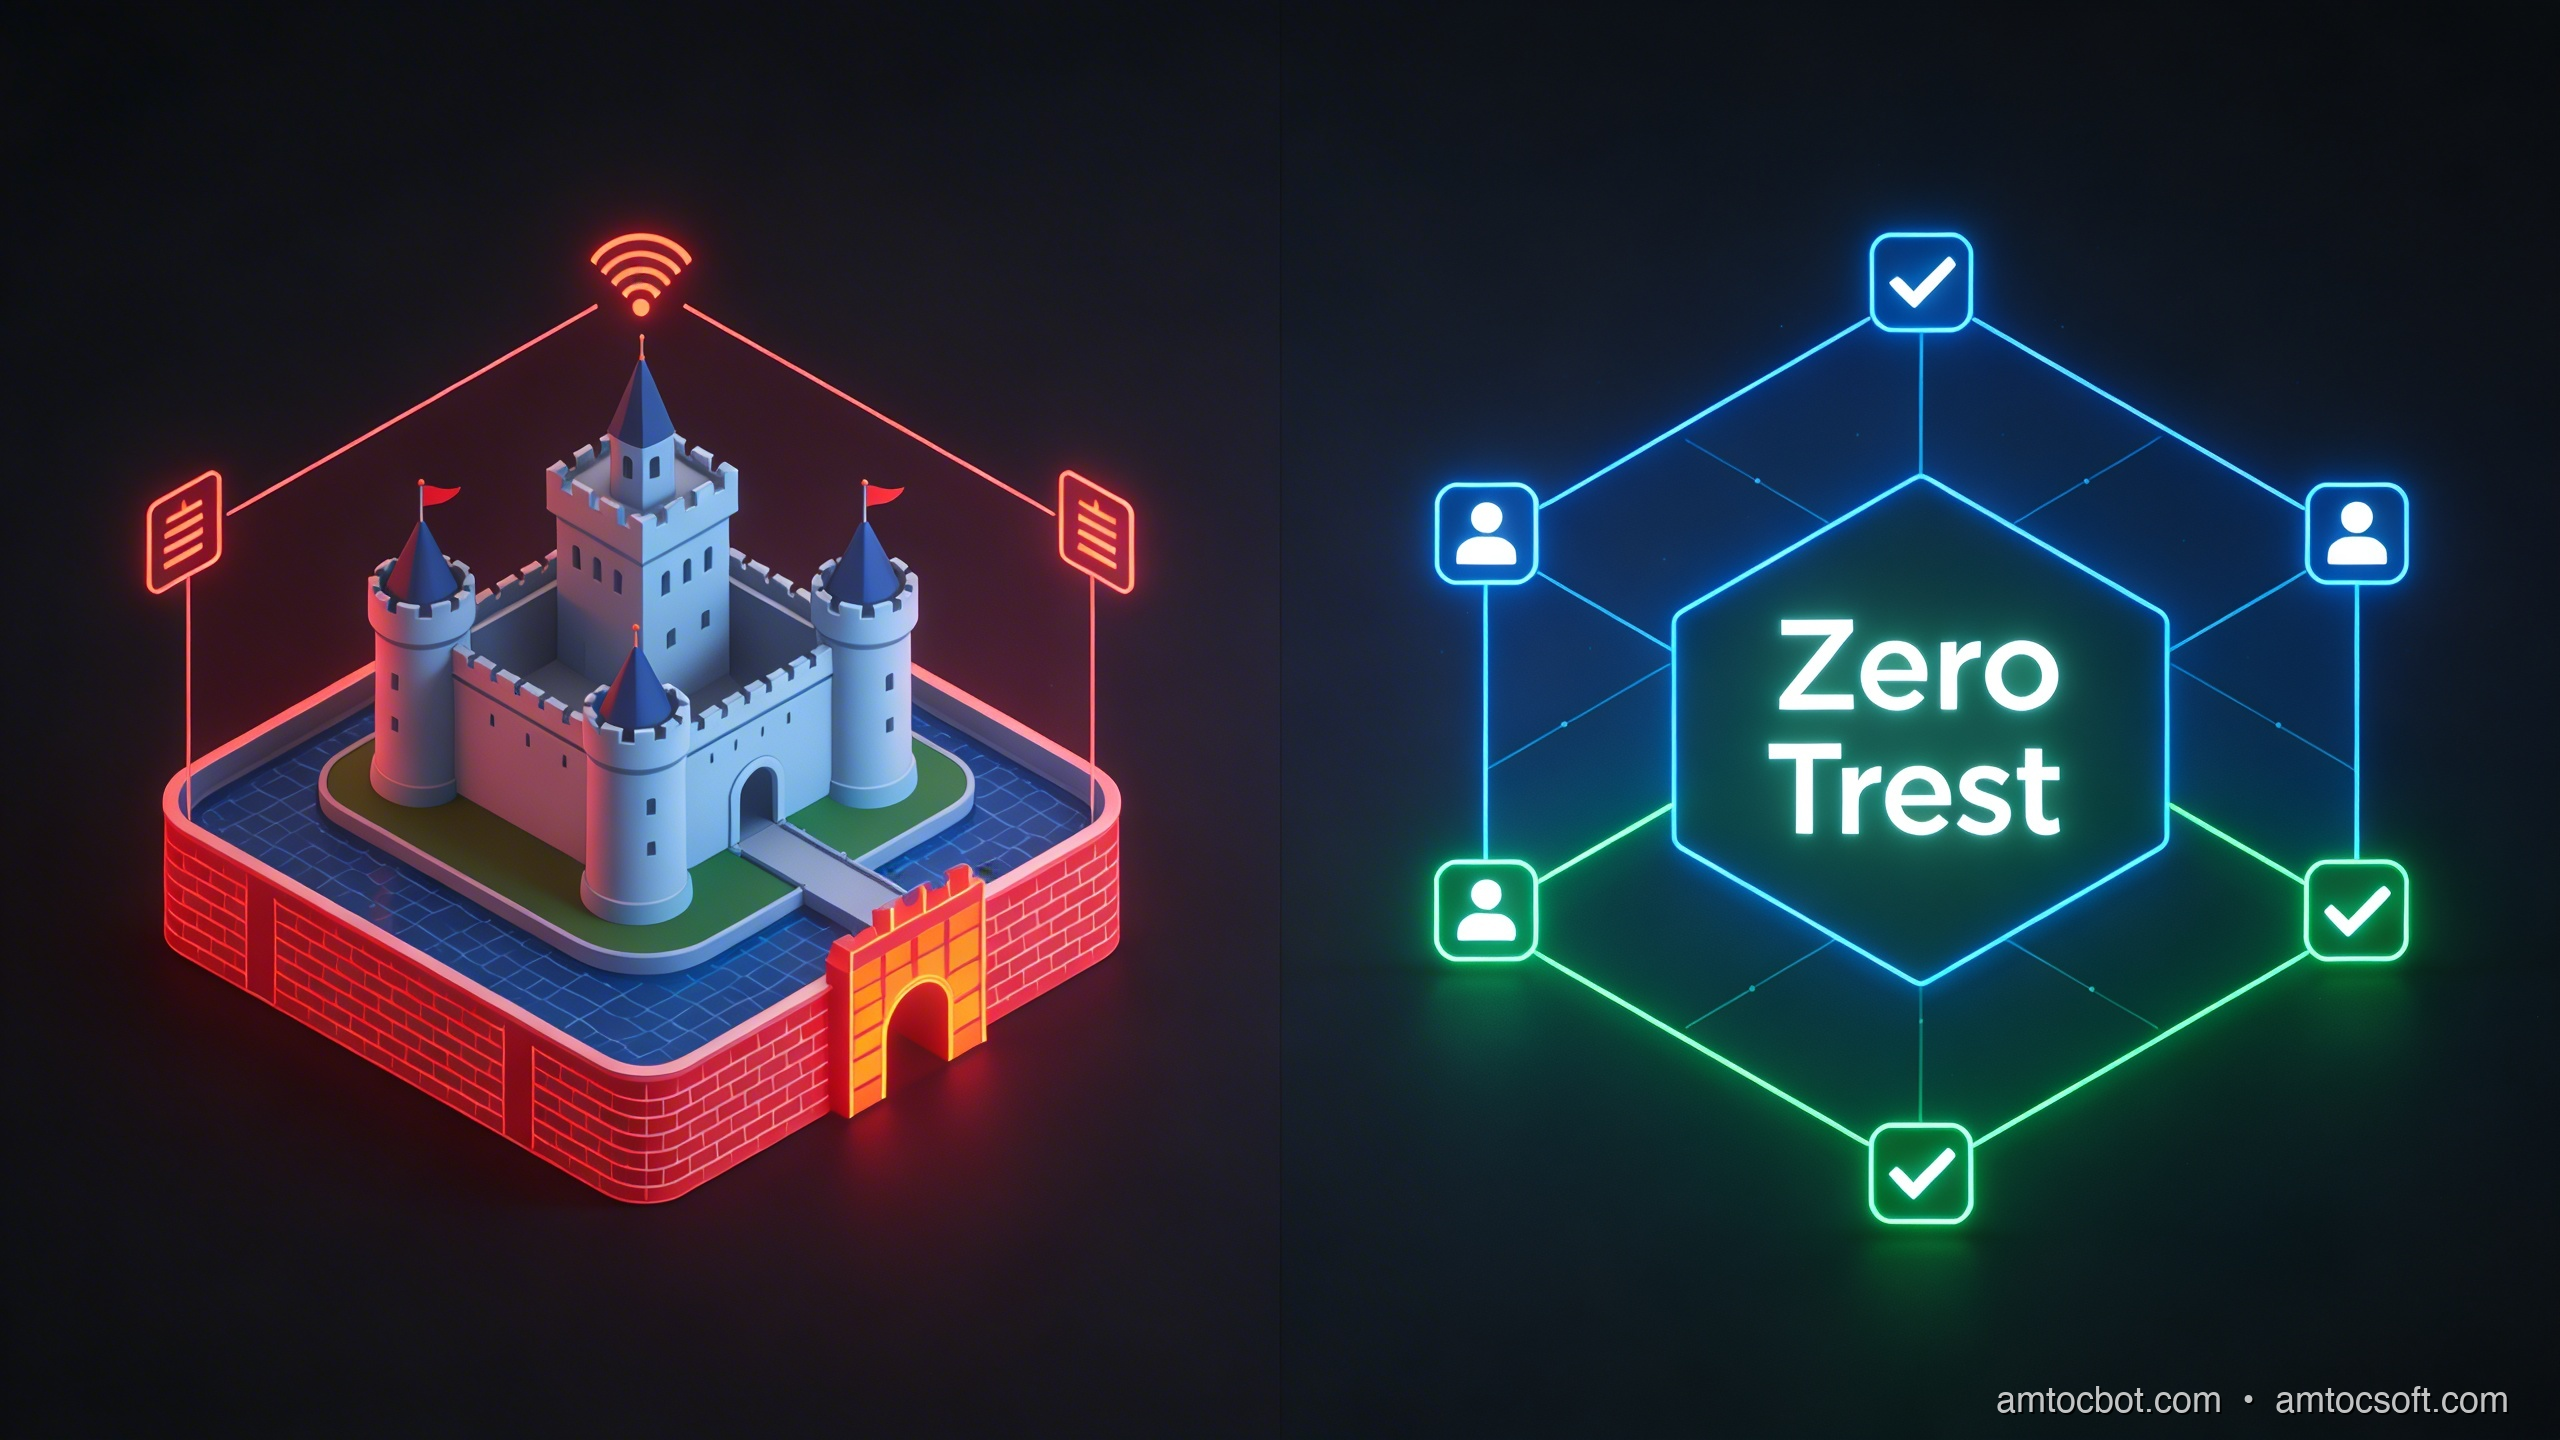
Architecture diagram: Zero Trust vs perimeter model — identity verification at each service boundary

How It Works: The Technical Building Blocks

Zero Trust is not a product you buy. It is a set of technical patterns you implement across your infrastructure and code. Let us walk through the key mechanisms.

Workload Identity with SPIFFE and SPIRE

The first problem to solve is: how does a service prove who it is? Usernames and passwords are unsuitable for machine-to-machine communication. Static API keys are better but require manual rotation and out-of-band distribution. The modern answer is workload identity — cryptographic attestation of what a piece of software is, based on verifiable properties of its runtime environment.

SPIFFE (Secure Production Identity Framework For Everyone) is the open standard for workload identity. A SPIFFE identity is a URI in the form spiffe://trust-domain/path — for example, spiffe://prod.example.com/payments-service. This URI is embedded in an X.509 certificate called an SVID (SPIFFE Verifiable Identity Document).

SPIRE is the reference implementation of SPIFFE. A SPIRE server manages the trust domain and issues SVIDs. SPIRE agents run on each node, attest workloads using platform-specific mechanisms (Kubernetes service account tokens, AWS instance identity documents, TPM attestation), and deliver short-lived SVIDs to workloads via a Unix domain socket.

The key properties of this model:

  • SVIDs are short-lived (typically 1 hour or less), so a compromised certificate has a small window of validity.
  • Attestation is automatic — a new pod gets an identity without a human issuing a certificate manually.
  • The trust domain is cryptographically rooted, so certificates cannot be forged.

Once your services have SPIFFE identities, you can use those identities in mTLS connections, OIDC token exchange, and policy evaluation.

Mutual TLS (mTLS)

Standard TLS authenticates the server to the client. The client verifies that the server's certificate was issued by a trusted CA and matches the domain it is connecting to. The server knows nothing verifiable about the client.

Mutual TLS adds client authentication. Both sides present certificates. Both sides verify the other's certificate against a trusted CA. The result is a cryptographically authenticated channel where both parties know exactly who they are talking to.

For service-to-service communication in a Zero Trust model, mTLS is the baseline. When the payments service calls the inventory service, the inventory service does not just trust the call because it came from an internal IP. It verifies the caller's SPIFFE SVID, confirms it maps to an identity it is permitted to accept requests from, and only then processes the request.

In a service mesh (Istio, Linkerd, Consul Connect), mTLS happens transparently in the sidecar proxy. Application code does not need to handle certificate management directly. But understanding what is happening underneath is essential for writing correct authorization policies and debugging failures.

JWT Token Validation

For user-facing APIs, the equivalent of mTLS is rigorous JWT validation. A JSON Web Token carries claims about the authenticated user, signed by an identity provider. The API must verify the signature, validate the claims, and enforce authorization before processing any request.

JWT validation sounds simple but has many pitfalls:

  • Algorithm confusion attacks: An attacker manipulates the alg header to none or switches from RS256 to HS256, using the public key as the HMAC secret. Libraries that respect the alg header field from the token rather than requiring a specific algorithm are vulnerable.
  • Audience and issuer validation: A JWT from your staging environment signed by your staging IdP should never be accepted by your production API. Always validate aud and iss claims explicitly.
  • Expiry validation: Always check exp. Do not accept tokens without an expiry claim.
  • Key rotation: Your validation logic must be able to fetch updated JWKS without restarting the service.

OAuth 2.0 and Token Exchange

For service-to-service calls that cross trust boundaries — calling an external API, or calling an internal API on behalf of a user — OAuth 2.0 token exchange (RFC 8693) allows a service to trade one token for a scoped token specific to the downstream call. This maintains the least-privilege principle: the downstream service receives a token scoped only to what it needs, not the original user's full credential.

Policy-Based Authorization

Authentication proves identity. Authorization determines what that identity is permitted to do. In a Zero Trust model, authorization should be explicit, centralized (or consistently distributed), and evaluated per request — not baked into application code as ad-hoc if/else checks.

Open Policy Agent (OPA) is the most widely adopted policy engine for this. You write authorization policy in Rego, a purpose-built policy language. At request time, your service sends a structured input document to OPA (or the embedded library) and receives a decision. OPA decouples policy from application code, allows policy to be versioned and tested independently, and can be audited.

Cedar (from AWS) is a newer alternative with a focus on formal verification and performance. It uses a different policy language with a strong type system and is designed for high-throughput authorization decisions.

flowchart TD A[Incoming Request] --> B{Has valid token?} B -- No --> C[Return 401 Unauthorized] B -- Yes --> D{Token signature valid?} D -- No --> C D -- Yes --> E{Token not expired?} E -- No --> F[Return 401 Token Expired] E -- Yes --> G{Issuer and audience match?} G -- No --> C G -- Yes --> H[Extract identity claims] H --> I{OPA policy check} I -- Deny --> J[Return 403 Forbidden] I -- Allow --> K[Process request] K --> L[Return 200 with response] style C fill:#ff4444,color:#fff style F fill:#ff4444,color:#fff style J fill:#ff8800,color:#fff style L fill:#22aa44,color:#fff

Implementation Guide

Let us write the code. All examples use Python with FastAPI, but the patterns apply to any stack.

1. JWT Validation Middleware

This middleware validates every incoming request, extracts verified claims, and attaches them to the request context. Application route handlers can then access the verified identity without repeating validation logic.

"""
jwt_middleware.py — Zero Trust JWT validation for FastAPI services.

Validates RS256-signed JWTs from an OIDC-compatible identity provider.
Fetches public keys from the JWKS endpoint and caches them with rotation support.
"""

import time
import httpx
import jwt
from jwt import PyJWKClient, InvalidTokenError, ExpiredSignatureError
from fastapi import Request, HTTPException, status
from fastapi.responses import JSONResponse
from starlette.middleware.base import BaseHTTPMiddleware
from functools import lru_cache
from typing import Optional


# Configuration — load from environment in production
JWKS_URI = "https://auth.example.com/.well-known/jwks.json"
EXPECTED_ISSUER = "https://auth.example.com/"
EXPECTED_AUDIENCE = "api://payments-service"

# Paths that bypass JWT validation (health checks, metrics endpoints)
PUBLIC_PATHS = {"/health", "/metrics", "/ready"}


class JWTValidationMiddleware(BaseHTTPMiddleware):
    """
    Middleware that validates JWT Bearer tokens on every protected request.

    Uses PyJWKClient for automatic key rotation: it fetches the JWKS from
    the identity provider and caches signing keys, re-fetching when an
    unknown key ID (kid) is encountered.
    """

    def __init__(self, app, jwks_uri: str = JWKS_URI):
        super().__init__(app)
        # PyJWKClient handles JWKS fetching, caching, and rotation automatically.
        # lifespan_seconds controls how long a cached key is trusted before
        # re-fetching — set to 3600 (1 hour) to handle routine key rotation.
        self.jwks_client = PyJWKClient(
            jwks_uri,
            lifespan_seconds=3600,
            headers={"User-Agent": "payments-service/1.0"},
        )

    async def dispatch(self, request: Request, call_next):
        # Skip validation for public paths
        if request.url.path in PUBLIC_PATHS:
            return await call_next(request)

        # Extract Bearer token from Authorization header
        token = self._extract_bearer_token(request)
        if token is None:
            return JSONResponse(
                status_code=status.HTTP_401_UNAUTHORIZED,
                content={"error": "missing_token", "detail": "Authorization header required"},
                headers={"WWW-Authenticate": "Bearer"},
            )

        # Validate and decode the token
        claims = self._validate_token(token)
        if claims is None:
            return JSONResponse(
                status_code=status.HTTP_401_UNAUTHORIZED,
                content={"error": "invalid_token", "detail": "Token validation failed"},
                headers={"WWW-Authenticate": "Bearer error=\"invalid_token\""},
            )

        # Attach verified claims to request state for use by route handlers
        request.state.identity = claims
        request.state.subject = claims.get("sub")
        request.state.scopes = set(claims.get("scope", "").split())

        return await call_next(request)

    def _extract_bearer_token(self, request: Request) -> Optional[str]:
        """Extract the raw JWT from the Authorization: Bearer <token> header."""
        auth_header = request.headers.get("Authorization", "")
        if not auth_header.startswith("Bearer "):
            return None
        token = auth_header[len("Bearer "):]
        return token if token else None

    def _validate_token(self, token: str) -> Optional[dict]:
        """
        Full JWT validation:
        1. Fetch the correct signing key from JWKS (by kid in token header)
        2. Verify RS256 signature — never accept 'none' or HS256
        3. Validate expiry (exp), issuer (iss), and audience (aud)
        """
        try:
            # Get the signing key matching the token's kid header.
            # This raises PyJWKClientError if the key is not found,
            # which triggers a JWKS re-fetch automatically.
            signing_key = self.jwks_client.get_signing_key_from_jwt(token)

            claims = jwt.decode(
                token,
                signing_key.key,
                algorithms=["RS256"],  # Explicitly whitelist — never accept 'none'
                audience=EXPECTED_AUDIENCE,
                issuer=EXPECTED_ISSUER,
                options={
                    "require": ["exp", "iat", "sub", "iss", "aud"],
                    "verify_exp": True,
                    "verify_iat": True,
                },
            )
            return claims

        except ExpiredSignatureError:
            # Log separately — useful for debugging clock skew issues
            return None
        except InvalidTokenError:
            return None
        except Exception:
            # Catch-all for unexpected errors (network issues fetching JWKS, etc.)
            return None


# Example route handler using verified identity from middleware
from fastapi import FastAPI, Depends

app = FastAPI()
app.add_middleware(JWTValidationMiddleware)


def require_scope(required_scope: str):
    """Dependency that checks for a specific OAuth scope in the verified token."""
    def check_scope(request: Request):
        if required_scope not in request.state.scopes:
            raise HTTPException(
                status_code=status.HTTP_403_FORBIDDEN,
                detail=f"Required scope '{required_scope}' not present",
            )
        return request.state.identity
    return check_scope


@app.get("/payments/{payment_id}")
async def get_payment(
    payment_id: str,
    identity=Depends(require_scope("payments:read")),
):
    """
    This route handler only runs if:
    - A valid, non-expired JWT was presented
    - The token has the 'payments:read' scope
    The identity dict contains verified claims (sub, email, roles, etc.)
    """
    return {
        "payment_id": payment_id,
        "requested_by": identity["sub"],
    }

2. mTLS Client Certificate Verification

When services communicate with each other, mTLS provides cryptographic authentication on both sides. In Python, this is typically handled at the server level by configuring the TLS termination to require and verify client certificates. Here is how to configure it in a FastAPI service running behind uvicorn, and how to add application-level verification of the SPIFFE identity in the certificate.

"""
mtls_server.py — Configure mTLS with SPIFFE identity verification.

This module shows two layers of mTLS enforcement:
1. TLS-level: uvicorn requires a client certificate signed by our CA.
2. Application-level: We extract and verify the SPIFFE URI SAN from the cert.

In a service mesh (Istio/Linkerd), layer 1 is handled by the sidecar proxy.
Layer 2 should still be done in application code for defense in depth.
"""

import ssl
import uvicorn
from fastapi import Request, HTTPException, status
from cryptography import x509
from cryptography.hazmat.backends import default_backend
from cryptography.x509.oid import ExtensionOID
from typing import Optional
import re


# Allowed SPIFFE identities that may call this service.
# In production, load from a policy store or environment config.
ALLOWED_CALLER_IDENTITIES = {
    "spiffe://prod.example.com/orders-service",
    "spiffe://prod.example.com/api-gateway",
}

TRUST_DOMAIN = "prod.example.com"


def extract_spiffe_id_from_cert(cert_der: bytes) -> Optional[str]:
    """
    Parse the DER-encoded client certificate and extract the SPIFFE ID
    from the Subject Alternative Name (SAN) URI extension.

    SPIFFE SVIDs embed the workload identity as a URI SAN in the form:
      spiffe://trust-domain/workload-path

    Returns the SPIFFE URI string, or None if not present.
    """
    try:
        cert = x509.load_der_x509_certificate(cert_der, default_backend())
        san_extension = cert.extensions.get_extension_for_oid(
            ExtensionOID.SUBJECT_ALTERNATIVE_NAME
        )
        san = san_extension.value

        # Extract URI-type SANs and find the SPIFFE one
        for uri in san.get_values_for_type(x509.UniformResourceIdentifier):
            if uri.startswith("spiffe://"):
                return uri

        return None
    except Exception:
        return None


def verify_spiffe_identity(spiffe_id: Optional[str]) -> bool:
    """
    Verify that the presented SPIFFE ID:
    1. Belongs to our trust domain (not a foreign SPIRE instance)
    2. Is in the allowed callers list for this service

    This is the authorization step — even a valid mTLS connection from
    a legitimate service should be rejected if it is not authorized to
    call this specific service.
    """
    if spiffe_id is None:
        return False

    # Validate trust domain to prevent cross-domain identity confusion
    expected_prefix = f"spiffe://{TRUST_DOMAIN}/"
    if not spiffe_id.startswith(expected_prefix):
        return False

    return spiffe_id in ALLOWED_CALLER_IDENTITIES


# FastAPI middleware to enforce SPIFFE identity at the application layer
from starlette.middleware.base import BaseHTTPMiddleware
from starlette.responses import JSONResponse


class SPIFFEIdentityMiddleware(BaseHTTPMiddleware):
    """
    Extracts and verifies the SPIFFE identity from the mTLS client certificate.

    NOTE: This middleware requires that uvicorn/the TLS terminator is configured
    to pass the client certificate to the application. When running behind a
    reverse proxy or service mesh, the proxy typically passes the cert via the
    X-Forwarded-Client-Cert header (XFCC) — adjust extraction accordingly.
    """

    async def dispatch(self, request: Request, call_next):
        # In direct uvicorn mTLS, the client cert is accessible via
        # request.scope["transport"].get_extra_info("peercert").
        # For XFCC header (Envoy/Istio), parse from the header value.

        spiffe_id = self._get_spiffe_id_from_request(request)

        if not verify_spiffe_identity(spiffe_id):
            return JSONResponse(
                status_code=status.HTTP_403_FORBIDDEN,
                content={
                    "error": "unauthorized_caller",
                    "detail": f"SPIFFE identity '{spiffe_id}' is not authorized",
                },
            )

        # Attach verified workload identity to request state
        request.state.caller_spiffe_id = spiffe_id
        return await call_next(request)

    def _get_spiffe_id_from_request(self, request: Request) -> Optional[str]:
        """
        Extract SPIFFE ID from XFCC header (Istio/Envoy format).

        The X-Forwarded-Client-Cert header in Envoy contains the client cert
        fields in a structured format. We extract the URI SAN from it.

        Example XFCC value:
          Hash=abc123;URI=spiffe://prod.example.com/orders-service;...
        """
        xfcc = request.headers.get("X-Forwarded-Client-Cert", "")
        if not xfcc:
            return None

        # Parse URI field from XFCC header
        uri_match = re.search(r'URI=([^;,]+)', xfcc)
        if uri_match:
            return uri_match.group(1)

        return None


def create_mtls_ssl_context(
    cert_path: str,
    key_path: str,
    ca_cert_path: str,
) -> ssl.SSLContext:
    """
    Create an SSL context for uvicorn that:
    - Presents our service certificate to clients
    - Requires clients to present a certificate (CERT_REQUIRED)
    - Verifies client certificates against our CA bundle (SPIRE CA)
    """
    ctx = ssl.SSLContext(ssl.PROTOCOL_TLS_SERVER)
    ctx.load_cert_chain(certfile=cert_path, keyfile=key_path)
    ctx.load_verify_locations(cafile=ca_cert_path)
    ctx.verify_mode = ssl.CERT_REQUIRED  # Reject connections without a client cert
    ctx.minimum_version = ssl.TLSVersion.TLSv1_3  # Enforce TLS 1.3 minimum
    return ctx


# To run with mTLS:
# ssl_ctx = create_mtls_ssl_context(
#     cert_path="/run/spiffe/svid/cert.pem",
#     key_path="/run/spiffe/svid/key.pem",
#     ca_cert_path="/run/spiffe/bundle/bundle.crt",
# )
# uvicorn.run(app, host="0.0.0.0", port=8443, ssl=ssl_ctx)

3. Policy-Based Authorization with OPA

Authentication and identity verification tell you who is making the request. Authorization policy tells you whether they are allowed to do what they are asking. Rather than embedding authorization logic as if/else conditions in route handlers, use a policy engine that can be managed, versioned, and tested independently.

"""
opa_authz.py — Policy-based authorization using Open Policy Agent.

Sends a structured authorization request to OPA and uses the decision
to allow or deny the incoming API request. Policy is defined in Rego
files managed separately from application code.
"""

import httpx
from fastapi import Request, HTTPException, status, Depends
from typing import Any, Optional
import logging

logger = logging.getLogger(__name__)

# OPA server endpoint — in production, OPA runs as a sidecar or local agent
OPA_URL = "http://localhost:8181/v1/data/payments/authz/allow"
OPA_TIMEOUT_SECONDS = 0.1  # Keep authorization decisions fast — 100ms max


class OPAAuthorizationError(Exception):
    pass


async def check_opa_policy(
    input_document: dict,
    opa_url: str = OPA_URL,
) -> bool:
    """
    Send an authorization request to OPA and return the boolean decision.

    OPA evaluates the request against the loaded Rego policy and returns
    a JSON response. We check the 'result' field for the allow decision.

    The input_document should contain everything the policy needs to make
    a decision: identity claims, the action being performed, and the resource.
    """
    try:
        async with httpx.AsyncClient(timeout=OPA_TIMEOUT_SECONDS) as client:
            response = await client.post(
                opa_url,
                json={"input": input_document},
            )
            response.raise_for_status()
            result = response.json()
            # OPA returns {"result": true} or {"result": false}
            return bool(result.get("result", False))

    except httpx.TimeoutException:
        # On OPA timeout, fail closed — deny the request
        logger.error("OPA authorization timeout — denying request for safety")
        return False
    except httpx.HTTPError as e:
        logger.error(f"OPA HTTP error: {e} — denying request")
        return False


def build_authz_input(
    request: Request,
    resource_id: Optional[str] = None,
) -> dict:
    """
    Construct the input document sent to OPA for evaluation.

    The structure of this document must match what the Rego policy expects.
    Include everything the policy might need: identity, action, resource, context.
    """
    identity = getattr(request.state, "identity", {})
    caller_service = getattr(request.state, "caller_spiffe_id", None)

    return {
        "subject": {
            "user_id": identity.get("sub"),
            "roles": identity.get("roles", []),
            "scopes": list(getattr(request.state, "scopes", set())),
            "service": caller_service,
        },
        "action": {
            "method": request.method,
            "path": request.url.path,
        },
        "resource": {
            "type": "payment",
            "id": resource_id,
        },
        "context": {
            "ip": request.client.host if request.client else None,
            "user_agent": request.headers.get("User-Agent"),
        },
    }


def require_policy_allow(resource_id_param: Optional[str] = None):
    """
    FastAPI dependency factory that enforces OPA policy for a route.

    Usage:
        @app.delete("/payments/{payment_id}")
        async def delete_payment(
            payment_id: str,
            _=Depends(require_policy_allow("payment_id")),
        ):
            ...
    """
    async def enforce(request: Request):
        input_doc = build_authz_input(
            request,
            resource_id=request.path_params.get(resource_id_param) if resource_id_param else None,
        )

        allowed = await check_opa_policy(input_doc)

        if not allowed:
            logger.warning(
                f"OPA denied {request.method} {request.url.path} "
                f"for subject {input_doc['subject']}"
            )
            raise HTTPException(
                status_code=status.HTTP_403_FORBIDDEN,
                detail="Policy evaluation denied this request",
            )

    return enforce


# Example Rego policy (payments/authz.rego — managed in a separate policy repo):
#
# package payments.authz
#
# default allow = false
#
# # Admins can do anything
# allow {
#     "admin" in input.subject.roles
# }
#
# # Service-to-service: orders-service can read payments
# allow {
#     input.subject.service == "spiffe://prod.example.com/orders-service"
#     input.action.method == "GET"
# }
#
# # Users can read their own payments if they have the right scope
# allow {
#     input.action.method == "GET"
#     "payments:read" in input.subject.scopes
# }
#
# # Users cannot delete payments — even with admin role, require 2FA context
# allow {
#     input.action.method == "DELETE"
#     "admin" in input.subject.roles
#     input.context.mfa_verified == true
# }


# Route using full Zero Trust stack: JWT validation + mTLS + OPA
from fastapi import FastAPI
app = FastAPI()


@app.delete(
    "/payments/{payment_id}",
    dependencies=[Depends(require_policy_allow("payment_id"))],
)
async def delete_payment(payment_id: str, request: Request):
    """
    This route is protected by three layers:
    1. JWTValidationMiddleware — validates the Bearer token
    2. SPIFFEIdentityMiddleware — verifies caller's mTLS certificate
    3. OPA policy — evaluates fine-grained authorization rules
    """
    return {"deleted": payment_id, "by": request.state.identity.get("sub")}
sequenceDiagram participant C as Client Service participant GW as API Gateway participant SV as Payments Service participant OPA as OPA Sidecar participant DB as Database C->>GW: POST /payments (JWT + mTLS cert) GW->>GW: Verify JWT signature & claims GW->>GW: Validate mTLS client cert (SPIFFE) GW->>SV: Forward request (XFCC header set) SV->>SV: Extract SPIFFE ID from XFCC SV->>SV: Verify SPIFFE ID in allowlist SV->>OPA: POST /v1/data/payments/authz/allow OPA->>OPA: Evaluate Rego policy OPA-->>SV: {"result": true} SV->>DB: Execute query with verified identity DB-->>SV: Result SV-->>GW: 200 OK GW-->>C: 200 OK Note over C,DB: Every hop is authenticated and authorized independently

Comparison and Tradeoffs

Traditional VPN vs Zero Trust

The VPN model was designed to extend a trusted network to remote users. It solves the "employee is not in the office" problem by putting them back on the internal network. Zero Trust solves a fundamentally different problem: it treats the network itself as untrusted, regardless of where you are connecting from.

Dimension Traditional VPN / Perimeter Zero Trust
Trust model Trust by network location Trust by verified identity only
Authentication Single point at VPN gateway Per-request, per-service
Lateral movement Unrestricted inside the perimeter Limited by per-service authorization
Credential scope VPN credential grants broad access Tokens/certs scoped to specific services
Breach blast radius High — attacker has full internal access Low — compromise limited to one workload's permissions
Auditability Coarse-grained (who was on VPN, when) Fine-grained (who called what, with what identity, what was decided)
Developer experience Connect once, access everything Additional headers/tokens per service (mitigated by service mesh)
Operational complexity Simple once set up Higher — SPIRE, OPA, JWKS rotation, mTLS all require ops investment
Performance VPN latency at edge only Latency at every service boundary (typically 1-5ms per hop)

Security Model Comparison

Pattern Threat it addresses Limitation
mTLS Service impersonation, man-in-the-middle Does not control what an authenticated service is allowed to do
JWT validation Forged user identity Does not authenticate the calling service
SPIFFE/SPIRE Workload identity spoofing, static credentials Requires SPIRE infrastructure investment
OPA policy Over-broad authorization, inconsistent access control Policy correctness depends on Rego code quality and test coverage
Service mesh (Istio) mTLS complexity, certificate management Sidecar overhead (CPU and memory per pod)

When to Use a Service Mesh vs Application-Level mTLS

A service mesh (Istio, Linkerd, Consul Connect) implements mTLS and workload identity transparently at the infrastructure layer. Application code does not change. This is ideal for organizations with many services and dedicated platform engineering capacity.

Application-level mTLS and SPIFFE integration is appropriate when:
- You have a small number of services and cannot absorb the operational complexity of a full service mesh.
- You need fine-grained control that goes beyond what mesh-level policy can express.
- You are running on infrastructure where sidecar injection is impractical (e.g., Lambda, managed container services without sidecar support).

A service mesh does not eliminate the need for application-level authorization. Mesh-level policy is coarse-grained (can service A talk to service B at all). OPA or Cedar adds fine-grained authorization (can service A call the DELETE /payments/{id} endpoint on service B for payment ID 12345, given the current user context).

Comparison visual: service mesh mTLS vs application-level mTLS and OPA authorization layers
graph LR subgraph "Traditional Perimeter" FW[Firewall] --> |"Trusted internal traffic"| S1[Service A] FW --> S2[Service B] FW --> S3[Service C] S1 --> |"No auth needed"| S2 S2 --> |"No auth needed"| S3 end subgraph "Zero Trust" GW2[API Gateway] --> |"JWT validated"| SA[Service A
SPIFFE ID] SA --> |"mTLS + OPA check"| SB[Service B
SPIFFE ID] SB --> |"mTLS + OPA check"| SC[Service C
SPIFFE ID] SPIRE[SPIRE Server] -.->|"Issues SVID"| SA SPIRE -.->|"Issues SVID"| SB SPIRE -.->|"Issues SVID"| SC OPA2[OPA Policy] -.->|"Auth decisions"| SA OPA2 -.->|"Auth decisions"| SB OPA2 -.->|"Auth decisions"| SC end style FW fill:#cc3333,color:#fff style GW2 fill:#2266cc,color:#fff style SPIRE fill:#226622,color:#fff style OPA2 fill:#226622,color:#fff

Production Considerations

Certificate Rotation

Short-lived SVIDs are a feature, not a limitation, but they require your services to handle rotation gracefully. SPIRE agents automatically renew SVIDs before expiry and deliver the new credential via the Workload API. Your services need to:

  • Watch the Workload API socket for updates rather than reading the certificate once at startup. The SPIFFE Workload API provides a streaming gRPC interface that pushes updates automatically.
  • Not cache TLS connections indefinitely. Connection pools should respect certificate expiry. A connection established with an old certificate should be torn down and re-established after rotation.
  • Test rotation in staging. Set a very short SVID TTL (5 minutes) in staging and run load tests during rotation events to catch issues before production.

Key Management

SPIRE server is a critical piece of infrastructure. Its signing keys must be protected. In production:

  • Run SPIRE server with an external key manager — AWS KMS or HashiCorp Vault — rather than storing signing keys on disk.
  • Deploy SPIRE server in an HA configuration with an external database backend (PostgreSQL).
  • Treat the SPIRE server's availability as equivalent to your authentication infrastructure — if SPIRE is down and SVIDs expire, services lose the ability to authenticate to each other.

For JWT signing keys managed by your IdP (Auth0, Keycloak, Okta), ensure your JWKS fetching logic handles key rotation without service restarts. The PyJWKClient implementation shown earlier does this automatically by re-fetching when an unknown kid is encountered.

Performance Overhead

Zero Trust adds latency at every service boundary. Understanding the budget:

  • JWKS fetch and JWT validation: Negligible after the first request — signing keys are cached in memory. Budget 0.1-0.5ms per token validation with a warm cache.
  • mTLS handshake: TLS 1.3 with session resumption (tickets or session IDs) reduces handshake overhead to one round trip for resumed sessions. For new connections, budget 1-2ms for the handshake.
  • OPA policy evaluation: 1-5ms for most policies when OPA runs as a sidecar (local network call). With the embedded Go library (github.com/open-policy-agent/opa/rego), evaluation drops to under 1ms. The Python opa-python-client library adds network overhead — prefer the sidecar model.
  • Istio sidecar (Envoy): Adds 1-3ms per hop on average, 5-10ms at P99 under load, with 50-100MB memory overhead per pod.

For most API services, these overheads are negligible compared to database query times and business logic processing. The exception is high-frequency internal service calls (tens of thousands per second per service) where connection pool management and session resumption become critical.

Monitoring and Anomaly Detection

Zero Trust generates rich telemetry. Use it:

  • Log every authorization decision from OPA — allowed and denied. Denied requests are signals of misconfiguration, attempted lateral movement, or bugs.
  • Alert on SPIFFE attestation failures — a workload that cannot get a certificate is likely a deployment issue, but a sustained pattern of failures from unexpected nodes can indicate an attack.
  • Trace request identity across service boundaries with distributed tracing. Include the SPIFFE ID and JWT subject in trace attributes so you can reconstruct the full identity chain for any request.
  • Set SLOs on certificate renewal latency. If SVIDs are not renewed with sufficient buffer before expiry, services will start rejecting each other's connections.

Conclusion

The network perimeter as a security boundary is gone. Distributed systems, remote work, and cloud-native infrastructure have dismantled it, and no amount of VPN tunnel engineering will reassemble it. The question is not whether to move to a Zero Trust model — it is how to get there incrementally without breaking production.

The path is practical and well-defined. Start with JWT validation at your API gateway and standardize on it across all services. Move to SPIFFE/SPIRE for workload identity as you scale your service mesh — or adopt Istio or Linkerd to get mTLS for free at the infrastructure layer. Add OPA for authorization logic that is too complex or too important to live in application if/else blocks. Each step independently improves your security posture.

The code in this post gives you working starting points: a FastAPI middleware that handles JWT validation correctly (including algorithm whitelist enforcement, JWKS rotation, and claim validation), an mTLS setup with SPIFFE identity extraction from both direct TLS and Envoy's XFCC header, and an OPA integration pattern that keeps authorization decisions fast and fails closed on timeout.

Zero Trust is not a product you install on Tuesday and call done. It is an architectural discipline — a continuous process of making every assumption about identity and access explicit, verifiable, and auditable. The developers who understand it will build systems that are resilient to the breach scenarios that are inevitable in any large distributed environment. The ones who do not will continue to rely on a moat that has already been drained.

The perimeter is gone. Identity is what you have left. Build from there.


Next in the API Security series: Rate Limiting AI Agents: Protecting APIs from Intelligent Abuse.

About the Author

Toc Am

Founder of AmtocSoft. Writing practical deep-dives on AI engineering, cloud architecture, and developer tooling. Previously built backend systems at scale. Reviews every post published under this byline.

LinkedIn X / Twitter

Published: 2026-05-07 · Written with AI assistance, reviewed by Toc Am.

Get These In Your Inbox

Weekly deep-dives on AI engineering, no fluff. Join the newsletter →

Subscribe (free)

Or grab the book ($39, ~100 pages) · Buy me a coffee

Buy Me a Coffee · 🔔 YouTube · 💼 LinkedIn · 🐦 X/Twitter
Attention Is All You Need, Explained Simply

We published a plain-language walkthrough of the 2017 transformer paper — queries, keys, values, multi-head attention, and why no-recurrence...