Showing posts with label Python. Show all posts

Tuesday, April 14, 2026

TypeScript Dethroned Python: Why It's Now the Most Used Language on GitHub

Hero image showing TypeScript and Python logos with a trending upward chart

Introduction

For years, the language leaderboards felt settled. Python owned the AI/ML space and beginner education. JavaScript owned the web. Java owned enterprise. And the rankings fluctuated, but the overall structure was stable.

Then in 2024, something shifted. TypeScript — the statically-typed superset of JavaScript that Microsoft shipped in 2012 — crossed Python to become the most-used language on GitHub by repository count. By late 2025, the gap had widened. Pull requests, contributors, and ecosystem growth all pointed in the same direction.

This is not a story about which language is "better." Python isn't going anywhere — it remains dominant in data science, machine learning research, scripting, and beginners' education, and it will for the foreseeable future. This is a story about why TypeScript is growing faster than any major language in the ecosystem, what changed, and what it means for developers making technology choices in 2026.

TypeScript vs Python adoption chart

What TypeScript Actually Is

TypeScript is not a replacement for JavaScript. It compiles to JavaScript. Every valid JavaScript program is a valid TypeScript program. TypeScript adds one thing on top of JavaScript: a static type system.

// JavaScript — no type information
function calculateInterest(principal, rate, years) {
  return principal * rate * years;
}

// TypeScript — types make intent explicit and errors visible at compile time
function calculateInterest(
  principal: number, 
  rate: number, 
  years: number
): number {
  return principal * rate * years;
}

// TypeScript catches this at compile time — JavaScript only at runtime
calculateInterest("10000", 0.05, 3); // Error: Argument of type 'string' is not assignable to parameter of type 'number'

The type system catches entire categories of bugs before your code runs. The wrong type of value passed to a function. A property accessed on an object that might be null. An API response with a different shape than expected. In a dynamically typed language, these become runtime errors — exceptions in production. In TypeScript, they become compile-time errors — problems you see before you ever ship.

This is TypeScript's core value proposition. It's not about performance (TypeScript compiles to the same JavaScript that runs everywhere). It's about catching mistakes earlier, reasoning about code more confidently, and enabling editor tooling that makes large codebases navigable.

Why TypeScript Is Growing

The acceleration in TypeScript adoption has multiple contributing factors, but three are primary.

The Scale Problem Became Universal

TypeScript was originally designed for large JavaScript codebases where the lack of types became a maintenance burden. That context applied to Microsoft, Google, and large enterprises. Then the web expanded.

In 2015, a "large JavaScript codebase" meant 50,000+ lines at a major tech company. By 2024, startups with 5 engineers had frontend codebases that large. React applications grew into full SPAs with complex state management. Node.js backends handled enterprise business logic. The scale problem that TypeScript was built to solve became everyone's problem.

The AI Coding Tools Amplified the Gap

When AI coding assistants (Copilot, Cursor, Claude Code) generate code suggestions, they work better with TypeScript than with JavaScript. Type information gives the AI model more context: when you type user., the AI knows exactly what properties user has and can give more accurate completions. When you write a function signature with typed parameters, the AI understands what you're trying to do and generates better implementations.

This created a feedback loop: AI tools work better with TypeScript → developers who use AI tools prefer TypeScript → more TypeScript code in training data → AI tools get even better at TypeScript. The advantage compounded.

Framework Adoption Made It the Default

The major frameworks that developers use every day now ship with TypeScript support as the default, not an optional add-on.

Next.js: Create Next App prompts for TypeScript by default. The official documentation shows TypeScript examples first. The community expectation is TypeScript.

Angular: has used TypeScript as its primary language since version 2 in 2016. For Angular developers, TypeScript is not a choice — it's the baseline.

NestJS: the backend framework for Node.js that's closest in spirit to Spring Boot or ASP.NET, built entirely in TypeScript. Growing rapidly in enterprise Node.js adoption.

tRPC: type-safe RPC framework that uses TypeScript inference to ensure your frontend and backend stay in sync — impossible to implement without TypeScript.

Prisma: the ORM that generates a full TypeScript type for your database schema. Your query results are fully typed based on your actual database columns. This was a step-change improvement over working with untyped query results.

graph LR A[TypeScript adoption] --> B[AI tools work better] B --> C[Developer productivity ↑] C --> A A --> D[Frameworks default to TS] D --> E[New projects start in TS] E --> A A --> F[Ecosystem pressure] F --> G[Libraries add types] G --> H[TS projects less friction] H --> A

What TypeScript Does Better Than JavaScript

Types as Documentation

TypeScript types serve as machine-readable documentation that never goes out of date. A function signature like:

interface User {
  id: string;
  email: string;
  createdAt: Date;
  role: 'admin' | 'member' | 'viewer';
  subscription?: {
    plan: 'free' | 'pro' | 'enterprise';
    expiresAt: Date;
  };
}

async function updateUserRole(
  userId: string, 
  newRole: User['role'],
  requestedBy: User
): Promise<User> {
  // implementation
}

tells you exactly what the function accepts, what each parameter must look like, what it returns, and what states each field can be in — with compiler enforcement. In JavaScript, this information lives (if it lives at all) in a README that may or may not be current.

Refactoring at Scale

One of the most practical advantages: TypeScript makes large refactors safe. When you rename a function, change its signature, or restructure a data type, the TypeScript compiler immediately shows you every location that needs to be updated. In a JavaScript codebase, the equivalent is running the application and waiting for it to crash.

// Before: User.name was a string
interface User {
  name: string;
}

// After: Splitting into firstName and lastName
interface User {
  firstName: string;
  lastName: string;
  // name: string; ← removed
}

// TypeScript immediately shows every file referencing user.name
// as an error — you fix them all before merging

Advanced Type Patterns

TypeScript's type system has become sophisticated enough to model complex domain logic at the type level, catching logical errors before runtime:

// Discriminated unions model state machines at the type level
type PaymentState =
  | { status: 'pending' }
  | { status: 'processing'; startedAt: Date }
  | { status: 'completed'; completedAt: Date; transactionId: string }
  | { status: 'failed'; failedAt: Date; reason: string };

function handlePayment(payment: PaymentState) {
  switch (payment.status) {
    case 'completed':
      // TypeScript knows transactionId exists here
      sendReceipt(payment.transactionId);
      break;
    case 'failed':
      // TypeScript knows reason exists here
      logFailure(payment.reason, payment.failedAt);
      break;
  }
}

What Python Still Does Better

TypeScript's growth doesn't make Python obsolete. Python retains significant, durable advantages in specific domains.

AI and machine learning research: PyTorch, TensorFlow, JAX, Hugging Face transformers — the ML ecosystem is built in Python. Type annotations exist in Python (via mypy), but the ecosystem's momentum and tooling are deeply Python-centric. Researchers and data scientists who need to train models, run experiments, and write papers will use Python for the foreseeable future.

Data engineering and analysis: Pandas, NumPy, Polars, DuckDB, dbt, Jupyter notebooks — the data engineering stack is Python-native. The interactive nature of Jupyter and the exploration-oriented workflow of data analysis suits Python's syntax and ecosystem.

Scripting and automation: Python's readability and standard library make it the language of choice for scripts, automation, and system administration tasks. For a 50-line script that parses some files and sends an alert, TypeScript's compilation step is friction without benefit.

Scientific computing: SciPy, matplotlib, scikit-learn, and the broader scientific Python stack have no TypeScript equivalents that match their depth or adoption.

The right mental model: TypeScript is dominant where the product is a web service, API, or frontend application — the business logic layer of software. Python is dominant where the product is an analysis, a trained model, or a data pipeline.

graph TB subgraph "TypeScript Dominates" A[Web frontends] B[REST/GraphQL APIs] C[Full-stack applications] D[Real-time services] E[CLI tools with complex logic] end subgraph "Python Dominates" F[ML model training] G[Data analysis & notebooks] H[Scientific computing] I[Data pipelines & ETL] J[Scripting & automation] end subgraph "Both Viable" K[Backend microservices] L[AI application layer] M[Infrastructure tooling] end

The Myth of Python's AI Advantage in Application Development

There's a common misconception worth addressing: because the ML ecosystem is Python-centric, AI applications should be built in Python.

This confuses two different layers. The model training and inference layer (PyTorch, transformers, vLLM) is Python. The application layer that calls those models via API is not constrained to Python at all. In 2026, most production AI applications don't train their own models — they call Claude, GPT-4o, Gemini, or a fine-tuned model via HTTP API. That API call is equally natural from TypeScript, Go, Rust, or any other language.

The most common production architecture: TypeScript/Node.js (or Go, or Rust) application → HTTP call to AI inference endpoint → Python-based inference service. The TypeScript layer handles the product logic, user sessions, database access, and API routing. The Python layer handles model inference. Each language does what it's best at.

This pattern, sometimes called the "inference tier / application tier split," gives you the benefits of TypeScript's type safety, tooling, and ecosystem for the product code without sacrificing Python's dominance in the model layer.

Production Considerations

Migration paths: if you have an existing JavaScript codebase, TypeScript migration can be done incrementally. Start by adding "allowJs": true to your tsconfig.json — this lets TypeScript and JavaScript files coexist. Rename files to .ts one at a time, adding types as you go. The compiler will guide you with errors for each newly typed file.

TypeScript in the build pipeline: TypeScript adds a compilation step. For production, use tsc --noEmit for type checking and esbuild or swc for the actual compilation (they're dramatically faster than tsc for emit). Modern bundlers (Vite, Turbopack) handle this transparently.

tsconfig.json strictness settings: TypeScript's default settings are permissive for migration convenience. For new projects, enable strict mode from the start:

{
  "compilerOptions": {
    "strict": true,
    "noUncheckedIndexedAccess": true,
    "exactOptionalPropertyTypes": true
  }
}

strict: true enables the full set of type-checking rules including strictNullChecks (which catches the most bugs). The other two options catch additional classes of errors that strict misses.

Type-safe APIs end-to-end: the most powerful TypeScript architecture pattern in 2026 is end-to-end type safety — the same TypeScript types describe your database schema, your API contracts, and your frontend components. Tools like tRPC, Prisma, and Zod make this practical. When your database schema changes, the TypeScript compiler shows you every place in the frontend that needs to be updated.

Conclusion

TypeScript's rise to the top of the GitHub charts is not a trend — it's the outcome of a decade of gradual adoption reaching a tipping point. The type system that seemed like unnecessary overhead for small scripts turned out to be essential infrastructure for the complex applications that developers are now building.

Python isn't going anywhere. If you're working with data, training models, or writing analysis code, Python is still the right tool. But if you're building web services, APIs, full-stack applications, or anything that will be maintained by a team over years, TypeScript's value proposition has become hard to argue against.

The developer who understands both — who knows when to reach for TypeScript's type safety and when Python's flexibility and ecosystem are the right fit — is positioned well for the rest of this decade.


Sources & References

  1. GitHub — "The State of the Octoverse 2025"
  2. Stack Overflow — "Developer Survey 2025"
  3. TypeScript Handbook
  4. Matt Pocock — "Total TypeScript"
  5. tRPC Documentation
  6. Prisma — "Type-Safe Database Access"

About the Author

Toc Am

Founder of AmtocSoft. Writing practical deep-dives on AI engineering, cloud architecture, and developer tooling. Previously built backend systems at scale. Reviews every post published under this byline.

LinkedIn X / Twitter

Published: 2026-04-29 · Written with AI assistance, reviewed by Toc Am.

Get These In Your Inbox

Weekly deep-dives on AI engineering, no fluff. Join the newsletter →

Subscribe (free)

Or grab the book ($39, ~100 pages) · Buy me a coffee

Buy Me a Coffee · 🔔 YouTube · 💼 LinkedIn · 🐦 X/Twitter

Monday, April 6, 2026

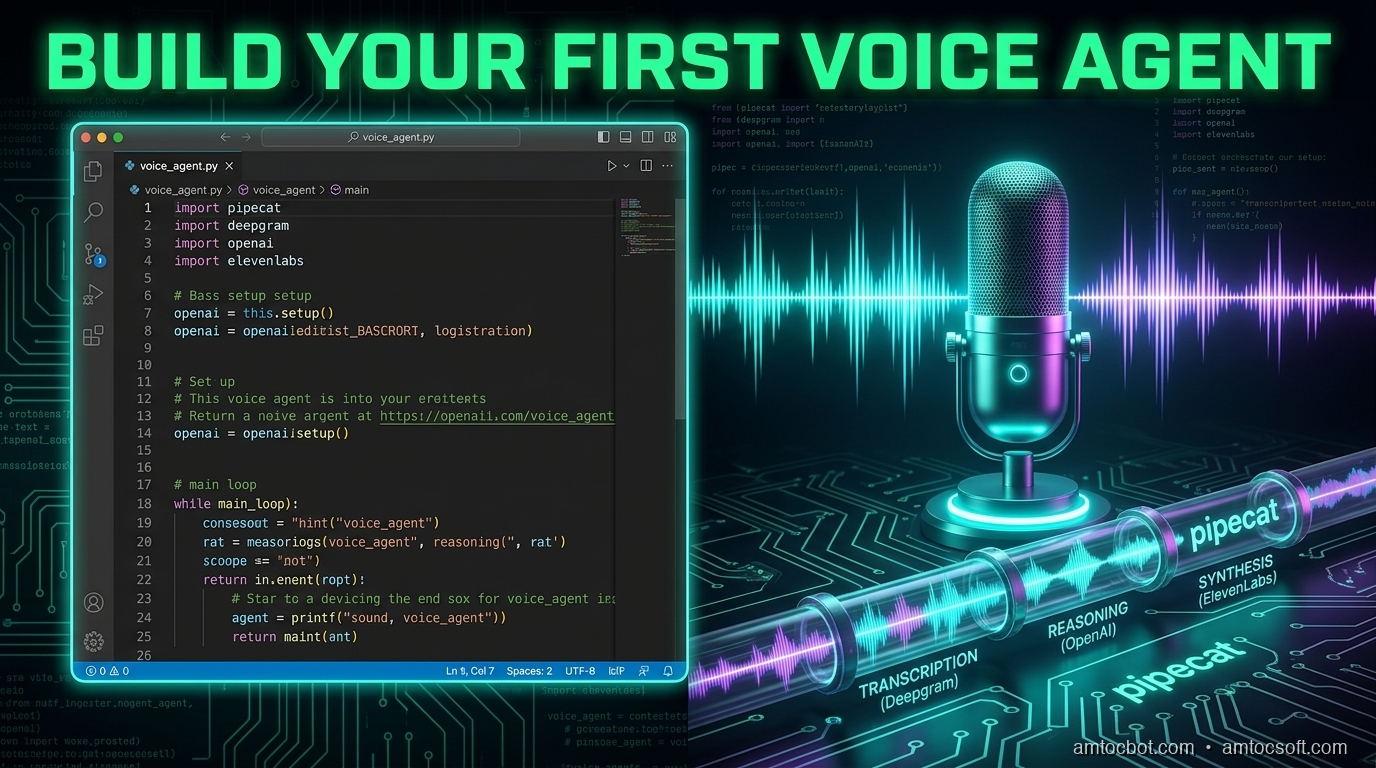
Build Your First Voice Agent: Python Tutorial with Pipecat

Level: Intermediate
Topic: Voice AI, TTS, STT

Hero Image: Python code flowing into a voice assistant speaking to a user

In the previous posts, we explored TTS engines and STT models individually. Now it's time to wire them together into something that actually talks back. In this tutorial, you'll build a voice agent from scratch using Python and Pipecat -- an open-source framework for building real-time voice and multimodal AI pipelines.

By the end, you'll have a working voice agent that listens to your microphone, processes your speech through an LLM, and speaks the response back to you -- all in real time. We'll start with the simplest possible agent (under 80 lines), then progressively add function calling, conversation memory, error handling, and phone connectivity.

Pipecat has grown into a mature framework with 60+ provider integrations, client SDKs for JavaScript, React, iOS, Android, and C++, and a managed cloud hosting option. It's the most popular open-source choice for voice agent development in 2026.


What Is Pipecat?

Pipecat is an open-source Python framework created by Daily.co for building real-time voice and multimodal AI applications. It provides a pipeline-based architecture where you chain together processors -- STT, LLM, TTS, transport -- and data flows through them automatically.

Why Pipecat Over Building From Scratch?

  • Pipeline abstraction: Chain STT, LLM, and TTS together declaratively -- no manual threading or async coordination
  • Turn-taking: Built-in support for interruptions, barge-in, and conversational flow
  • Transport layer: Handles WebRTC, WebSocket, and local audio I/O
  • Provider-agnostic: Swap STT/LLM/TTS providers without rewriting your pipeline (60+ integrations including Deepgram, OpenAI, Anthropic, ElevenLabs, Cartesia, Kokoro, and more)
  • Real-time optimized: Frame-based processing designed for sub-second latency
  • Client SDKs: JavaScript, React, React Native, iOS, Android, C++ for building front-ends
graph LR subgraph Pipecat Pipeline A[Transport Input
Microphone/WebRTC] --> B[STT
Deepgram Nova-3] B --> C[Context Aggregator
User Message] C --> D[LLM
GPT-4o / Claude] D --> E[TTS
OpenAI / ElevenLabs] E --> F[Transport Output
Speaker/WebRTC] F --> G[Context Aggregator
Assistant Message] end style A fill:#4CAF50,color:#fff style D fill:#FF9800,color:#fff style F fill:#2196F3,color:#fff

Prerequisites

Before we start, make sure you have:

  • Python 3.10 or higher
  • A microphone and speakers (or headphones -- recommended to avoid echo)
  • API keys for:
  • OpenAI (for the LLM and TTS) -- platform.openai.com
  • Deepgram (for STT) -- free tier gives you $200 in credits at console.deepgram.com
  • Basic Python async/await knowledge

Step 1: Set Up the Project

Create a new project directory and install dependencies:

mkdir voice-agent && cd voice-agent
python -m venv venv
source venv/bin/activate  # On Windows: venv\Scripts\activate

# Install Pipecat with the providers we need
pip install "pipecat-ai[daily,openai,deepgram,silero]"

# Install PyAudio for local microphone access
pip install pyaudio

# If PyAudio fails on macOS:
# brew install portaudio
# pip install pyaudio

Create a .env file for your API keys:

OPENAI_API_KEY=your-openai-key
DEEPGRAM_API_KEY=your-deepgram-key

Project structure:

voice-agent/
  .env
  agent.py           # Basic agent (Step 3)
  agent_tools.py     # Agent with function calling (Step 5)
  agent_full.py      # Production-ready agent (Step 8)
  venv/

Step 2: Understand the Pipeline Architecture

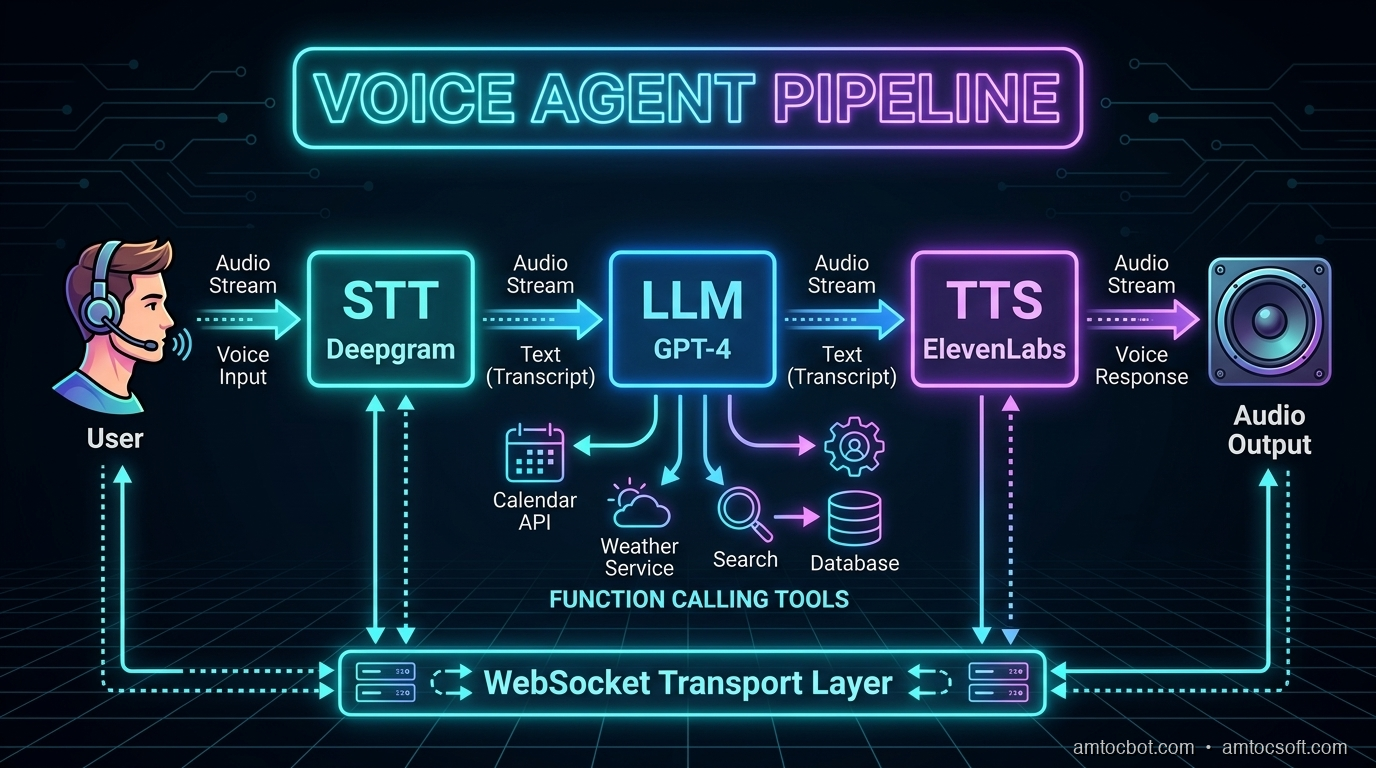
A voice agent pipeline has four stages that process data in sequence:

Microphone Audio
      |
      v
[1. STT] -- Deepgram Nova-3 converts speech to text
      |
      v
[2. LLM] -- GPT-4o processes text and generates response
      |
      v
[3. TTS] -- OpenAI TTS converts response to speech audio
      |
      v
Speaker Output

In Pipecat, each stage is a processor that receives frames (units of data) and outputs new frames. Audio frames flow in, text frames flow between processors, and audio frames flow out.

The key insight: everything streams. The STT starts outputting text before you finish speaking. The LLM starts generating tokens before the full input arrives. The TTS starts producing audio from the first sentence while the LLM is still generating the rest. This streaming overlap is what makes sub-second response times possible.

Architecture Diagram: Data flow through Pipecat pipeline stages

Latency Budget

Here's where time is spent in a well-optimized pipeline:

Stage Latency Optimization
VAD (end-of-speech detection) 50-100ms Silero VAD with tuned thresholds
STT finalization 100-300ms Deepgram streaming with endpointing
LLM time-to-first-token 150-400ms GPT-4o-mini for speed, GPT-4o for quality
TTS time-to-first-byte 100-300ms OpenAI tts-1 or ElevenLabs Flash
Network + buffering 50-150ms Connection pooling, edge deployment
Total 450-1250ms Target: <800ms P95

Step 3: Build a Minimal Voice Agent

Here's the simplest possible voice agent with Pipecat. Create a file called agent.py:

import asyncio
import os
from dotenv import load_dotenv

from pipecat.frames.frames import EndFrame, LLMMessagesFrame
from pipecat.pipeline.pipeline import Pipeline
from pipecat.pipeline.runner import PipelineRunner
from pipecat.pipeline.task import PipelineParams, PipelineTask
from pipecat.processors.aggregators.openai_llm_context import OpenAILLMContext
from pipecat.services.deepgram import DeepgramSTTService
from pipecat.services.openai import OpenAILLMService, OpenAITTSService
from pipecat.transports.local.audio import LocalAudioTransport
from pipecat.vad.silero import SileroVADAnalyzer

load_dotenv()

async def main():
    # --- Transport: handles microphone input and speaker output ---
    transport = LocalAudioTransport(
        mic_enabled=True,
        speaker_enabled=True,
        vad_analyzer=SileroVADAnalyzer()  # Detects when you're speaking
    )

    # --- STT: Deepgram Nova-3 for real-time transcription ---
    stt = DeepgramSTTService(
        api_key=os.getenv("DEEPGRAM_API_KEY"),
        model="nova-3",
        language="en"
    )

    # --- LLM: OpenAI GPT-4o for conversation ---
    llm = OpenAILLMService(
        api_key=os.getenv("OPENAI_API_KEY"),
        model="gpt-4o"
    )

    # --- TTS: OpenAI TTS for speech output ---
    tts = OpenAITTSService(
        api_key=os.getenv("OPENAI_API_KEY"),
        voice="nova",
        model="tts-1"
    )

    # --- Conversation context ---
    messages = [
        {
            "role": "system",
            "content": (
                "You are a helpful voice assistant. Keep your responses "
                "concise -- aim for 1-2 sentences. You're having a real-time "
                "voice conversation, so be natural and conversational. "
                "Don't use markdown, lists, or formatting in your responses."
            ),
        }
    ]

    context = OpenAILLMContext(messages)
    context_aggregator = llm.create_context_aggregator(context)

    # --- Build the pipeline ---
    pipeline = Pipeline([
        transport.input(),       # Microphone audio in
        stt,                     # Speech to text
        context_aggregator.user(),  # Add user message to context
        llm,                     # Generate response
        tts,                     # Text to speech
        transport.output(),      # Speaker audio out
        context_aggregator.assistant()  # Add assistant message to context
    ])

    task = PipelineTask(
        pipeline,
        PipelineParams(
            allow_interruptions=True,  # Let user interrupt the AI
            enable_metrics=True        # Track latency metrics
        )
    )

    # --- Run ---
    runner = PipelineRunner()

    # Send initial greeting
    await task.queue_frames([
        LLMMessagesFrame(messages),
    ])

    print("Voice agent is running! Speak into your microphone.")
    print("Press Ctrl+C to stop.")

    await runner.run(task)

if __name__ == "__main__":
    asyncio.run(main())

Run it:

python agent.py

Speak into your microphone, and the agent will respond through your speakers. That's a working voice agent in under 80 lines of code.


Step 4: Add Turn-Taking and Interruptions

The basic agent already supports interruptions thanks to allow_interruptions=True. But let's understand how turn-taking works and how to customize it for your use case.

How Pipecat Handles Turns

graph TD A[User starts speaking] --> B[VAD detects speech] B --> C[Audio streams to STT] C --> D[STT produces interim transcripts] D --> E{User stops speaking?} E -->|No - still talking| C E -->|Yes - silence detected| F[STT produces final transcript] F --> G[Transcript sent to LLM] G --> H[LLM generates response tokens] H --> I[Tokens stream to TTS] I --> J[TTS produces audio chunks] J --> K[Audio plays through speaker] K --> L{User interrupts?} L -->|Yes| M[Stop TTS playback immediately] M --> A L -->|No| N[Response completes] N --> O[Wait for next user utterance] O --> A style A fill:#4CAF50,color:#fff style M fill:#f44336,color:#fff style N fill:#2196F3,color:#fff

Customizing VAD Sensitivity

The Voice Activity Detection (VAD) parameters control when the agent thinks you've started and stopped speaking:

from pipecat.vad.silero import SileroVADAnalyzer, VADParams

# Configure VAD sensitivity
vad_analyzer = SileroVADAnalyzer(
    params=VADParams(
        threshold=0.5,              # Speech detection sensitivity (0-1)
                                     # Lower = more sensitive, higher = less false positives
        min_speech_duration_ms=250,  # Minimum speech to trigger (ignore brief sounds)
        max_speech_duration_s=30,    # Maximum single utterance before forced turn end
        min_silence_duration_ms=500, # Silence before end-of-turn
                                     # THIS IS THE MOST IMPORTANT PARAMETER
        speech_pad_ms=100            # Padding around detected speech
    )
)

transport = LocalAudioTransport(
    mic_enabled=True,
    speaker_enabled=True,
    vad_analyzer=vad_analyzer
)

Tuning min_silence_duration_ms

This parameter determines how long the agent waits after you stop talking before it responds:

Value Behavior Best For
200-300ms Very responsive, but interrupts natural pauses Quick Q&A, command-driven agents
400-600ms Good balance for most conversations General-purpose voice agents
700-1000ms Very patient, lets user collect thoughts Therapy bots, elderly users, complex topics
1000-2000ms Extremely patient Dictation, users with speech difficulties

Start with 500ms and adjust based on user feedback.


Step 5: Add Function Calling

A voice agent becomes truly useful when it can take actions. Let's add function calling so our agent can check the weather, set reminders, or look up information.

import json
from datetime import datetime, timedelta

# Define tools the agent can use
tools = [
    {
        "type": "function",
        "function": {
            "name": "get_weather",
            "description": "Get the current weather for a location",
            "parameters": {
                "type": "object",
                "properties": {
                    "location": {
                        "type": "string",
                        "description": "City name, e.g. 'San Francisco'"
                    }
                },
                "required": ["location"]
            }
        }
    },
    {
        "type": "function",
        "function": {
            "name": "set_reminder",
            "description": "Set a reminder for the user",
            "parameters": {
                "type": "object",
                "properties": {
                    "message": {
                        "type": "string",
                        "description": "The reminder message"
                    },
                    "minutes": {
                        "type": "integer",
                        "description": "Minutes from now"
                    }
                },
                "required": ["message", "minutes"]
            }
        }
    },
    {
        "type": "function",
        "function": {
            "name": "search_knowledge_base",
            "description": "Search internal documentation or knowledge base",
            "parameters": {
                "type": "object",
                "properties": {
                    "query": {
                        "type": "string",
                        "description": "The search query"
                    }
                },
                "required": ["query"]
            }
        }
    }
]

# Handler for function calls
async def handle_function_call(function_name, tool_call_id, args, llm, context, result_callback):
    if function_name == "get_weather":
        location = args["location"]
        # In production, call a real weather API (OpenWeatherMap, etc.)
        result = json.dumps({
            "location": location,
            "temperature": 72,
            "condition": "sunny",
            "humidity": 45
        })
        await result_callback(result)

    elif function_name == "set_reminder":
        message = args["message"]
        minutes = args["minutes"]
        reminder_time = datetime.now() + timedelta(minutes=minutes)
        # In production, schedule via APScheduler, Celery, or system cron
        result = json.dumps({
            "status": "set",
            "message": message,
            "trigger_at": reminder_time.isoformat()
        })
        await result_callback(result)

    elif function_name == "search_knowledge_base":
        query = args["query"]
        # In production, call your RAG pipeline (Pinecone, Weaviate, etc.)
        result = json.dumps({
            "results": [
                {"title": "Getting Started Guide", "relevance": 0.95},
                {"title": "API Reference", "relevance": 0.87}
            ],
            "query": query
        })
        await result_callback(result)

# Register handlers with the LLM
llm = OpenAILLMService(
    api_key=os.getenv("OPENAI_API_KEY"),
    model="gpt-4o"
)
llm.register_function("get_weather", handle_function_call)
llm.register_function("set_reminder", handle_function_call)
llm.register_function("search_knowledge_base", handle_function_call)

# Update context to include tools
messages = [
    {
        "role": "system",
        "content": (
            "You are a helpful voice assistant with access to tools. "
            "You can check the weather, set reminders, and search a knowledge base. "
            "Keep responses concise and conversational. Never use markdown."
        ),
    }
]

context = OpenAILLMContext(messages, tools)

Now you can say "What's the weather in Tokyo?" and the agent will call the function and speak the result naturally.


Step 6: Add Conversation Memory

Pipecat's context aggregator automatically tracks conversation history. Every user message and assistant response is added to the context window. But for longer conversations, you need a strategy to manage context size.

from pipecat.processors.frame_processor import FrameProcessor
from pipecat.frames.frames import Frame, LLMMessagesFrame

class ConversationMemoryManager(FrameProcessor):
    """Manages conversation context to prevent token overflow.

    Strategy: Keep system message + summary of old messages + last N messages.
    This preserves important context while staying within token limits.
    """

    def __init__(self, max_messages: int = 20, summary_threshold: int = 15):
        super().__init__()
        self.max_messages = max_messages
        self.summary_threshold = summary_threshold
        self.conversation_summary = ""

    async def process_frame(self, frame: Frame, direction):
        if isinstance(frame, LLMMessagesFrame):
            messages = frame.messages

            if len(messages) > self.max_messages:
                system_msg = messages[0]  # Always keep system message

                # Summarize older messages (in production, use the LLM for this)
                old_messages = messages[1:-(self.summary_threshold)]
                topics = set()
                for msg in old_messages:
                    content = msg.get("content", "")
                    if len(content) > 20:
                        topics.add(content[:50])

                self.conversation_summary = (
                    f"Earlier in this conversation, the following topics "
                    f"were discussed: {', '.join(list(topics)[:5])}. "
                    f"Continue naturally from the recent context."
                )

                summary_msg = {
                    "role": "system",
                    "content": self.conversation_summary
                }

                recent = messages[-(self.summary_threshold):]
                frame.messages = [system_msg, summary_msg] + recent

        await self.push_frame(frame, direction)

Token Budget Planning

LLM Context Window Recommended Conversation Limit
GPT-4o 128K tokens ~50-100 exchanges before summarizing
GPT-4o-mini 128K tokens ~50-100 exchanges (cheaper per token)
Claude Sonnet 200K tokens ~100-200 exchanges before summarizing

For most voice agents, conversations last 5-15 exchanges. Context overflow is mainly a concern for long customer service calls or ongoing assistant sessions.


Step 7: Add Error Handling and Resilience

Real voice agents need to handle failures gracefully. Users can't see error logs -- they only hear silence or confusion. Every failure mode needs a spoken recovery.

from pipecat.processors.frame_processor import FrameProcessor
from pipecat.frames.frames import Frame, TextFrame, ErrorFrame
import logging

logger = logging.getLogger(__name__)

class VoiceErrorHandler(FrameProcessor):
    """Catches errors in the pipeline and converts them to spoken feedback.

    Without this, errors cause dead silence -- the worst possible UX.
    """

    def __init__(self):
        super().__init__()
        self.consecutive_errors = 0
        self.max_retries = 3

    async def process_frame(self, frame: Frame, direction):
        if isinstance(frame, ErrorFrame):
            self.consecutive_errors += 1
            logger.error(f"Pipeline error ({self.consecutive_errors}): {frame.error}")

            if self.consecutive_errors >= self.max_retries:
                # Too many errors -- graceful shutdown
                error_response = TextFrame(
                    "I'm experiencing technical difficulties and need to restart. "
                    "Please try again in a moment."
                )
                await self.push_frame(error_response, direction)
                # In production: alert on-call, restart pipeline
            else:
                # Recoverable error -- ask user to repeat
                error_response = TextFrame(
                    "I'm sorry, I ran into a brief issue. "
                    "Could you please repeat that?"
                )
                await self.push_frame(error_response, direction)
        else:
            # Reset error counter on successful frames
            self.consecutive_errors = 0
            await self.push_frame(frame, direction)


class LatencyMonitor(FrameProcessor):
    """Tracks and logs latency between pipeline stages.

    Critical for production monitoring -- alerts when TTFB exceeds targets.
    """

    def __init__(self, stage_name: str, warn_threshold_ms: float = 500):
        super().__init__()
        self.stage_name = stage_name
        self.warn_threshold_ms = warn_threshold_ms
        self.frame_count = 0
        self.total_latency = 0

    async def process_frame(self, frame: Frame, direction):
        import time
        start = time.monotonic()
        await self.push_frame(frame, direction)
        elapsed_ms = (time.monotonic() - start) * 1000

        self.frame_count += 1
        self.total_latency += elapsed_ms

        if elapsed_ms > self.warn_threshold_ms:
            logger.warning(
                f"[{self.stage_name}] High latency: {elapsed_ms:.0f}ms "
                f"(threshold: {self.warn_threshold_ms}ms)"
            )

    @property
    def avg_latency_ms(self) -> float:
        return self.total_latency / max(self.frame_count, 1)


# Add to pipeline
pipeline = Pipeline([
    transport.input(),
    stt,
    LatencyMonitor("stt", warn_threshold_ms=300),
    context_aggregator.user(),
    llm,
    LatencyMonitor("llm", warn_threshold_ms=500),
    VoiceErrorHandler(),         # Catch errors before TTS
    tts,
    LatencyMonitor("tts", warn_threshold_ms=300),
    transport.output(),
    context_aggregator.assistant()
])

Step 8: Connect to WebRTC (Phone & Web)

To make your voice agent accessible beyond your local machine -- via a web browser or phone -- replace the local audio transport with Daily's WebRTC transport.

from pipecat.transports.services.daily import DailyTransport, DailyParams

# Replace LocalAudioTransport with DailyTransport
transport = DailyTransport(
    room_url="https://your-domain.daily.co/your-room",
    token="your-daily-token",
    bot_name="AmtocBot",
    params=DailyParams(
        audio_in_enabled=True,
        audio_out_enabled=True,
        vad_enabled=True,
        vad_analyzer=SileroVADAnalyzer(
            params=VADParams(
                threshold=0.5,
                min_silence_duration_ms=500
            )
        )
    )
)

Web Browser Integration

Daily provides a JavaScript SDK for embedding voice agents in web pages:

// Frontend: Connect to the voice agent via WebRTC
import DailyIframe from '@daily-co/daily-js';

const callFrame = DailyIframe.createFrame();
await callFrame.join({
    url: 'https://your-domain.daily.co/your-room',
    token: 'your-participant-token'
});

// Audio is automatically routed to/from the voice agent

Phone Connectivity

Connect a Twilio phone number to a Daily room for telephone access:

# Twilio webhook handler (Flask example)
from flask import Flask, request
from twilio.twiml.voice_response import VoiceResponse, Connect

app = Flask(__name__)

@app.route("/incoming-call", methods=["POST"])
def handle_incoming_call():
    response = VoiceResponse()
    connect = Connect()
    # Route the phone call to the Daily room where your agent lives
    connect.stream(
        url="wss://your-domain.daily.co/your-room/stream",
        name="phone-caller"
    )
    response.append(connect)
    return str(response)

Step 9: Swap Providers Without Rewriting

One of Pipecat's biggest strengths is provider swappability. Here's how to switch between different STT, LLM, and TTS providers with minimal code changes:

# --- STT Options ---
# Deepgram (best for real-time streaming)
from pipecat.services.deepgram import DeepgramSTTService
stt = DeepgramSTTService(api_key=os.getenv("DEEPGRAM_API_KEY"), model="nova-3")

# Google (best for enterprise/multilingual)
from pipecat.services.google import GoogleSTTService
stt = GoogleSTTService(credentials=os.getenv("GOOGLE_CREDENTIALS"))

# AssemblyAI (best streaming accuracy)
from pipecat.services.assemblyai import AssemblyAISTTService
stt = AssemblyAISTTService(api_key=os.getenv("ASSEMBLYAI_API_KEY"))

# --- LLM Options ---
# OpenAI GPT-4o
from pipecat.services.openai import OpenAILLMService
llm = OpenAILLMService(api_key=os.getenv("OPENAI_API_KEY"), model="gpt-4o")

# Anthropic Claude
from pipecat.services.anthropic import AnthropicLLMService
llm = AnthropicLLMService(api_key=os.getenv("ANTHROPIC_API_KEY"), model="claude-sonnet-4-20250514")

# Groq (ultra-fast inference)
from pipecat.services.groq import GroqLLMService
llm = GroqLLMService(api_key=os.getenv("GROQ_API_KEY"), model="llama-3.3-70b")

# --- TTS Options ---
# OpenAI TTS (simple, reliable)
from pipecat.services.openai import OpenAITTSService
tts = OpenAITTSService(api_key=os.getenv("OPENAI_API_KEY"), voice="nova")

# ElevenLabs (highest quality)
from pipecat.services.elevenlabs import ElevenLabsTTSService
tts = ElevenLabsTTSService(api_key=os.getenv("ELEVENLABS_API_KEY"), voice_id="...")

# Cartesia (lowest latency -- 40ms)
from pipecat.services.cartesia import CartesiaTTSService
tts = CartesiaTTSService(api_key=os.getenv("CARTESIA_API_KEY"), voice_id="...")

# Kokoro (self-hosted, free)
from pipecat.services.kokoro import KokoroTTSService
tts = KokoroTTSService(voice="af_heart")

The pipeline code stays exactly the same -- only the service initialization changes.


The Complete Production-Ready Agent

Here's the full agent combining everything we've built:

import asyncio
import os
import json
import logging
from datetime import datetime, timedelta
from dotenv import load_dotenv

from pipecat.frames.frames import LLMMessagesFrame
from pipecat.pipeline.pipeline import Pipeline
from pipecat.pipeline.runner import PipelineRunner
from pipecat.pipeline.task import PipelineParams, PipelineTask
from pipecat.processors.aggregators.openai_llm_context import OpenAILLMContext
from pipecat.services.deepgram import DeepgramSTTService
from pipecat.services.openai import OpenAILLMService, OpenAITTSService
from pipecat.transports.local.audio import LocalAudioTransport
from pipecat.vad.silero import SileroVADAnalyzer, VADParams

load_dotenv()
logging.basicConfig(level=logging.INFO)

# --- Tools ---
tools = [
    {
        "type": "function",
        "function": {
            "name": "get_weather",
            "description": "Get the current weather for a location",
            "parameters": {
                "type": "object",
                "properties": {
                    "location": {"type": "string", "description": "City name"}
                },
                "required": ["location"]
            }
        }
    },
    {
        "type": "function",
        "function": {
            "name": "set_reminder",
            "description": "Set a reminder for the user",
            "parameters": {
                "type": "object",
                "properties": {
                    "message": {"type": "string"},
                    "minutes": {"type": "integer"}
                },
                "required": ["message", "minutes"]
            }
        }
    }
]

async def handle_function_call(function_name, tool_call_id, args, llm, context, result_callback):
    if function_name == "get_weather":
        result = json.dumps({
            "temperature": 72, "condition": "sunny",
            "location": args["location"]
        })
        await result_callback(result)
    elif function_name == "set_reminder":
        trigger = datetime.now() + timedelta(minutes=args["minutes"])
        result = json.dumps({
            "status": "set", "message": args["message"],
            "trigger_at": trigger.strftime("%I:%M %p")
        })
        await result_callback(result)

async def main():
    # Transport with tuned VAD
    transport = LocalAudioTransport(
        mic_enabled=True,
        speaker_enabled=True,
        vad_analyzer=SileroVADAnalyzer(
            params=VADParams(
                threshold=0.5,
                min_silence_duration_ms=500,
                min_speech_duration_ms=250
            )
        )
    )

    # Services
    stt = DeepgramSTTService(
        api_key=os.getenv("DEEPGRAM_API_KEY"),
        model="nova-3",
        language="en"
    )

    llm = OpenAILLMService(
        api_key=os.getenv("OPENAI_API_KEY"),
        model="gpt-4o"
    )
    llm.register_function("get_weather", handle_function_call)
    llm.register_function("set_reminder", handle_function_call)

    tts = OpenAITTSService(
        api_key=os.getenv("OPENAI_API_KEY"),
        voice="nova",
        model="tts-1"
    )

    # Context
    messages = [
        {
            "role": "system",
            "content": (
                "You are a friendly voice assistant called Amtoc. "
                "Keep responses to 1-3 sentences. Be conversational "
                "and natural. You can check the weather and set reminders. "
                "Never use markdown, lists, or formatting. "
                "If you're not sure about something, say so honestly."
            ),
        }
    ]
    context = OpenAILLMContext(messages, tools)
    context_aggregator = llm.create_context_aggregator(context)

    # Pipeline
    pipeline = Pipeline([
        transport.input(),
        stt,
        context_aggregator.user(),
        llm,
        tts,
        transport.output(),
        context_aggregator.assistant()
    ])

    task = PipelineTask(
        pipeline,
        PipelineParams(
            allow_interruptions=True,
            enable_metrics=True
        )
    )

    runner = PipelineRunner()
    await task.queue_frames([LLMMessagesFrame(messages)])

    print("=" * 50)
    print("  Amtoc Voice Agent is Running!")
    print("  Speak into your microphone.")
    print("  Press Ctrl+C to stop.")
    print("=" * 50)

    await runner.run(task)

if __name__ == "__main__":
    asyncio.run(main())

Troubleshooting Common Issues

"No audio input detected"

  • Check microphone permissions in your OS settings
  • Verify PyAudio can see your microphone: python -c "import pyaudio; p = pyaudio.PyAudio(); print(p.get_device_count())"
  • On macOS: grant Terminal/IDE microphone permission in System Settings > Privacy
  • Try specifying a device index in the transport configuration

High latency (>1 second response time)

  • Switch from tts-1-hd to tts-1 (quality vs speed trade-off)
  • Use gpt-4o-mini instead of gpt-4o for the LLM (2-3x faster)
  • Reduce min_silence_duration_ms to detect end-of-turn faster (try 300ms)
  • Check network: API calls need low latency (<50ms round trip)
  • Use Cartesia TTS (40ms TTFA) instead of OpenAI (200-400ms)

Agent interrupts you mid-sentence

  • Increase min_silence_duration_ms (try 700-800ms)
  • Increase min_speech_duration_ms to avoid triggering on brief sounds (try 300ms)
  • Adjust VAD threshold higher (0.6-0.7) to require stronger speech signal

Echo or feedback loop

  • Use headphones -- this is the #1 fix
  • Enable acoustic echo cancellation in your OS audio settings
  • In production, use WebRTC transport (Daily) which has built-in echo cancellation

API rate limits

  • Implement exponential backoff for retries
  • Use connection pooling (Pipecat does this automatically)
  • For high-volume: negotiate enterprise API rates or self-host STT/TTS

Cost of Running This Agent

For a typical deployment handling 1,000 minutes of conversation per month:

Component Provider Cost/Month
STT Deepgram Nova-3 (streaming) $7.70
LLM GPT-4o $10-30 (varies by conversation length)
TTS OpenAI tts-1 ~$15
Total ~$33-53/month

For budget optimization, swap GPT-4o for GPT-4o-mini ($3-10/month) and you're under $30/month for 1,000 minutes.


Next Steps

You now have a working voice agent. From here, you can:

  1. Add more tools: Connect to calendars, databases, CRMs -- anything your agent needs
  2. Swap providers: Try ElevenLabs TTS for higher quality, or self-hosted Kokoro for zero API costs
  3. Deploy to the cloud: Use Daily rooms and Twilio for phone access, or Pipecat Cloud for managed hosting
  4. Add a personality: Tune the system prompt for your specific use case
  5. Build a web interface: Use the React or JavaScript SDK to embed the agent in a web page
  6. Add analytics: Track conversation metrics, user satisfaction, and task completion rates

In the next post, we'll go deeper into voice agent architectures -- comparing the pipeline approach we just built to end-to-end models like GPT-4o Voice and managed platforms like Retell and VAPI.

Sources & References:
1. Pipecat — "Voice Agent Framework" — https://github.com/pipecat-ai/pipecat
2. OpenAI — "Whisper API" — https://platform.openai.com/docs/guides/speech-to-text
3. Deepgram — "Streaming Speech-to-Text" — https://developers.deepgram.com/


This is part 4 of the AmtocSoft Voice AI series. Full source code is available in the examples above -- copy, paste, and start experimenting.


Tools mentioned in this post

Disclosure: the links below are affiliate links. If you sign up via them, we earn a small commission at no extra cost to you. This helps fund the writing of more posts like this one.

  • Pinecone — production vector database. Sign up
  • Anthropic Claude API — production LLM access. Sign up
  • OpenAI Platform — GPT-4 and embedding APIs. Sign up

About the Author

Toc Am

Founder of AmtocSoft. Writing practical deep-dives on AI engineering, cloud architecture, and developer tooling. Previously built backend systems at scale. Reviews every post published under this byline.

LinkedIn X / Twitter

Published: 2026-04-06 · Written with AI assistance, reviewed by Toc Am.

Get These In Your Inbox

Weekly deep-dives on AI engineering, no fluff. Join the newsletter →

Subscribe (free)

Or grab the book ($39, ~100 pages) · Buy me a coffee

Buy Me a Coffee · 🔔 YouTube · 💼 LinkedIn · 🐦 X/Twitter

Thursday, April 2, 2026

Building a RAG Pipeline with LangChain and Pinecone

Building a RAG Pipeline with LangChain and Pinecone Hero

Building a RAG Pipeline with LangChain and Pinecone

You understand what RAG is. You know why vector databases matter. Now it's time to build one.

In this tutorial, we'll build a complete RAG pipeline from scratch using two of the most popular tools in the ecosystem: LangChain for orchestration and Pinecone for vector storage. By the end, you'll have a working system that can answer questions using your own documents.

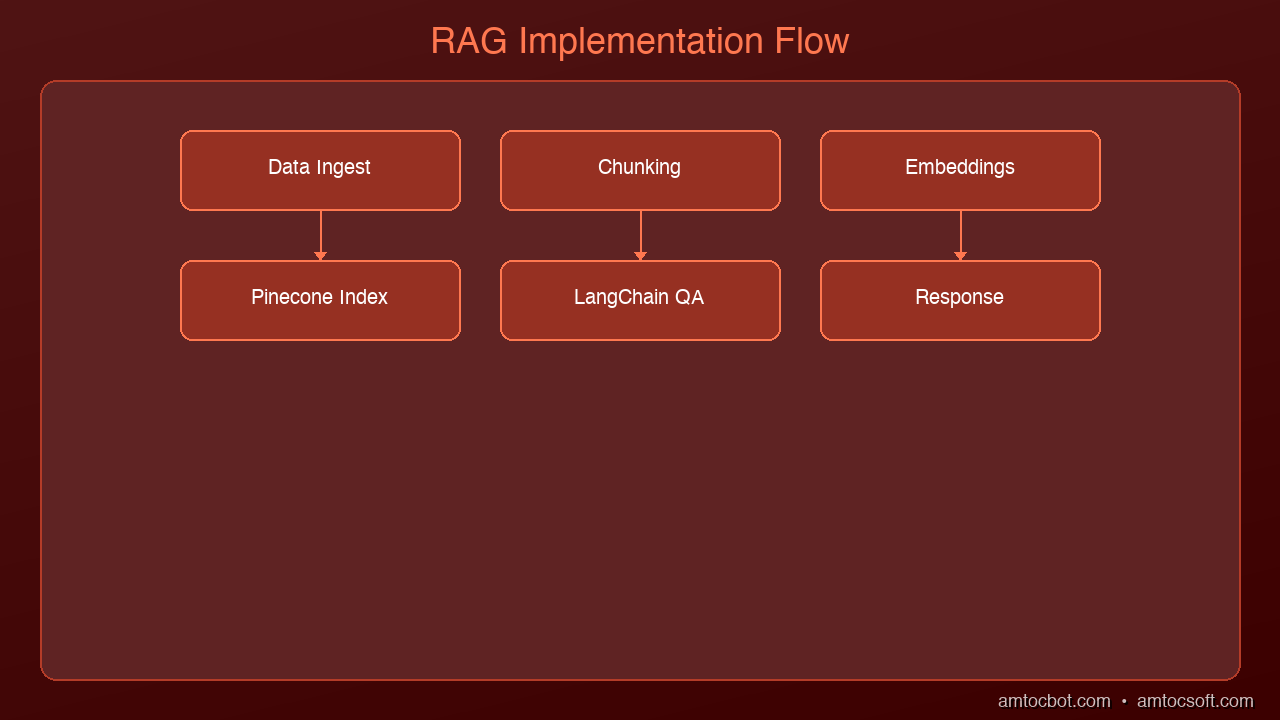
What We're Building

A document Q&A system that:
1. Loads PDF documents
2. Chunks them into manageable passages
3. Embeds and stores them in Pinecone
4. Retrieves relevant chunks for any question
5. Generates accurate answers using Claude

The entire pipeline takes about 50 lines of core code.

graph LR
  A["Documents"] -->|split| B["Chunking Strategy"]
  B -->|encode| C["Embedding"]
  C -->|store| D["Vector DB"]
  D -.->|query time| E["Query"]
  E -->|fetch| F["Retriever"]
  F -->|rank| G["Re-ranker"]
  G -->|inject| H["Context Window"]
  H -->|generate| I["LLM"]
  I -->|deliver| J["Answer"]

Prerequisites

Architecture Diagram
pip install langchain langchain-anthropic langchain-pinecone pinecone-client pypdf

You'll need:
- An Anthropic API key (for Claude)
- A Pinecone API key (free tier works for this tutorial)

Step 1: Load and Chunk Documents

The first decision in any RAG pipeline is how to split your documents. Too large and the embeddings lose specificity. Too small and you lose context. The sweet spot is 500-1000 characters with some overlap.

from langchain_community.document_loaders import PyPDFLoader
from langchain.text_splitter import RecursiveCharacterTextSplitter

# Load a PDF
loader = PyPDFLoader("company-handbook.pdf")
pages = loader.load()

# Split into chunks with overlap
splitter = RecursiveCharacterTextSplitter(
    chunk_size=800,
    chunk_overlap=100,
    separators=["\n\n", "\n", ". ", " ", ""]
)
chunks = splitter.split_documents(pages)

print(f"Split {len(pages)} pages into {len(chunks)} chunks")

Why RecursiveCharacterTextSplitter? It tries to split at natural boundaries first (double newlines, then single newlines, then sentences) before falling back to arbitrary character splits. This preserves paragraph structure better than a naive character split.

Why overlap? If a key concept spans the boundary between two chunks, the overlap ensures both chunks contain enough context. 100 characters is usually sufficient.

Step 2: Set Up Pinecone

Pinecone is a managed vector database. You don't run any infrastructure — just create an index and start inserting vectors.

from pinecone import Pinecone, ServerlessSpec

# Initialize Pinecone
pc = Pinecone(api_key="your-pinecone-api-key")

# Create an index (only needed once)
index_name = "company-docs"

if index_name not in pc.list_indexes().names():
    pc.create_index(
        name=index_name,
        dimension=1536,  # Matches the embedding model dimension
        metric="cosine",
        spec=ServerlessSpec(
            cloud="aws",
            region="us-east-1"
        )
    )

index = pc.Index(index_name)

Key parameters:
- dimension=1536: Must match your embedding model's output dimension. OpenAI's text-embedding-3-small outputs 1536 dimensions.
- metric="cosine": Cosine similarity is standard for text search. It measures the angle between vectors, ignoring magnitude.
- ServerlessSpec: Pinecone's serverless tier scales to zero when idle — perfect for development.

Step 3: Embed and Store Documents

Now we convert each chunk into a vector and store it in Pinecone.

from langchain_pinecone import PineconeVectorStore
from langchain_community.embeddings import OpenAIEmbeddings

# Initialize the embedding model
embeddings = OpenAIEmbeddings(
    model="text-embedding-3-small",
    openai_api_key="your-openai-api-key"
)

# Store chunks in Pinecone (embeds automatically)
vectorstore = PineconeVectorStore.from_documents(
    documents=chunks,
    embedding=embeddings,
    index_name=index_name
)

print(f"Stored {len(chunks)} chunks in Pinecone")

This single call handles:
1. Embedding each chunk using the OpenAI model
2. Uploading the vectors to Pinecone
3. Storing the original text as metadata for retrieval

Cost note: Embedding 1,000 chunks with text-embedding-3-small costs roughly $0.002. Pinecone's free tier stores up to 100,000 vectors.

Step 4: Build the Retriever

The retriever is the component that finds relevant chunks for a given question.

# Create a retriever that returns the top 4 most relevant chunks
retriever = vectorstore.as_retriever(
    search_type="similarity",
    search_kwargs={"k": 4}
)

# Test it
docs = retriever.invoke("What is our remote work policy?")
for doc in docs:
    print(f"[Page {doc.metadata.get('page', '?')}] {doc.page_content[:100]}...")

Why k=4? Retrieving too few chunks risks missing relevant context. Too many dilutes the signal with noise. 3-5 is the sweet spot for most use cases. You can tune this based on your document size and question complexity.

Search types:
- similarity: Pure vector similarity (default, fastest)
- mmr (Maximum Marginal Relevance): Balances relevance with diversity — prevents retrieving 4 chunks that all say the same thing
- similarity_score_threshold: Only returns chunks above a minimum similarity score

Step 5: Create the RAG Chain

Now we wire the retriever to Claude for answer generation.

from langchain_anthropic import ChatAnthropic
from langchain.chains import RetrievalQA
from langchain.prompts import PromptTemplate

# Initialize Claude
llm = ChatAnthropic(
    model="claude-sonnet-4-6-20250514",
    anthropic_api_key="your-anthropic-api-key",
    temperature=0
)

# Custom prompt that instructs Claude to use only the provided context
prompt_template = PromptTemplate(
    input_variables=["context", "question"],
    template="""Use the following context to answer the question. If the context
doesn't contain enough information to answer, say "I don't have enough
information to answer that question."

Context:
{context}

Question: {question}

Answer:"""
)

# Build the chain
qa_chain = RetrievalQA.from_chain_type(
    llm=llm,
    chain_type="stuff",  # Stuffs all retrieved docs into the prompt
    retriever=retriever,
    chain_type_kwargs={"prompt": prompt_template},
    return_source_documents=True
)

Chain types explained:
- stuff: Concatenates all retrieved documents into the prompt. Simple, works for most cases.
- map_reduce: Processes each document separately, then combines answers. Good for large document sets.
- refine: Iteratively refines the answer with each document. Best quality but slowest.

Step 6: Ask Questions

# Ask a question
result = qa_chain.invoke({"query": "What is our remote work policy?"})

print("Answer:", result["result"])
print("\nSources:")
for doc in result["source_documents"]:
    page = doc.metadata.get("page", "unknown")
    print(f"  - Page {page}: {doc.page_content[:80]}...")

Sample output:

Answer: According to the company handbook, employees can work remotely up to
3 days per week. Remote work requires manager approval and employees must be
available during core hours (10am-3pm ET). Full-time remote arrangements
require VP-level approval.

Sources:
  - Page 12: Remote Work Policy. Employees may work from home up to three...
  - Page 13: Core hours are defined as 10:00 AM to 3:00 PM Eastern Time...
  - Page 45: For full-time remote arrangements, employees must obtain...

The Complete Pipeline

Here's everything together in a clean, reusable script:

"""
RAG Pipeline with LangChain + Pinecone + Claude
Usage: python rag_pipeline.py --pdf document.pdf --query "Your question"
"""
import argparse
from langchain_community.document_loaders import PyPDFLoader
from langchain.text_splitter import RecursiveCharacterTextSplitter
from langchain_community.embeddings import OpenAIEmbeddings
from langchain_pinecone import PineconeVectorStore
from langchain_anthropic import ChatAnthropic
from langchain.chains import RetrievalQA
from langchain.prompts import PromptTemplate
from pinecone import Pinecone, ServerlessSpec

def build_pipeline(pdf_path: str, index_name: str = "my-docs"):
    # Load and chunk
    chunks = RecursiveCharacterTextSplitter(
        chunk_size=800, chunk_overlap=100
    ).split_documents(PyPDFLoader(pdf_path).load())

    # Embed and store
    embeddings = OpenAIEmbeddings(model="text-embedding-3-small")
    vectorstore = PineconeVectorStore.from_documents(
        chunks, embeddings, index_name=index_name
    )

    # Build QA chain
    llm = ChatAnthropic(model="claude-sonnet-4-6-20250514", temperature=0)
    return RetrievalQA.from_chain_type(
        llm=llm,
        retriever=vectorstore.as_retriever(search_kwargs={"k": 4}),
        return_source_documents=True
    )

if __name__ == "__main__":
    parser = argparse.ArgumentParser()
    parser.add_argument("--pdf", required=True)
    parser.add_argument("--query", required=True)
    args = parser.parse_args()

    chain = build_pipeline(args.pdf)
    result = chain.invoke({"query": args.query})
    print(result["result"])

Common Mistakes and How to Avoid Them

1. Not cleaning documents before chunking: PDFs often contain headers, footers, page numbers, and formatting artifacts. Pre-process your text to remove these before splitting.

2. Using the wrong chunk size: Start with 800 characters and adjust. If answers seem incomplete, increase chunk size. If they seem noisy, decrease it.

3. Forgetting to handle "I don't know": Without explicit instructions, LLMs will hallucinate answers even when the context doesn't contain relevant information. Always include a fallback instruction in your prompt.

4. Not storing metadata: Always store page numbers, section headers, document names, and dates as metadata. This makes debugging and source attribution much easier.

5. Skipping evaluation: Before shipping, test your pipeline with 20-30 known questions and manually verify the answers. Measure retrieval accuracy (did it find the right chunks?) separately from generation accuracy (did it answer correctly?).

What's Next

This tutorial gives you a production-ready starting point. From here, you can:

  • Add more document types: LangChain supports Word docs, HTML, Notion, Confluence, and dozens more loaders
  • Implement hybrid search: Combine vector search with keyword search for better recall
  • Add conversation memory: Let users ask follow-up questions with ConversationalRetrievalChain
  • Deploy as an API: Wrap the chain in a FastAPI endpoint for production use

The RAG pattern is the most practical way to make AI work with your private data. Start with one document, get the pipeline working, then scale.

Sources & References:
1. LangChain — "Official Documentation" — https://python.langchain.com/
2. Pinecone — "Documentation" — https://docs.pinecone.io/
3. OpenAI — "Embeddings Guide" — https://platform.openai.com/docs/guides/embeddings


Part of the RAG & Retrieval Systems series on AmtocSoft. Follow us on LinkedIn and X for daily AI engineering insights.


Tools mentioned in this post

Disclosure: the links below are affiliate links. If you sign up via them, we earn a small commission at no extra cost to you. This helps fund the writing of more posts like this one.

  • Pinecone — production vector database. Sign up
  • Anthropic Claude API — production LLM access. Sign up
  • OpenAI Platform — GPT-4 and embedding APIs. Sign up
  • LangChain — LangSmith observability tier. Sign up

About the Author

Toc Am

Founder of AmtocSoft. Writing practical deep-dives on AI engineering, cloud architecture, and developer tooling. Previously built backend systems at scale. Reviews every post published under this byline.

LinkedIn X / Twitter

Published: 2026-04-02 · Written with AI assistance, reviewed by Toc Am.

Get These In Your Inbox

Weekly deep-dives on AI engineering, no fluff. Join the newsletter →

Subscribe (free)

Or grab the book ($39, ~100 pages) · Buy me a coffee

Buy Me a Coffee · 🔔 YouTube · 💼 LinkedIn · 🐦 X/Twitter

Wednesday, April 1, 2026

Building Your First AI Agent with Claude and MCP

Building Your First AI Agent Hero

Building Your First AI Agent with Claude and MCP

You've read the explainers. You understand what AI agents are. You know what MCP does. Now it's time to build one.

In this tutorial, we'll build a working AI agent that can read files from your local filesystem, look up information, and take actions — all by connecting Claude to tools via MCP. By the end, you'll have a running agent you can extend in any direction you want.

No magic. Just code.

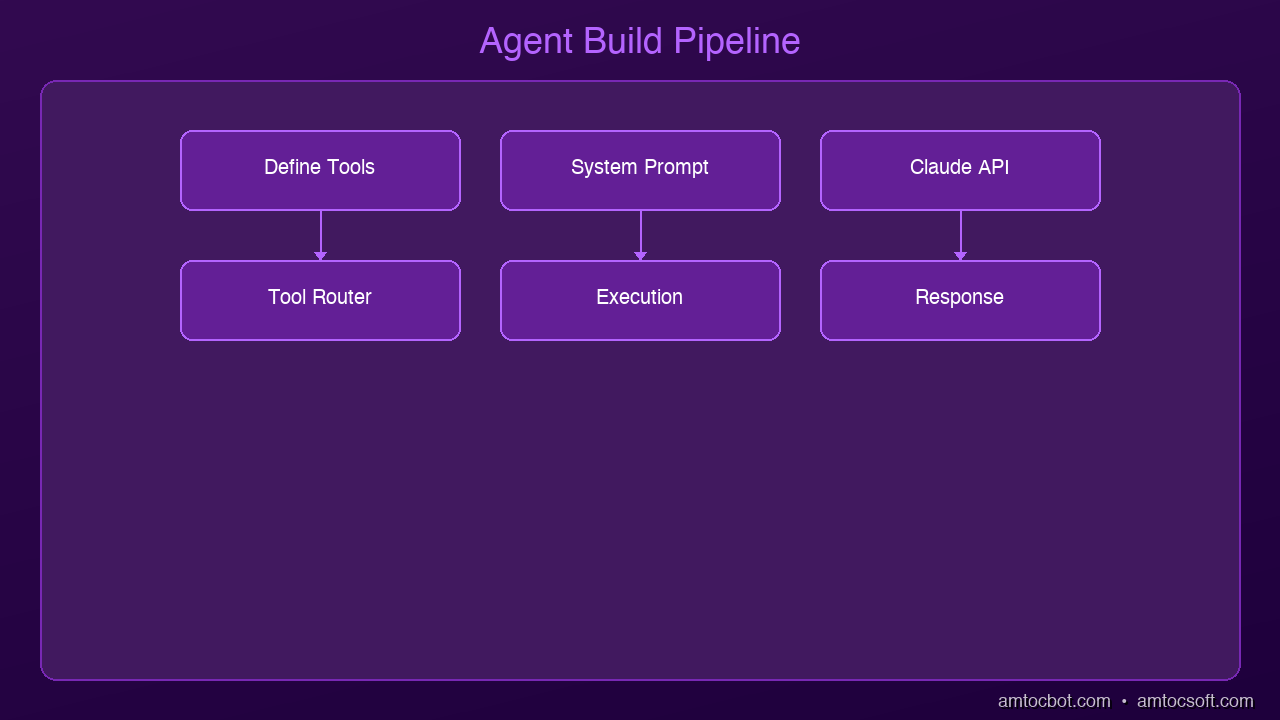
graph LR
  A["User Input"] -->|send query| B["LLM Reasoning"]
  B -->|decide action| C["Tool Selection"]
  C -->|invoke| D["Tool Execution"]
  D -->|return data| E["Response Formation"]
  E -->|deliver| F["User Output"]

What We're Building

A Claude-powered agent that:
- Reads files from a local directory
- Answers questions about their contents
- Can write a summary back to disk

Simple enough to follow in one sitting. Sophisticated enough to show you exactly how the architecture works in practice.


Prerequisites

Architecture Diagram
  • Python 3.10+
  • An Anthropic API key (get one at console.anthropic.com)
  • Basic familiarity with Python and the terminal

Install the required packages:

pip install anthropic mcp

Step 1: Understand the Architecture

Before writing a single line of code, let's be clear about what's happening under the hood.

An MCP agent has three parts:

  1. The LLM (Claude) — the brain. It decides what to do, interprets results, and produces the final response.
  2. The MCP Client — the bridge. It sits between Claude and your tools, translating Claude's tool calls into actual function executions.
  3. The MCP Server — the muscle. It exposes your tools (filesystem access, APIs, databases, anything) over a standardized protocol.

The flow looks like this:

User prompt
  → Claude (decides to use a tool)
  → MCP Client (sends tool call to server)
  → MCP Server (executes the tool, returns result)
  → Claude (reads result, decides next step or responds)
  → Final answer to user

Claude never directly touches your filesystem. It asks the MCP server to do it. This keeps everything sandboxed, observable, and composable.


Step 2: Set Up the MCP Filesystem Server

MCP ships with a reference filesystem server. It gives Claude tools to read, write, and list files in a directory you specify.

Create a working directory and a folder for the agent to operate on:

mkdir -p ~/my-agent/data
echo "Project Alpha: Due April 15. Owner: Sarah." > ~/my-agent/data/project-alpha.txt
echo "Project Beta: Due May 1. Owner: James." > ~/my-agent/data/project-beta.txt
echo "Budget Q2: $50,000 approved for tooling." > ~/my-agent/data/budget-q2.txt

Now run the MCP filesystem server, pointing it at that data directory:

python -m mcp.server.filesystem ~/my-agent/data

Leave this running in a terminal. It's now listening for MCP tool calls over stdio.


Step 3: Write the Agent

Create ~/my-agent/agent.py:

import asyncio
import anthropic
from mcp import ClientSession, StdioServerParameters
from mcp.client.stdio import stdio_client

ANTHROPIC_API_KEY = "your-api-key-here"

async def run_agent(user_message: str):
    client = anthropic.Anthropic(api_key=ANTHROPIC_API_KEY)

    # Connect to the MCP filesystem server
    server_params = StdioServerParameters(
        command="python",
        args=["-m", "mcp.server.filesystem", "/Users/your-name/my-agent/data"]
    )

    async with stdio_client(server_params) as (read, write):
        async with ClientSession(read, write) as session:
            # Initialize the MCP session and discover available tools
            await session.initialize()
            tools_result = await session.list_tools()

            # Convert MCP tools to Anthropic tool format
            tools = [
                {
                    "name": tool.name,
                    "description": tool.description,
                    "input_schema": tool.inputSchema
                }
                for tool in tools_result.tools
            ]

            print(f"Available tools: {[t['name'] for t in tools]}\n")

            messages = [{"role": "user", "content": user_message}]

            # Agentic loop -- run until Claude stops calling tools
            while True:
                response = client.messages.create(
                    model="claude-opus-4-5",
                    max_tokens=4096,
                    tools=tools,
                    messages=messages
                )

                # If Claude is done (no more tool calls), print and exit
                if response.stop_reason == "end_turn":
                    for block in response.content:
                        if hasattr(block, "text"):
                            print("Agent:", block.text)
                    break

                # Process tool calls
                tool_uses = [b for b in response.content if b.type == "tool_use"]
                if not tool_uses:
                    break

                # Add Claude's response to message history
                messages.append({"role": "assistant", "content": response.content})

                # Execute each tool call and collect results
                tool_results = []
                for tool_use in tool_uses:
                    print(f"→ Calling tool: {tool_use.name}({tool_use.input})")
                    result = await session.call_tool(tool_use.name, tool_use.input)
                    tool_results.append({
                        "type": "tool_result",
                        "tool_use_id": tool_use.id,
                        "content": str(result.content)
                    })

                # Feed tool results back to Claude
                messages.append({"role": "user", "content": tool_results})

if __name__ == "__main__":
    question = "What projects do we have, who owns them, and what's the Q2 budget?"
    asyncio.run(run_agent(question))

Step 4: Run It

cd ~/my-agent
python agent.py

You'll see something like:

Available tools: ['read_file', 'write_file', 'list_directory']

→ Calling tool: list_directory({'path': '.'})
→ Calling tool: read_file({'path': 'project-alpha.txt'})
→ Calling tool: read_file({'path': 'project-beta.txt'})
→ Calling tool: read_file({'path': 'budget-q2.txt'})

Agent: Here's a summary of your projects and budget:

**Projects:**
- **Project Alpha** -- Due April 15, owned by Sarah
- **Project Beta** -- Due May 1, owned by James

**Q2 Budget:** $50,000 approved for tooling

Would you like me to write a consolidated summary file to your data directory?

Claude autonomously decided which files to read, read them in sequence, and synthesized a coherent answer. You didn't hardcode any of that logic.


Step 5: Extend It

This is where it gets interesting. Swap out the filesystem server for any other MCP server and your agent instantly gains new capabilities:

  • GitHub MCP server → Claude can read issues, open PRs, review code
  • Postgres MCP server → Claude can query your database in natural language
  • Slack MCP server → Claude can read channels and post messages
  • Your own custom server → expose any internal tool, API, or service

The agent loop stays the same. Only the tools change.

To add a second server (e.g., a web search tool), you'd connect multiple MCP sessions and merge their tool lists before sending to Claude. The pattern is identical.


Key Concepts to Remember

The agentic loop — Claude calls a tool, gets a result, calls another tool or responds. This repeats until stop_reason == "end_turn". You control when it stops.

Tool schemas matter — Claude chooses tools based on their description and input_schema. Write clear descriptions. Vague descriptions lead to wrong tool choices.

Context is everything — The messages array is your agent's memory within a session. It sees everything that's happened. For long-running agents, you'll need to manage context window limits.

MCP is just a protocol — Any process that speaks MCP can be a server. You can write one in 50 lines of Python. The MCP SDK handles the transport.


What's Next

You now have a working AI agent. From here, the natural next steps are:

  • Add persistence — store conversation history to a file or database so the agent remembers context across runs
  • Add multiple tools — connect to APIs, databases, or web search alongside the filesystem
  • Add guardrails — restrict what tools the agent can call, add confirmation steps for destructive actions
  • Go async at scale — for production, look at multi-agent architectures where specialized sub-agents handle different domains

The hardest part of building agents isn't the code — it's deciding what you want the agent to do and writing tool descriptions precise enough that it does it correctly every time.

Start small. One tool. One clear task. Then expand from there.

Sources & References:
1. Anthropic — "Claude API Documentation" — https://docs.anthropic.com/
2. MCP — "Model Context Protocol Specification" — https://modelcontextprotocol.io/
3. MCP — "Python SDK" — https://github.com/modelcontextprotocol/python-sdk


📖 Read the companion posts: What Are AI Agents? | What Is MCP?

About the Author

Toc Am

Founder of AmtocSoft. Writing practical deep-dives on AI engineering, cloud architecture, and developer tooling. Previously built backend systems at scale. Reviews every post published under this byline.

LinkedIn X / Twitter

Published: 2026-04-01 · Written with AI assistance, reviewed by Toc Am.

Get These In Your Inbox

Weekly deep-dives on AI engineering, no fluff. Join the newsletter →

Subscribe (free)

Or grab the book ($39, ~100 pages) · Buy me a coffee

Buy Me a Coffee · 🔔 YouTube · 💼 LinkedIn · 🐦 X/Twitter

AI as Infrastructure: Value Moves Up-Stack

For a few years the AI conversation was about who had the biggest model. That is the wrong altitude now. Models still matter, the way CPUs s...